Chapter 4---Maintenance (Removal/Replacement)
5.Loosen the wing nut on top of the Relay Lens mount (the bracket at the rear of the Relay Lens).
6.Remove the 2 long hex bolts at the front of the Relay Lens (shown in Figure
7.Remove the 2 hex bolts at the rear of the Relay Lens (these bolts are level with the bottom of the Relay Lens and hold the bracket in place).
8.Remove the Relay Lens. Leave the Relay Lens Bracket and the CRT Lens Stopper Ring in the
9.Replace the Relay Lens in reverse order from above.
4.17Projection Lens
To remove the Projection Lens:
1.Remove the sponge cover from around the front of the Projection Lens.
2.Disconnect and label the Projection Lens Focus and Zoom motor cables (The Focus motor is at the top of the Projection Lens. The Zoom motor is at the bottom.)
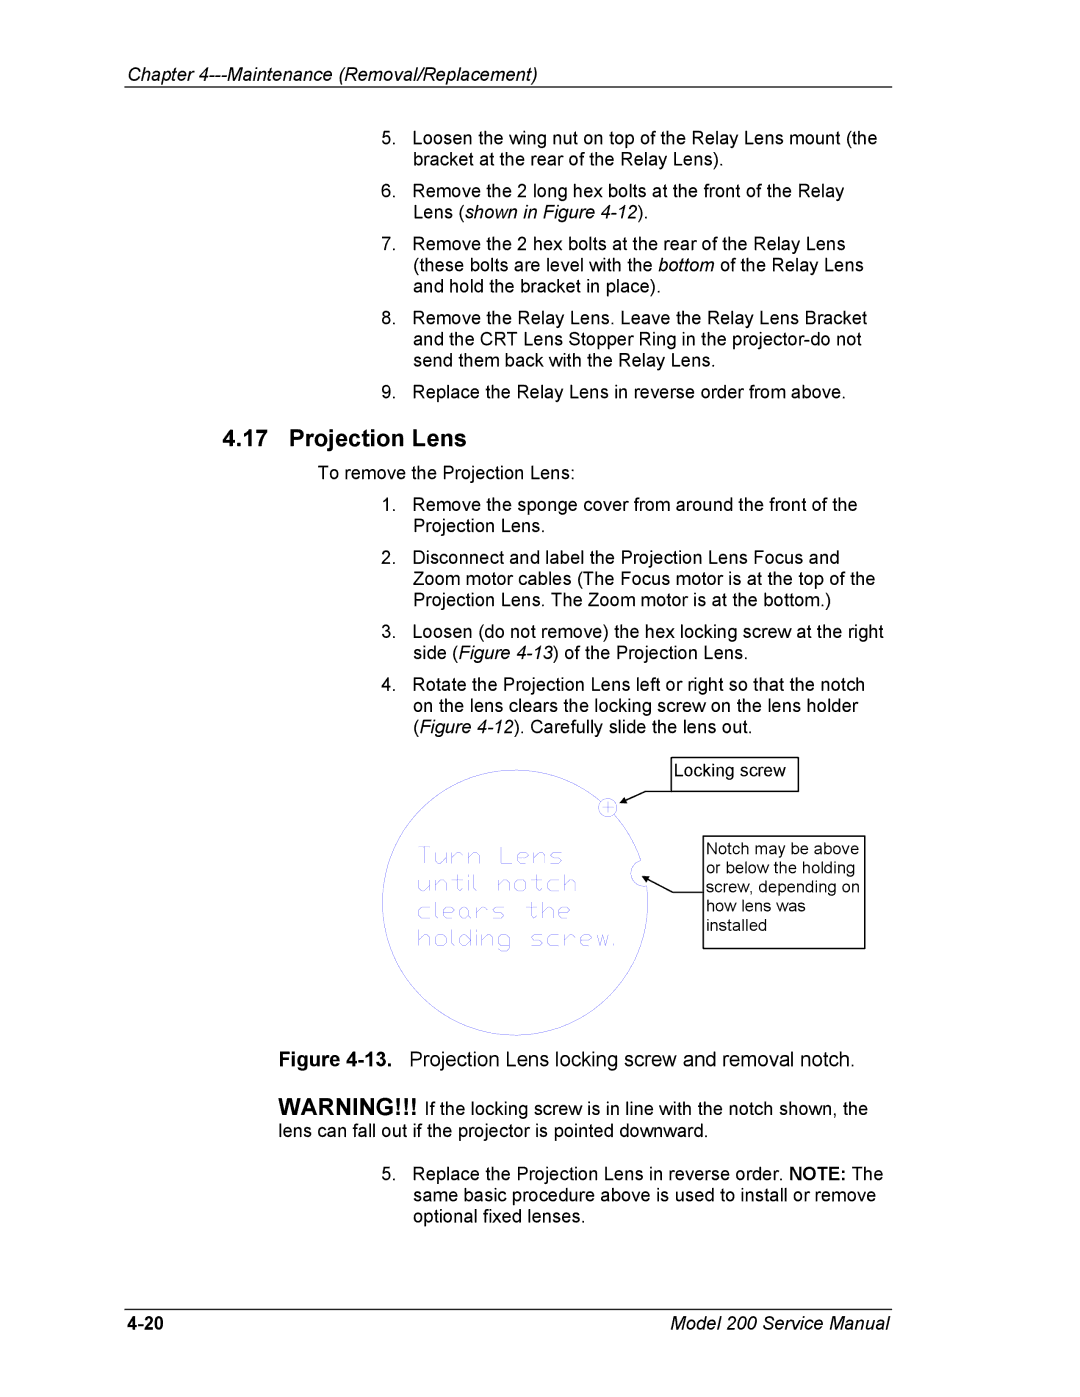
3.Loosen (do not remove) the hex locking screw at the right side (Figure
4.Rotate the Projection Lens left or right so that the notch on the lens clears the locking screw on the lens holder (Figure
Locking screw
Notch may be above or below the holding ![]()
![]() screw, depending on
screw, depending on
how lens was installed
Figure 4-13. Projection Lens locking screw and removal notch.
WARNING!!! If the locking screw is in line with the notch shown, the lens can fall out if the projector is pointed downward.
5.Replace the Projection Lens in reverse order. NOTE: The same basic procedure above is used to install or remove optional fixed lenses.
Model 200 Service Manual |