Chapter 3 Service Adjustments
3.Use the right/left arrow keys on the remote control and adjust the Flat Field to 0%.
4.From the System menu, select Maintenance, then select #3, ILA® Bias. Record the ILA® Bias current value (the Green bias will be readable). This bias value will be returned to when this procedure is complete. The Green value only need be recorded because Red and Blue returns to their original values when Green is reset.
5.Use the right arrow key to increase the ILA® Bias so the Flat Field turns white. If the screen begins to turn from white to a
6.Loosen the large flathead screw (½ turn CCW) at the bottom of the Arc Lamp cover (Figure
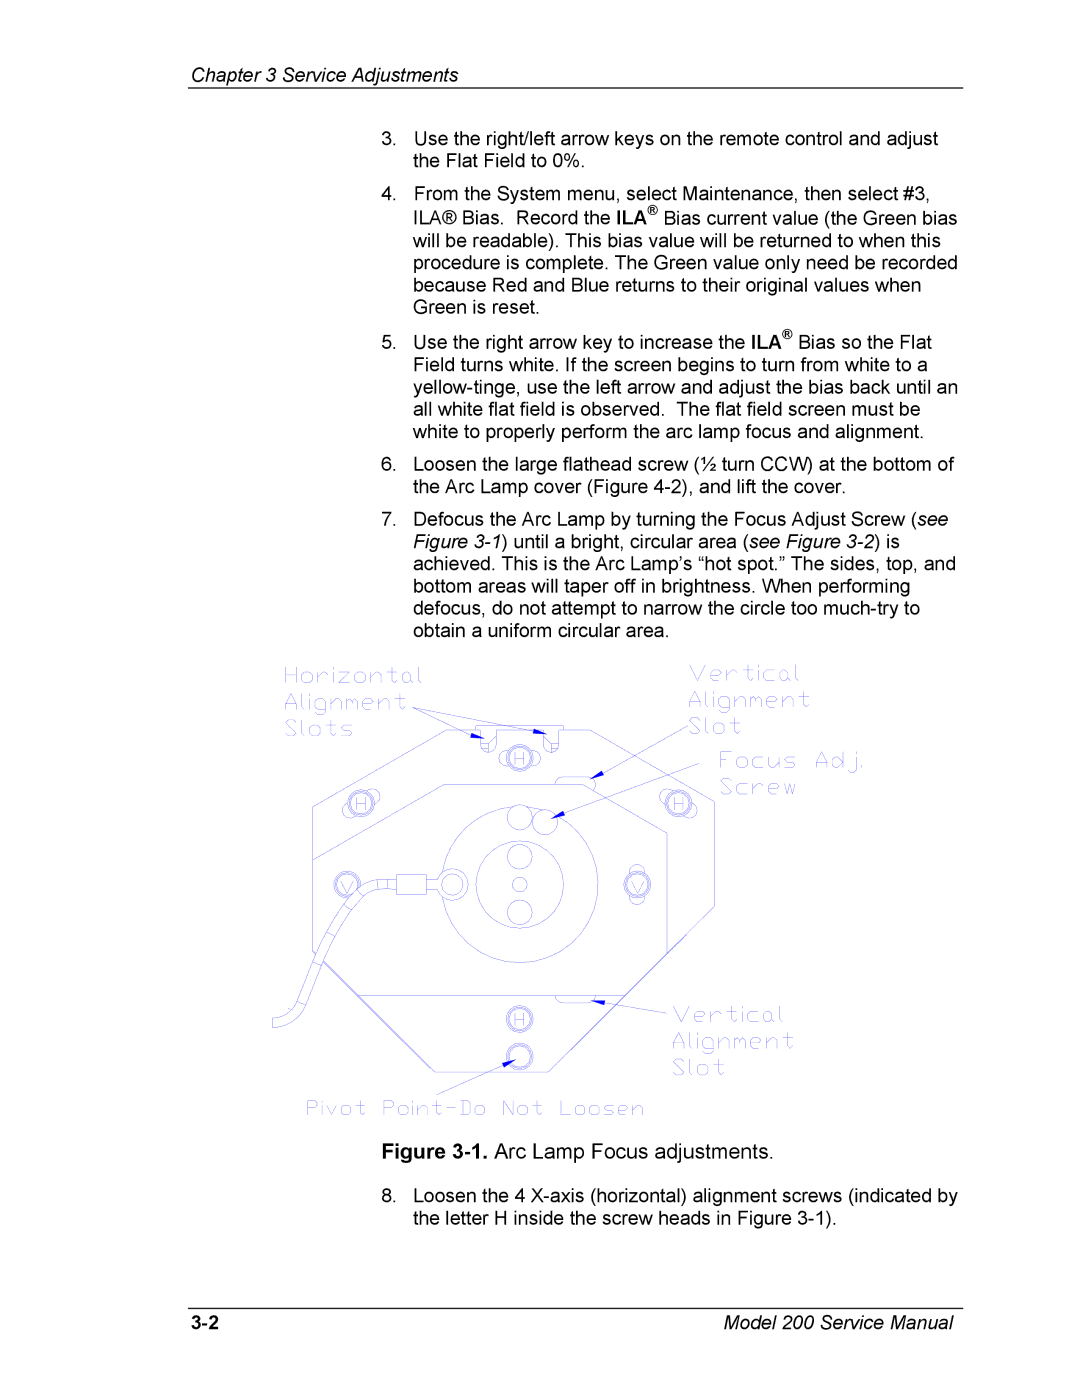
7.Defocus the Arc Lamp by turning the Focus Adjust Screw (see Figure
Figure 3-1. Arc Lamp Focus adjustments.
8.Loosen the 4
Model 200 Service Manual |