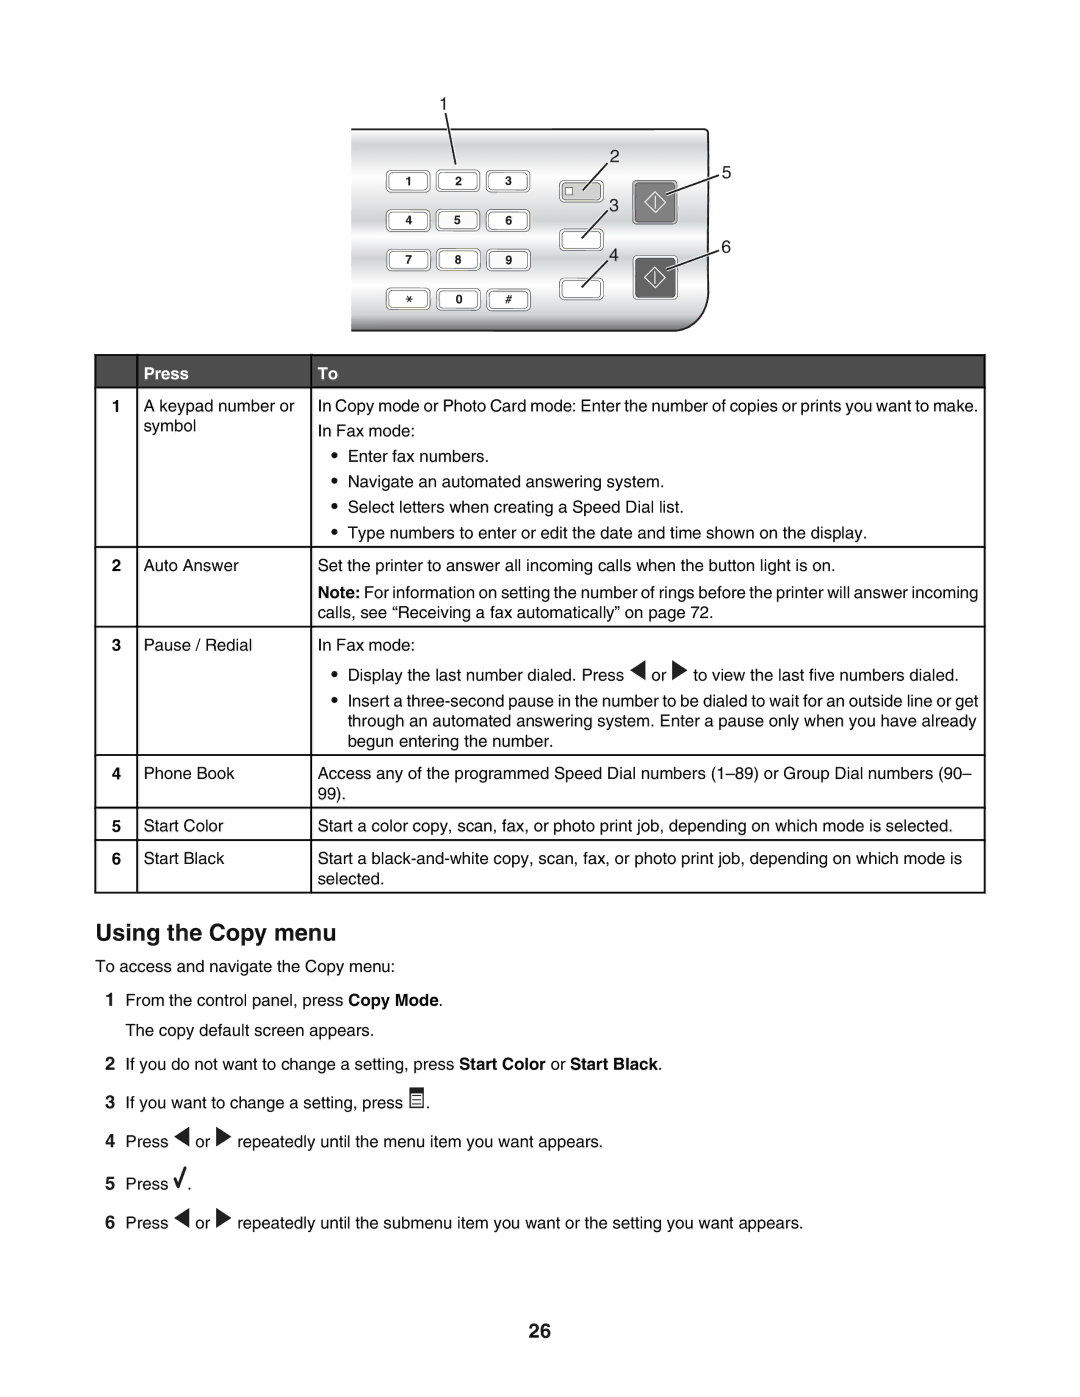
1
2 ![]() 5
5
3
46
| Press | To |
|
|
1 | A keypad number or | In Copy mode or Photo Card mode: Enter the number of copies or prints you want to make. | ||
| symbol | In Fax mode: | ||
|
| |||
|
| • | Enter fax numbers. | |
|
| • | Navigate an automated answering system. | |
|
| • | Select letters when creating a Speed Dial list. | |
|
| • | Type numbers to enter or edit the date and time shown on the display. | |
|
|
|
|
|
2 | Auto Answer | Set the printer to answer all incoming calls when the button light is on. | ||
|
| Note: For information on setting the number of rings before the printer will answer incoming | ||
|
| calls, see “Receiving a fax automatically” on page 72. | ||
|
|
|
|
|
3 | Pause / Redial | In Fax mode: | ||
|
| • | Display the last number dialed. Press or to view the last five numbers dialed. | |
|
| • Insert a | ||
|
|
| through an automated answering system. Enter a pause only when you have already | |
|
|
| begun entering the number. | |
|
|
|
|
|
4 | Phone Book | Access any of the programmed Speed Dial numbers | ||
|
| 99). |
|
|
|
|
|
|
|
5 | Start Color | Start a color copy, scan, fax, or photo print job, depending on which mode is selected. | ||
|
|
|
|
|
6 | Start Black | Start a | ||
|
| selected. | ||
|
|
|
|
|
Using the Copy menu
To access and navigate the Copy menu:
1From the control panel, press Copy Mode. The copy default screen appears.
2If you do not want to change a setting, press Start Color or Start Black.
3If you want to change a setting, press ![]() .
.
4Press ![]() or
or ![]() repeatedly until the menu item you want appears.
repeatedly until the menu item you want appears.
5Press ![]() .
.
6Press ![]() or
or ![]() repeatedly until the submenu item you want or the setting you want appears.
repeatedly until the submenu item you want or the setting you want appears.
26
