If your telecommunications equipment uses a
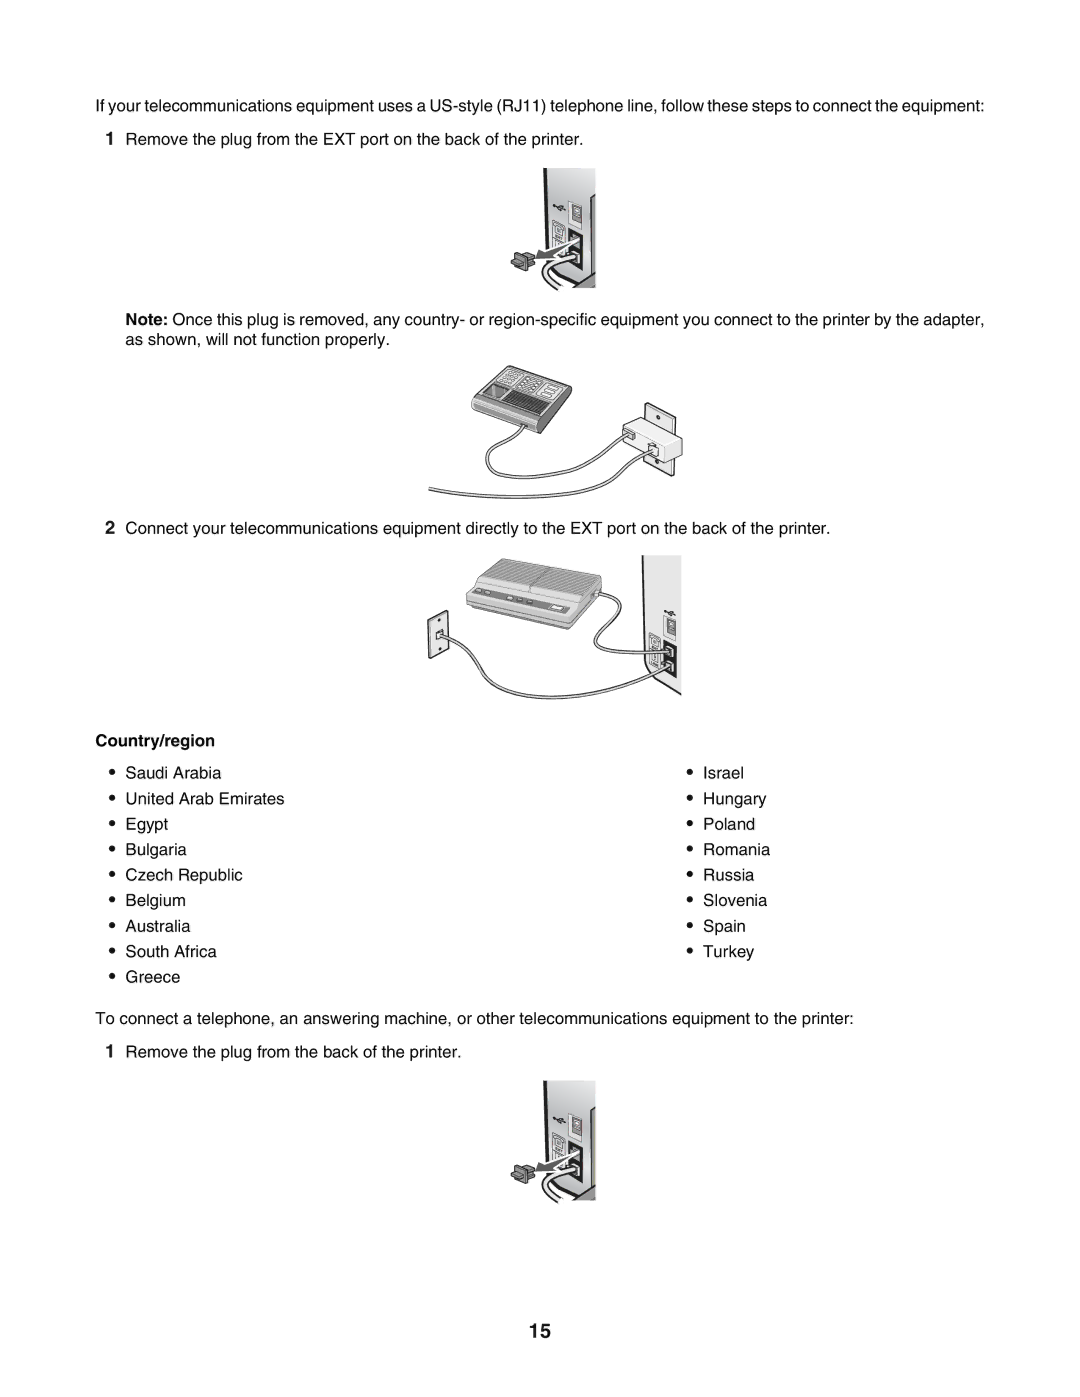
1Remove the plug from the EXT port on the back of the printer.
Note: Once this plug is removed, any country- or
2Connect your telecommunications equipment directly to the EXT port on the back of the printer.
Country/region |
|
| |
• | Saudi Arabia | • | Israel |
• | United Arab Emirates | • | Hungary |
• | Egypt | • | Poland |
• | Bulgaria | • | Romania |
• | Czech Republic | • | Russia |
• | Belgium | • | Slovenia |
• | Australia | • | Spain |
• | South Africa | • | Turkey |
•Greece
To connect a telephone, an answering machine, or other telecommunications equipment to the printer:
1Remove the plug from the back of the printer.
15