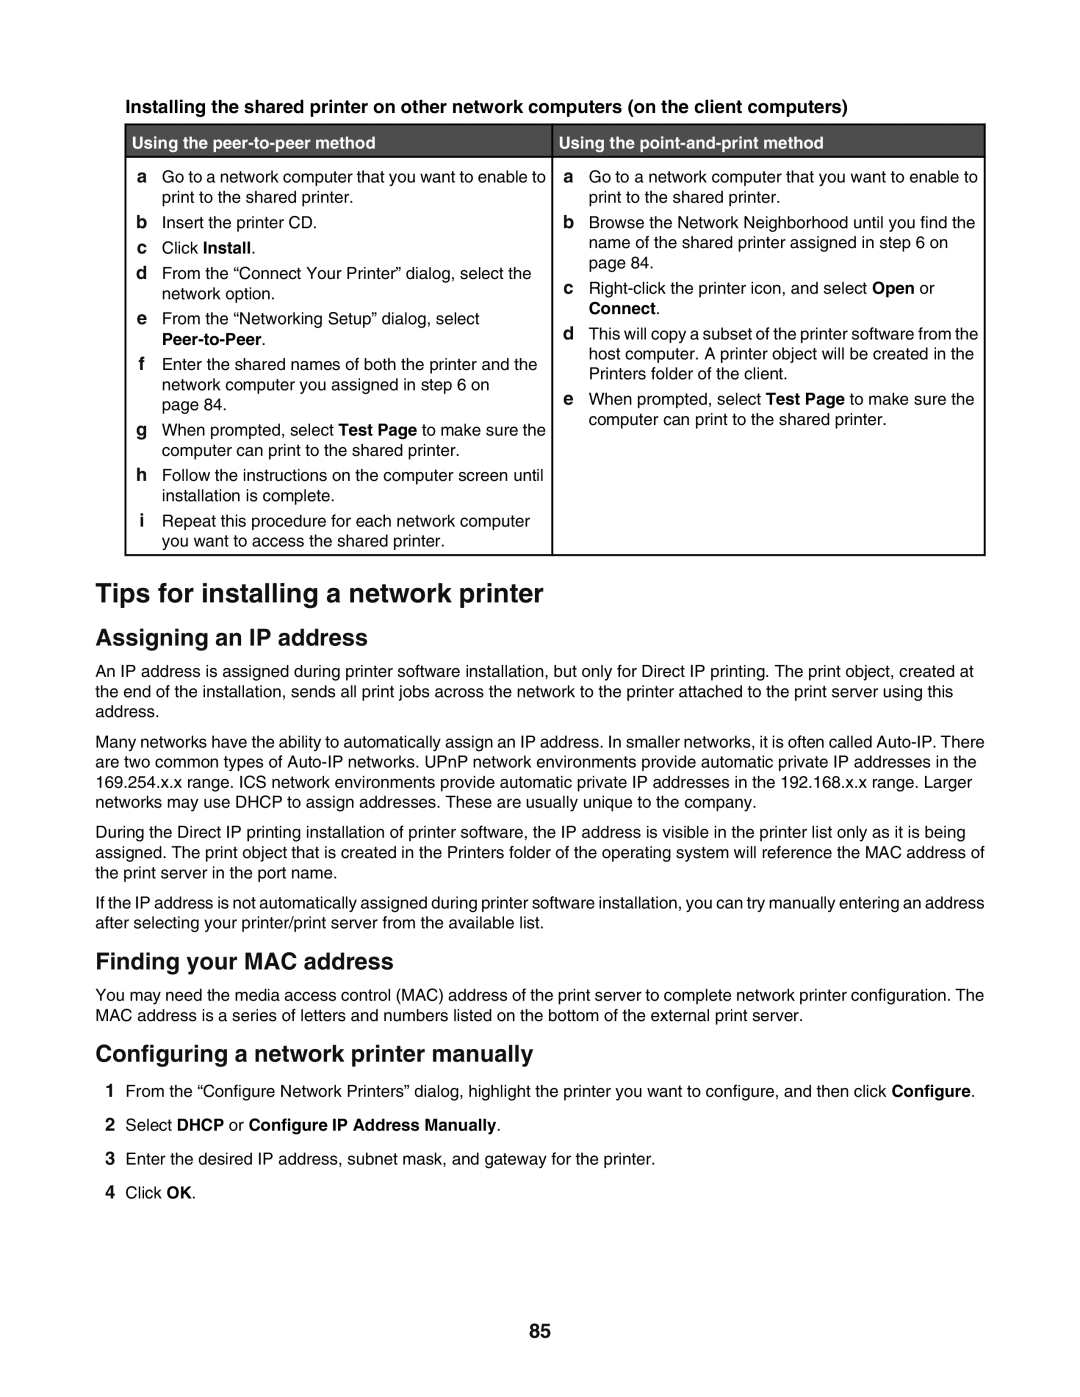
Installing the shared printer on other network computers (on the client computers)
Using the | Using the | |||
a | Go to a network computer that you want to enable to | a Go to a network computer that you want to enable to |
| |
| print to the shared printer. | print to the shared printer. | ||
b | Insert the printer CD. | b Browse the Network Neighborhood until you find the | ||
c | Click Install. | name of the shared printer assigned in step 6 on | ||
d | From the “Connect Your Printer” dialog, select the | page 84. | ||
c | ||||
| network option. | |||
| Connect. | |||
e | From the “Networking Setup” dialog, select | |||
d This will copy a subset of the printer software from the | ||||
|
| |||
| host computer. A printer object will be created in the | |||
f | Enter the shared names of both the printer and the | |||
Printers folder of the client. | ||||
| network computer you assigned in step 6 on | |||
| e When prompted, select Test Page to make sure the | |||
| page 84. | |||
| computer can print to the shared printer. | |||
g | When prompted, select Test Page to make sure the | |||
|
| |||
| computer can print to the shared printer. |
|
| |
h | Follow the instructions on the computer screen until |
|
| |
| installation is complete. |
|
| |
i | Repeat this procedure for each network computer |
|
| |
| you want to access the shared printer. |
|
| |
|
|
|
| |
Tips for installing a network printer
Assigning an IP address
An IP address is assigned during printer software installation, but only for Direct IP printing. The print object, created at the end of the installation, sends all print jobs across the network to the printer attached to the print server using this address.
Many networks have the ability to automatically assign an IP address. In smaller networks, it is often called
During the Direct IP printing installation of printer software, the IP address is visible in the printer list only as it is being assigned. The print object that is created in the Printers folder of the operating system will reference the MAC address of the print server in the port name.
If the IP address is not automatically assigned during printer software installation, you can try manually entering an address after selecting your printer/print server from the available list.
Finding your MAC address
You may need the media access control (MAC) address of the print server to complete network printer configuration. The MAC address is a series of letters and numbers listed on the bottom of the external print server.
Configuring a network printer manually
1From the “Configure Network Printers” dialog, highlight the printer you want to configure, and then click Configure.
2Select DHCP or Configure IP Address Manually.
3Enter the desired IP address, subnet mask, and gateway for the printer.
4Click OK.
85