Return to Section
Return to Master
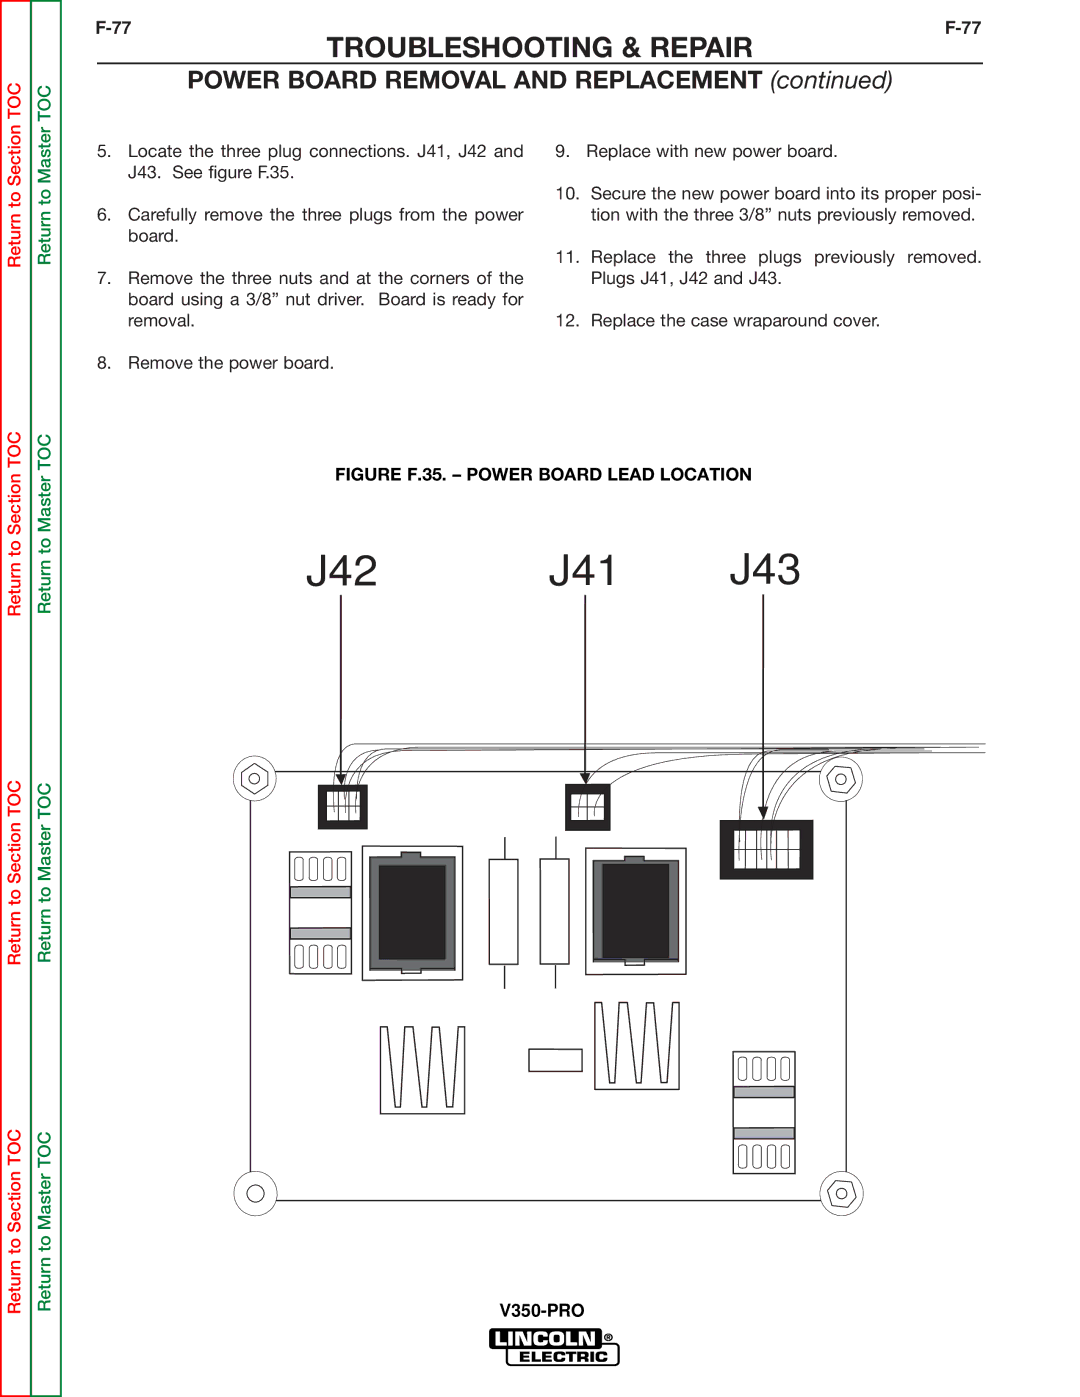
5.Locate the three plug connections. J41, J42 and J43. See figure F.35.
6.Carefully remove the three plugs from the power board.
7.Remove the three nuts and at the corners of the board using a 3/8” nut driver. Board is ready for removal.
9.Replace with new power board.
10.Secure the new power board into its proper posi- tion with the three 3/8” nuts previously removed.
11.Replace the three plugs previously removed. Plugs J41, J42 and J43.
12.Replace the case wraparound cover.
Return to Section TOC
Return to Section TOC
Return to Section TOC
Return to Master TOC
Return to Master TOC
Return to Master TOC
8. Remove the power board.
FIGURE F.35. – POWER BOARD LEAD LOCATION
J42 | J41 | J43 | ||||||||||||||
|
|
|
|
|
|
|
|
|
|
|
|
|
|
|
|
|
|
|
|
|
|
|
|
|
|
|
|
|
|
|
|
|
|
|
|
|
|
|
|
|
|
|
|
|
|
|
|
|
|
|
|
|
|
|
|
|
|
|
|
|
|
|
|
|
|
|
|
|
|
|
|
|
|
|
|
|
|
|
|
|
|
|
|
|
|
|
|
|
|
|
|
|
|
|
|
|
|
|
|
|
|
|
|
|
|
|
|
|
|
|
|
|
|
|
|
|
|
|
|
|
|
|
|
|
|
|
|
|
|
|
|
|
|
|
|
