Zebra
ZEBRA button
It will switch between the zebra display and the marker display every time the button is pressed. Zebra 1 # Zebra 2* # Marker* # setting canceled
* It is not displayed when the [ZEBRA DETECT 2]/[MARKER] is set to [OFF]. (l 153)
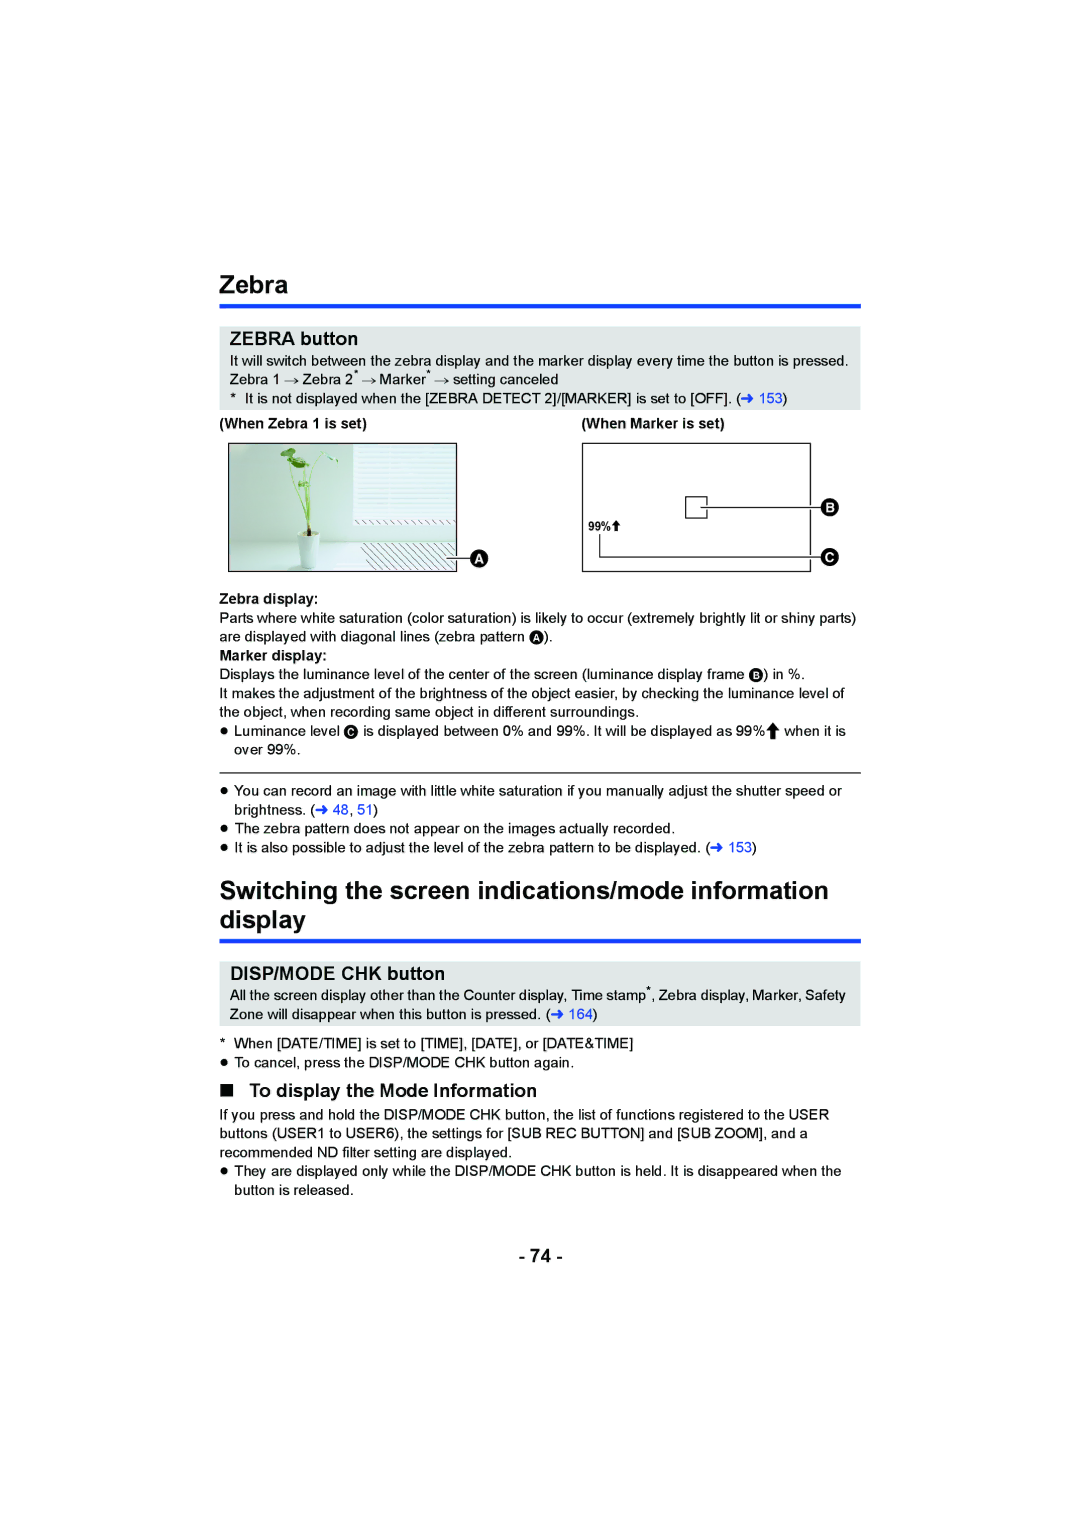
(When Zebra 1 is set) | (When Marker is set) |
![]()
99%![]()
Zebra display:
Parts where white saturation (color saturation) is likely to occur (extremely brightly lit or shiny parts) are displayed with diagonal lines (zebra pattern A).
Marker display:
Displays the luminance level of the center of the screen (luminance display frame B) in %.
It makes the adjustment of the brightness of the object easier, by checking the luminance level of the object, when recording same object in different surroundings.
≥Luminance level C is displayed between 0% and 99%. It will be displayed as 99%![]() when it is over 99%.
when it is over 99%.
≥You can record an image with little white saturation if you manually adjust the shutter speed or brightness. (l 48, 51)
≥The zebra pattern does not appear on the images actually recorded.
≥It is also possible to adjust the level of the zebra pattern to be displayed. (l 153)
Switching the screen indications/mode information display
DISP/MODE CHK button
All the screen display other than the Counter display, Time stamp*, Zebra display, Marker, Safety Zone will disappear when this button is pressed. (l 164)
*When [DATE/TIME] is set to [TIME], [DATE], or [DATE&TIME] ≥ To cancel, press the DISP/MODE CHK button again.
∫To display the Mode Information
If you press and hold the DISP/MODE CHK button, the list of functions registered to the USER buttons (USER1 to USER6), the settings for [SUB REC BUTTON] and [SUB ZOOM], and a recommended ND filter setting are displayed.
≥They are displayed only while the DISP/MODE CHK button is held. It is disappeared when the button is released.
- 74 -
