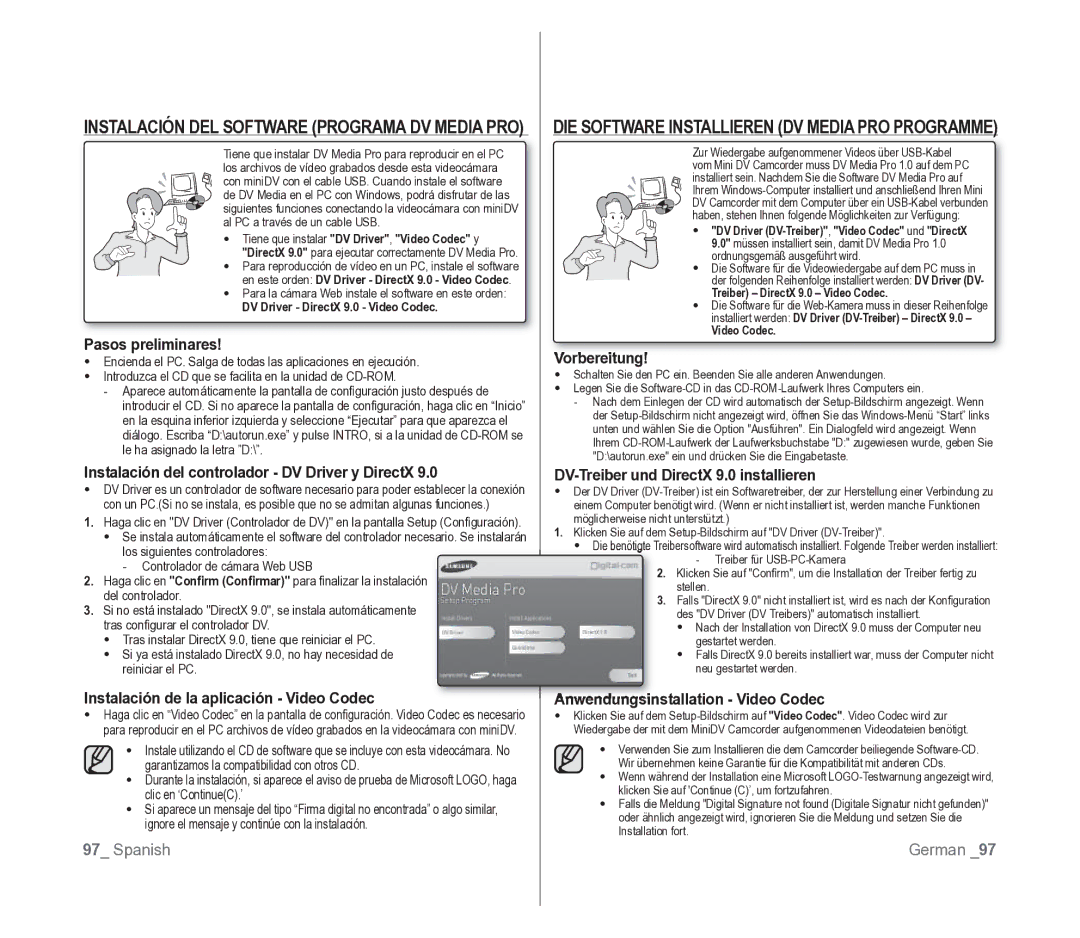
INSTALACIÓN DEL SOFTWARE (PROGRAMA DV MEDIA PRO)

Tiene que instalar DV Media Pro para reproducir en el PC los archivos de vídeo grabados desde esta videocámara con miniDV con el cable USB. Cuando instale el software de DV Media en el PC con Windows, podrá disfrutar de las siguientes funciones conectando la videocámara con miniDV al PC a través de un cable USB.

Tiene que instalar "DV Driver", "Video Codec" y "DirectX 9.0" para ejecutar correctamente DV Media Pro.

Para reproducción de vídeo en un PC, instale el software en este orden: DV Driver - DirectX 9.0 - Video Codec.

Para la cámara Web instale el software en este orden:

DV Driver - DirectX 9.0 - Video Codec.

Pasos preliminares!

Encienda el PC. Salga de todas las aplicaciones en ejecución.

Introduzca el CD que se facilita en la unidad de CD-ROM.

-Aparece automáticamente la pantalla de configuración justo después de introducir el CD. Si no aparece la pantalla de configuración, haga clic en “Inicio” en la esquina inferior izquierda y seleccione “Ejecutar” para que aparezca el diálogo. Escriba “D:\autorun.exe” y pulse INTRO, si a la unidad de CD-ROM se le ha asignado la letra ”D:\”.

Instalación del controlador - DV Driver y DirectX 9.0

DV Driver es un controlador de software necesario para poder establecer la conexión con un PC.(Si no se instala, es posible que no se admitan algunas funciones.)

1.Haga clic en "DV Driver (Controlador de DV)" en la pantalla Setup (Configuración).

Se instala automáticamente el software del controlador necesario. Se instalarán los siguientes controladores:

- Controlador de cámara Web USB

2.Haga clic en "Confirm (Confirmar)" para finalizar la instalación del controlador.

3.Si no está instalado "DirectX 9.0", se instala automáticamente tras configurar el controlador DV.

Tras instalar DirectX 9.0, tiene que reiniciar el PC.

Si ya está instalado DirectX 9.0, no hay necesidad de reiniciar el PC.

Instalación de la aplicación - Video Codec

Haga clic en “Video Codec” en la pantalla de configuración. Video Codec es necesario para reproducir en el PC archivos de vídeo grabados en la videocámara con miniDV.

Instale utilizando el CD de software que se incluye con esta videocámara. No garantizamos la compatibilidad con otros CD.

Durante la instalación, si aparece el aviso de prueba de Microsoft LOGO, haga clic en ‘Continue(C).’

Si aparece un mensaje del tipo “Firma digital no encontrada” o algo similar, ignore el mensaje y continúe con la instalación.

97_ Spanish

DIE SOFTWARE INSTALLIEREN (DV MEDIA PRO PROGRAMME)

Zur Wiedergabe aufgenommener Videos über USB-Kabel vom Mini DV Camcorder muss DV Media Pro 1.0 auf dem PC installiert sein. Nachdem Sie die Software DV Media Pro auf Ihrem Windows-Computer installiert und anschließend Ihren Mini DV Camcorder mit dem Computer über ein USB-Kabel verbunden haben, stehen Ihnen folgende Möglichkeiten zur Verfügung:

"DV Driver (DV-Treiber)","Video Codec" und "DirectX 9.0" müssen installiert sein, damit DV Media Pro 1.0 ordnungsgemäß ausgeführt wird.

Die Software für die Videowiedergabe auf dem PC muss in der folgenden Reihenfolge installiert werden: DV Driver (DV-

Treiber) – DirectX 9.0 – Video Codec.

Die Software für die Web-Kamera muss in dieser Reihenfolge installiert werden: DV Driver (DV-Treiber) – DirectX 9.0 –

Video Codec.

Vorbereitung!

Schalten Sie den PC ein. Beenden Sie alle anderen Anwendungen.

Legen Sie die Software-CD in das CD-ROM-Laufwerk Ihres Computers ein.

-Nach dem Einlegen der CD wird automatisch der Setup-Bildschirm angezeigt. Wenn der Setup-Bildschirm nicht angezeigt wird, öffnen Sie das Windows-Menü “Start” links unten und wählen Sie die Option "Ausführen". Ein Dialogfeld wird angezeigt. Wenn Ihrem CD-ROM-Laufwerk der Laufwerksbuchstabe "D:" zugewiesen wurde, geben Sie "D:\autorun.exe" ein und drücken Sie die Eingabetaste.

DV-Treiber und DirectX 9.0 installieren

Der DV Driver (DV-Treiber) ist ein Softwaretreiber, der zur Herstellung einer Verbindung zu einem Computer benötigt wird. (Wenn er nicht installiert ist, werden manche Funktionen möglicherweise nicht unterstützt.)

1.Klicken Sie auf dem Setup-Bildschirm auf "DV Driver (DV-Treiber)".

Die benötigte Treibersoftware wird automatisch installiert. Folgende Treiber werden installiert: - Treiber für USB-PC-Kamera

2.Klicken Sie auf "Confirm", um die Installation der Treiber fertig zu stellen.

3.Falls "DirectX 9.0" nicht installiert ist, wird es nach der Konfiguration des "DV Driver (DV Treibers)" automatisch installiert.

Nach der Installation von DirectX 9.0 muss der Computer neu gestartet werden.

Falls DirectX 9.0 bereits installiert war, muss der Computer nicht neu gestartet werden.

Anwendungsinstallation - Video Codec

Klicken Sie auf dem Setup-Bildschirm auf "Video Codec". Video Codec wird zur Wiedergabe der mit dem MiniDV Camcorder aufgenommenen Videodateien benötigt.

Verwenden Sie zum Installieren die dem Camcorder beiliegende Software-CD. Wir übernehmen keine Garantie für die Kompatibilität mit anderen CDs.

Wenn während der Installation eine Microsoft LOGO-Testwarnung angezeigt wird, klicken Sie auf 'Continue (C)’, um fortzufahren.

Falls die Meldung "Digital Signature not found (Digitale Signatur nicht gefunden)" oder ähnlich angezeigt wird, ignorieren Sie die Meldung und setzen Sie die Installation fort.

German _97

Page 101
Image 101
Samsung VP-D391/EDC manual Instalación DEL Software Programa DV Media PRO

VP-D391/EDC specifications

The Samsung VP-D391 is a versatile digital camcorder designed for users seeking a combination of quality performance and user-friendly features. Released in various models including the VP-D391/EDC and VP-D391/XEF, this camcorder stands out due to its compact design and practical functionality, making it an excellent choice for both amateur filmmakers and everyday users.

One of the key features of the VP-D391 is its Digital Image Stabilization technology. This innovative feature helps to reduce camera shake, ensuring smoother footage even when filming while in motion. This is particularly beneficial for capturing dynamic scenes or home videos during family gatherings or outdoor activities where stability could be an issue.

The camcorder boasts a 34x optical zoom lens, allowing users to get closer to their subjects without sacrificing image quality. This is complemented by a 1200x digital zoom, providing even more versatility for capturing distant details. The lens is also equipped with a built-in autofocus system, ensuring sharp focus on moving subjects, an important feature for many users.

In terms of video quality, the VP-D391 captures video in various formats, making it easy for users to share their content across different platforms. The camcorder supports both MPEG and AVI formats, catering to varying preferences when it comes to editing and sharing videos. The 680,000 pixel CCD sensor contributes to the camcorder’s impressive video quality, delivering vibrant colors and rich details for memorable recordings.

Another notable characteristic is the convenience factor, as the device comes with a 2.7-inch color LCD screen. This screen allows for easy framing of shots and accessing the menu options without straining the eyes. Additionally, the shot transition features such as self-timer and various digital effects add a creative touch to the recordings.

Users will also appreciate the extended battery life provided by the VP-D391, ensuring that they can capture hours of footage without the need for frequent recharging. This is especially useful for events such as weddings or birthday parties, where uninterrupted video capturing is essential.

Overall, the Samsung VP-D391 camcorder models like the VP-D391/EDC and VP-D391/XEF exemplify a balanced combination of advanced technology and practical design. Suitable for a wide range of filming needs, it is a reliable device for anyone looking to create high-quality video content easily.