9. ACTUAL OPERATION
NOTE
The results of M10: Auto Zero Execan be
displayed using M11: Magflow Zero. Alterna- tively, if the results of the automatic zero adjustment exceed the rated value, the warn- ing 82: Auto Zero Wngwill be displayed.
9.1.2Zero Adjustment via External Status Input
This section describes the procedure for zero adjustment via external status input. (For more details regarding external status input, refer to Chapter 6: Parameter Description.)
CAUTION
In certain cases where the multiple range function is being used with other status inputs, it may not be possible to perform settings for automatic zero adjustment. For more details, refer to the description of multiple ranges from Chapter 6: Parameter Description.
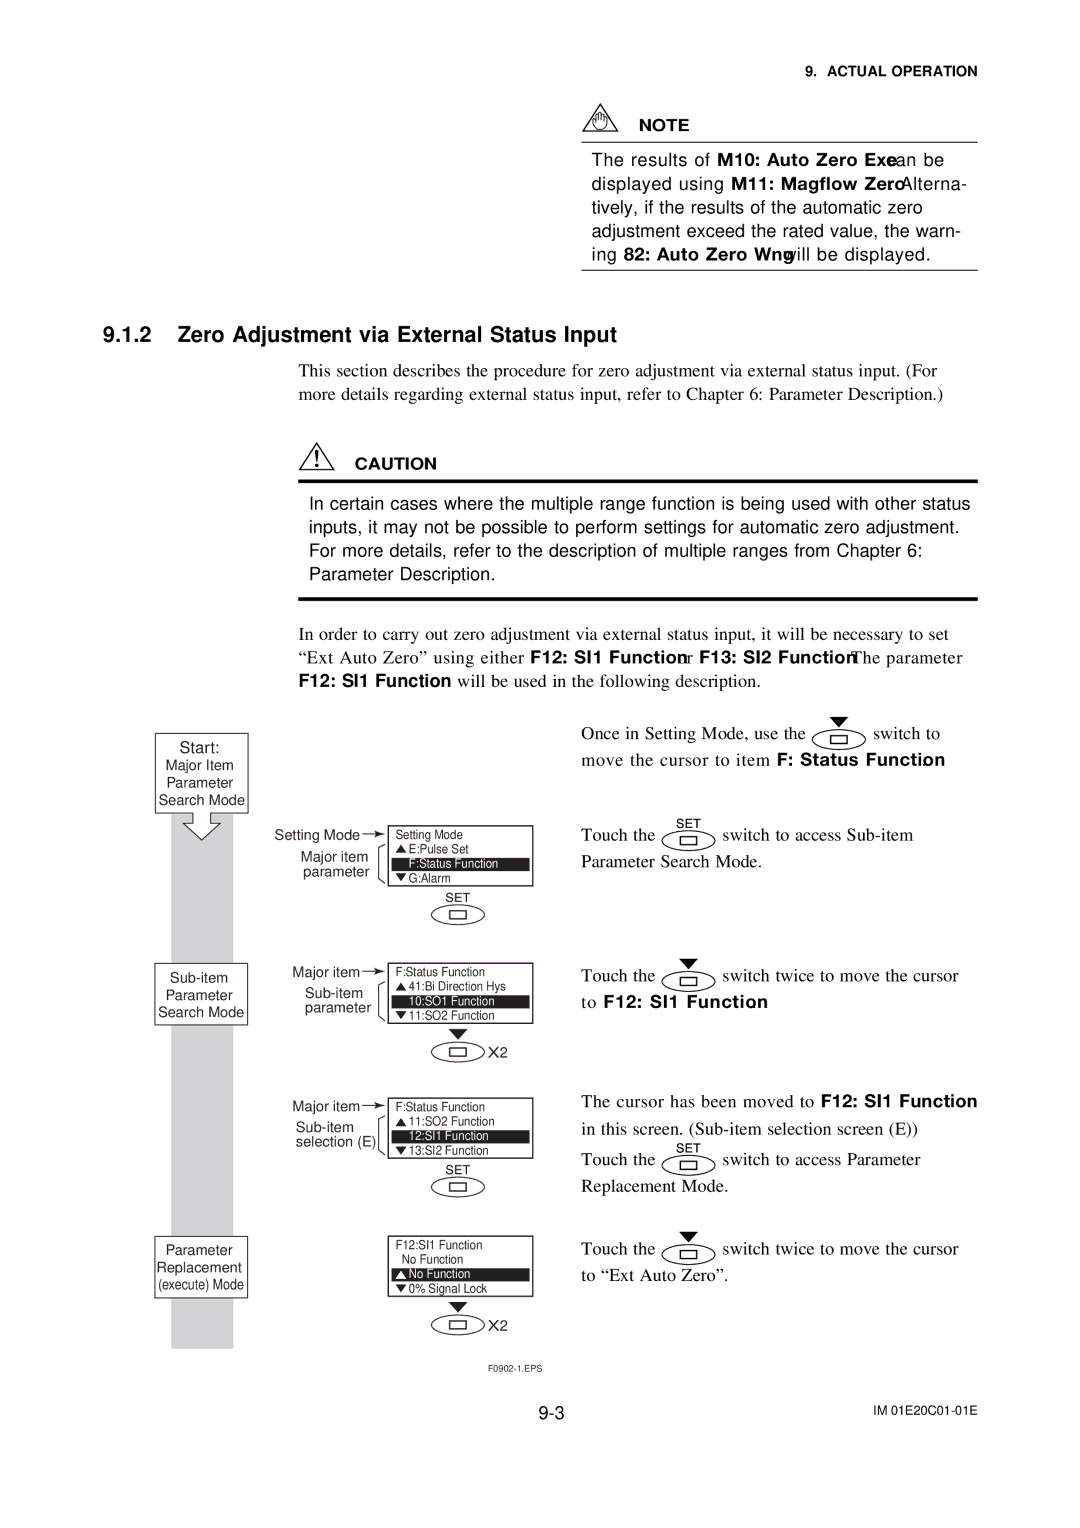
In order to carry out zero adjustment via external status input, it will be necessary to set “Ext Auto Zero” using either F12: SI1 Functionor F13: SI2 Function. The parameter F12: SI1 Function will be used in the following description.
Start:
Major Item
Parameter
Search Mode
Parameter
Search Mode
Parameter
Replacement
(execute) Mode
Setting Mode ![]()
Major item parameter
Major item ![]()
Major item ![]()
Setting Mode
![]() E:Pulse Set
E:Pulse Set
F:Status Function
![]() G:Alarm
G:Alarm
F:Status Function ![]() 41:Bi Direction Hys
41:Bi Direction Hys
10:SO1 Function
![]() 11:SO2 Function
11:SO2 Function
![]() X2
X2
F:Status Function
![]() 11:SO2 Function
11:SO2 Function
12:SI1 Function
![]() 13:SI2 Function
13:SI2 Function
F12:SI1 Function No Function
![]() No Function
No Function
![]() 0% Signal Lock
0% Signal Lock
Once in Setting Mode, use the ![]() switch to move the cursor to item F: Status Function.
switch to move the cursor to item F: Status Function.
Touch the ![]() switch to access
switch to access
Touch the ![]() switch twice to move the cursor to F12: SI1 Function.
switch twice to move the cursor to F12: SI1 Function.
The cursor has been moved to F12: SI1 Function in this screen.
Touch the ![]() switch to access Parameter Replacement Mode.
switch to access Parameter Replacement Mode.
Touch the ![]() switch twice to move the cursor to “Ext Auto Zero”.
switch twice to move the cursor to “Ext Auto Zero”.
![]() X2
X2
IM |
