DFX-8500
Step 7: While supporting the top cover to protect it from scratches, tilt back the printer and lay it on its back.
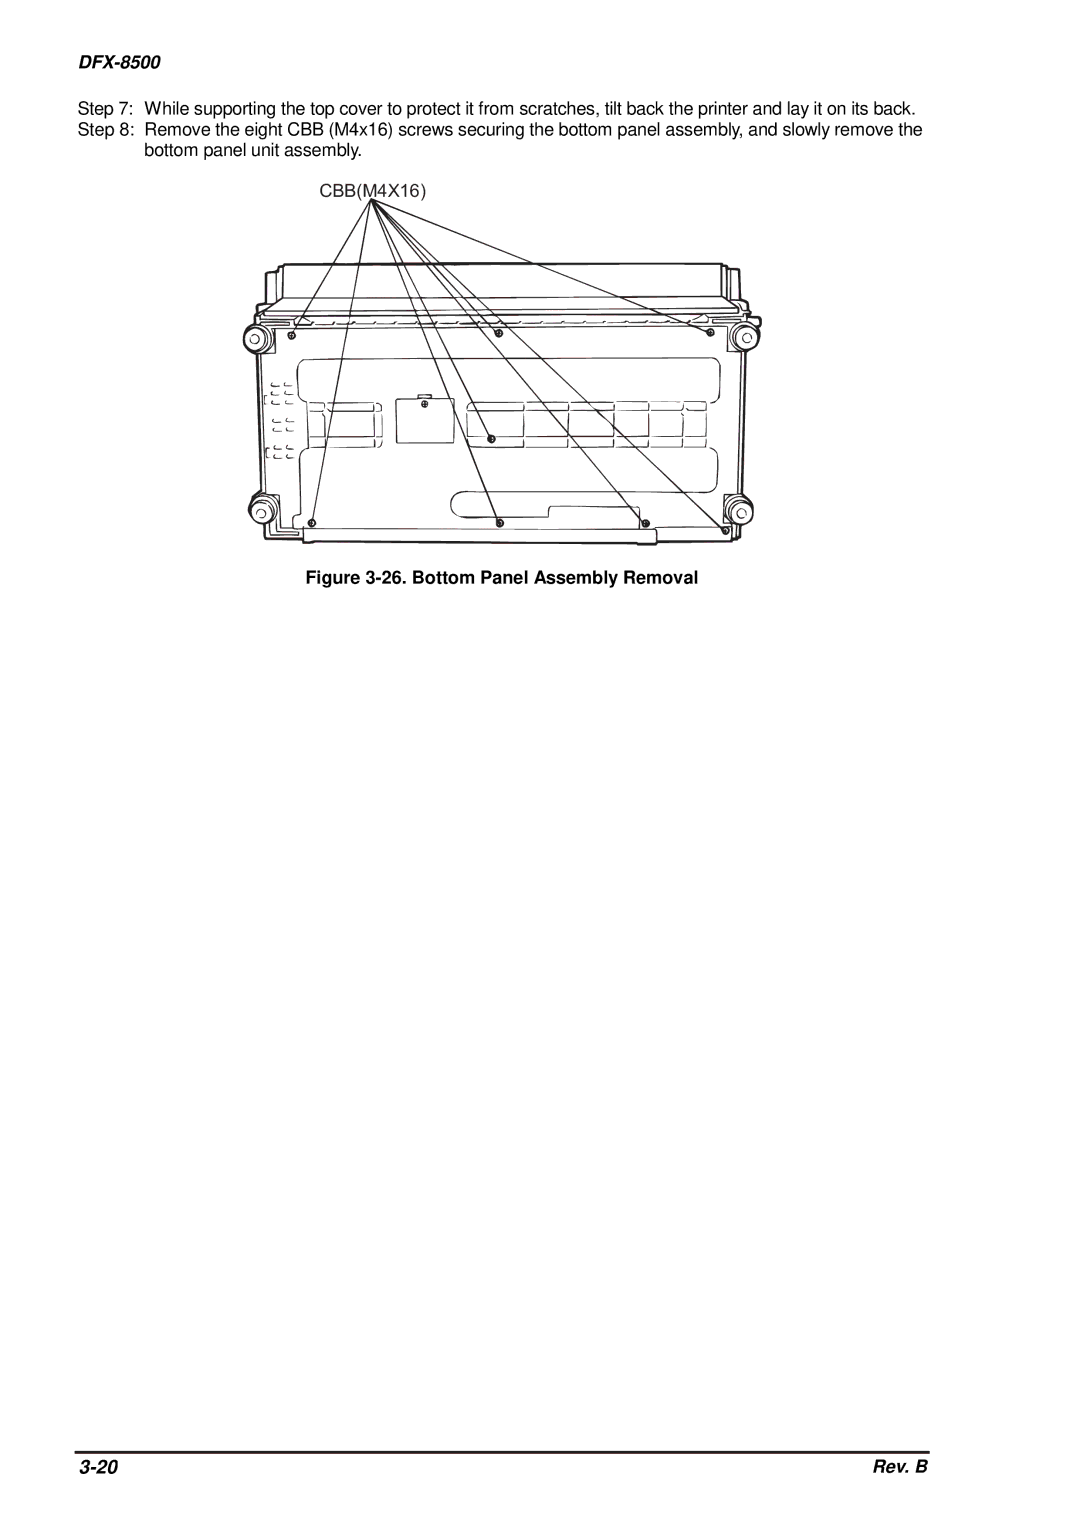
Step 8: Remove the eight CBB (M4x16) screws securing the bottom panel assembly, and slowly remove the bottom panel unit assembly.
C B B ( M 4 X 1 6 )
Figure 3-26. Bottom Panel Assembly Removal
Rev. B |