DFX-8500
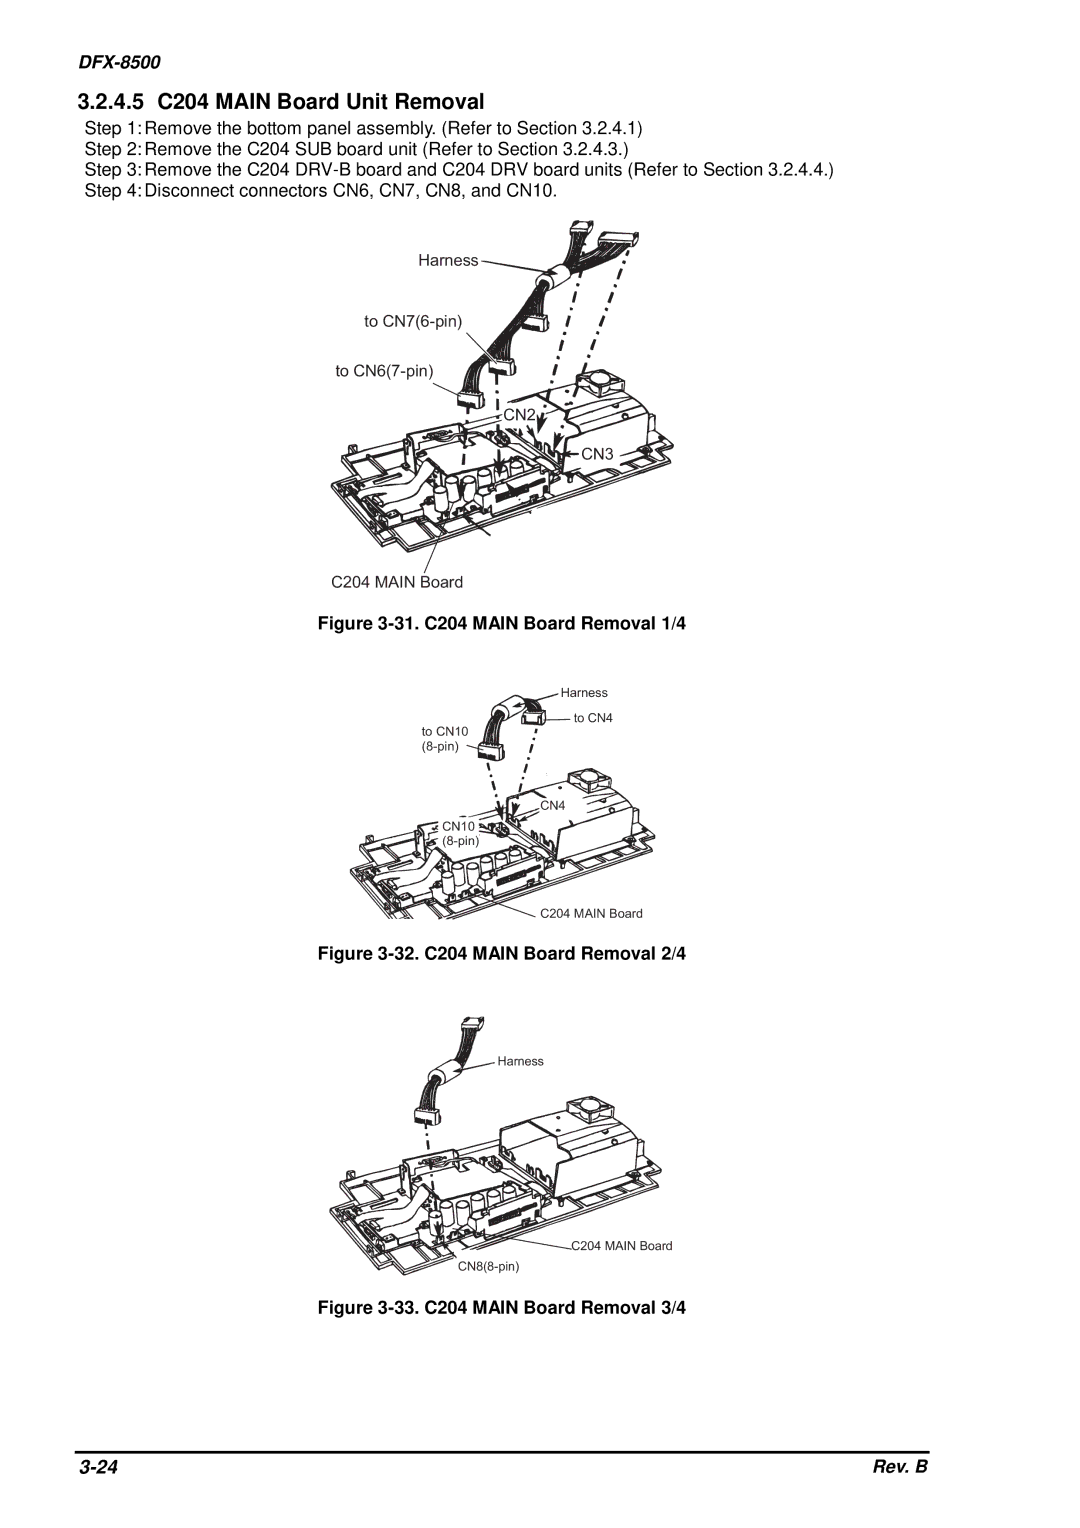
3.2.4.5 C204 MAIN Board Unit Removal
Step 1: Remove the bottom panel assembly. (Refer to Section 3.2.4.1)
Step 2: Remove the C204 SUB board unit (Refer to Section 3.2.4.3.)
Step 3: Remove the C204
Step 4: Disconnect connectors CN6, CN7, CN8, and CN10.
H a r n e s ![]() s
s ![]()
![]()
![]()
t o C N 7 ( 6 - p![]() in )
in )
t o C N 6![]() ( 7 -
( 7 - ![]() p in
p in![]() )
)
C N 2
C N 3![]()
C 2 0 4 M A I N B o a r d
Figure 3-31. C204 MAIN Board Removal 1/4
H a r n e s s
![]()
![]()
![]()
![]() t o C N 4 t o C
t o C N 4 t o C![]()
![]()
![]()
![]() N 1
N 1 ![]() 0
0
( 8 - p in ![]() )
)
C N 4
![]() C N 1
C N 1![]()
![]() 0
0
![]()
![]()
![]() ( 8 - p i n
( 8 - p i n![]()
![]() )
)
![]()
![]()
![]() C 2 0 4 M A I N B o a r d
C 2 0 4 M A I N B o a r d
Figure 3-32. C204 MAIN Board Removal 2/4
H a r n e s s
![]()
![]()
![]()
![]()
![]()
![]()
![]()
![]()
![]() C 2 0 4 M A I N B o a r d
C 2 0 4 M A I N B o a r d
C N 8 ( 8 - p in )
Figure 3-33. C204 MAIN Board Removal 3/4
Rev. B |
