ADJUSTMENT
4.1.3 Tractor Wire Spring Tension Adjustment
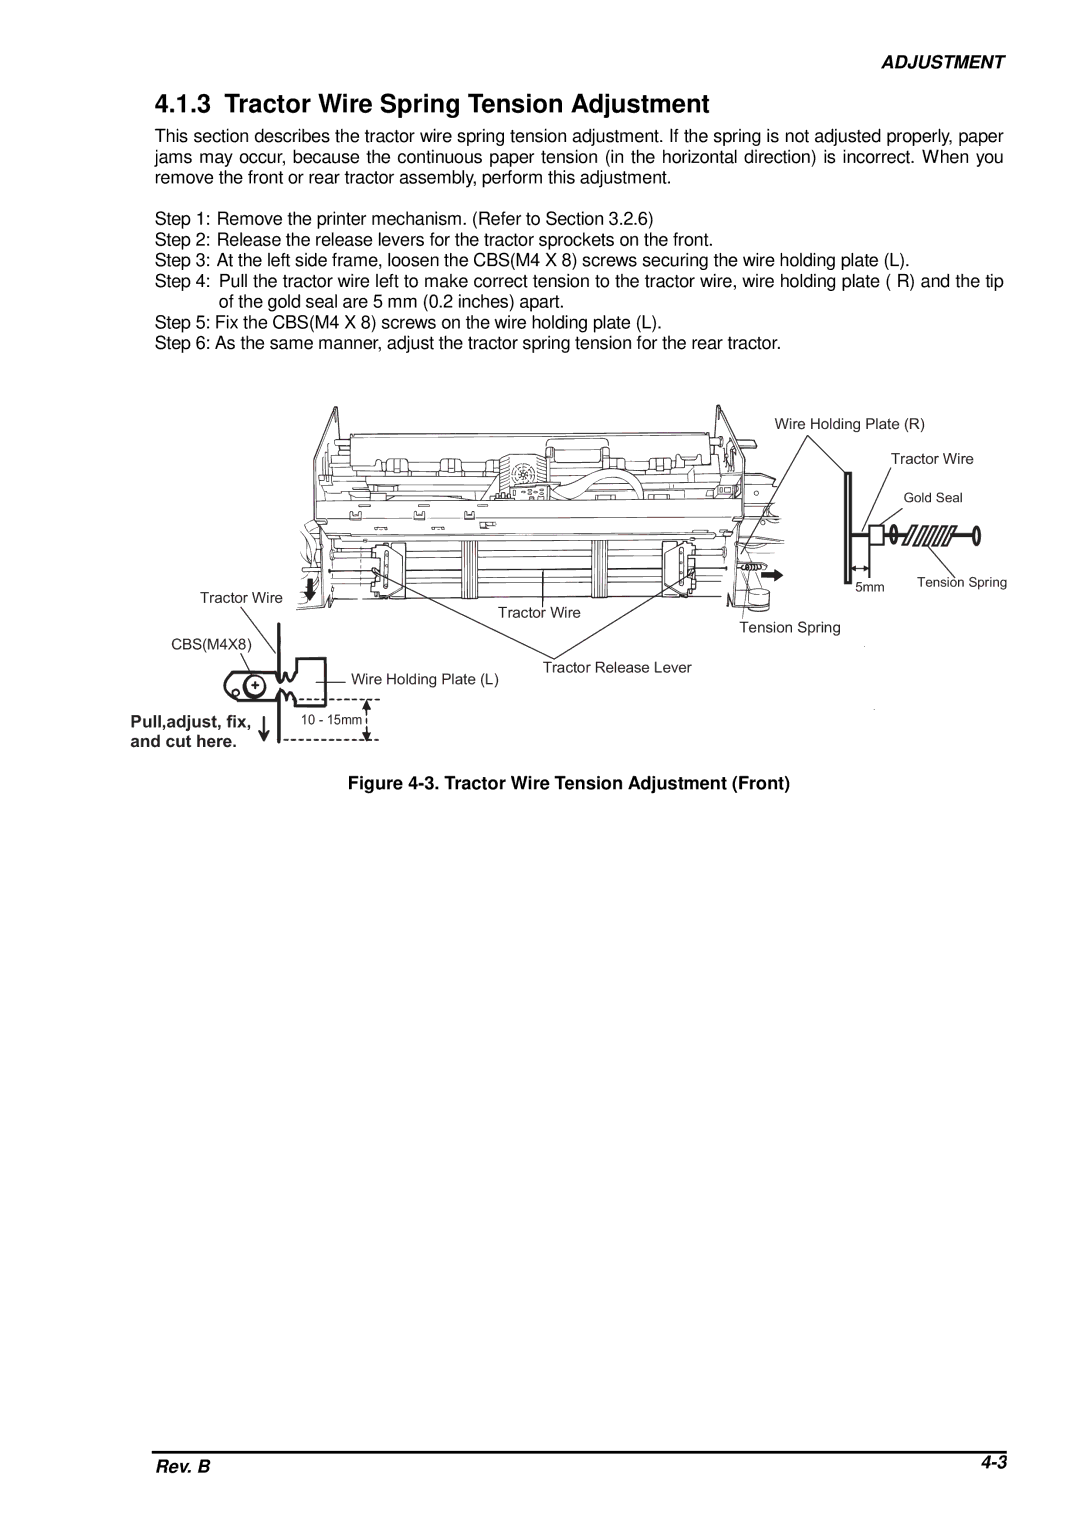
This section describes the tractor wire spring tension adjustment. If the spring is not adjusted properly, paper jams may occur, because the continuous paper tension (in the horizontal direction) is incorrect. When you remove the front or rear tractor assembly, perform this adjustment.
Step 1: Remove the printer mechanism. (Refer to Section 3.2.6)
Step 2: Release the release levers for the tractor sprockets on the front.
Step 3: At the left side frame, loosen the CBS(M4 X 8) screws securing the wire holding plate (L).
Step 4: Pull the tractor wire left to make correct tension to the tractor wire, wire holding plate ( R) and the tip of the gold seal are 5 mm (0.2 inches) apart.
Step 5: Fix the CBS(M4 X 8) screws on the wire holding plate (L).
Step 6: As the same manner, adjust the tractor spring tension for the rear tractor.
|
| W ir e H o ld in g | P |
|
| T r a c t o r | W |
|
| G o ld S e a l | |
T r a c t o r | W ir e | 5 m m T e n s io n | S |
T r a c t o r W ir e |
| ||
|
|
| |
|
| T e n s io n S p r in g |
|
C B S ( M 4 X 8 ) |
|
| |
|
| T r a c t o r R e le a s e L e v e r |
|
| W ir e H o ld in g P la t e ( L ) |
| |
1 0 | - 1 5 m m |
|
|
P u l l , a d j u s t , f i x , |
| ||
a n d c u t h e r e . |
|
| |
Figure 4-3. Tractor Wire Tension Adjustment (Front)
Rev. B |
