2. Installation
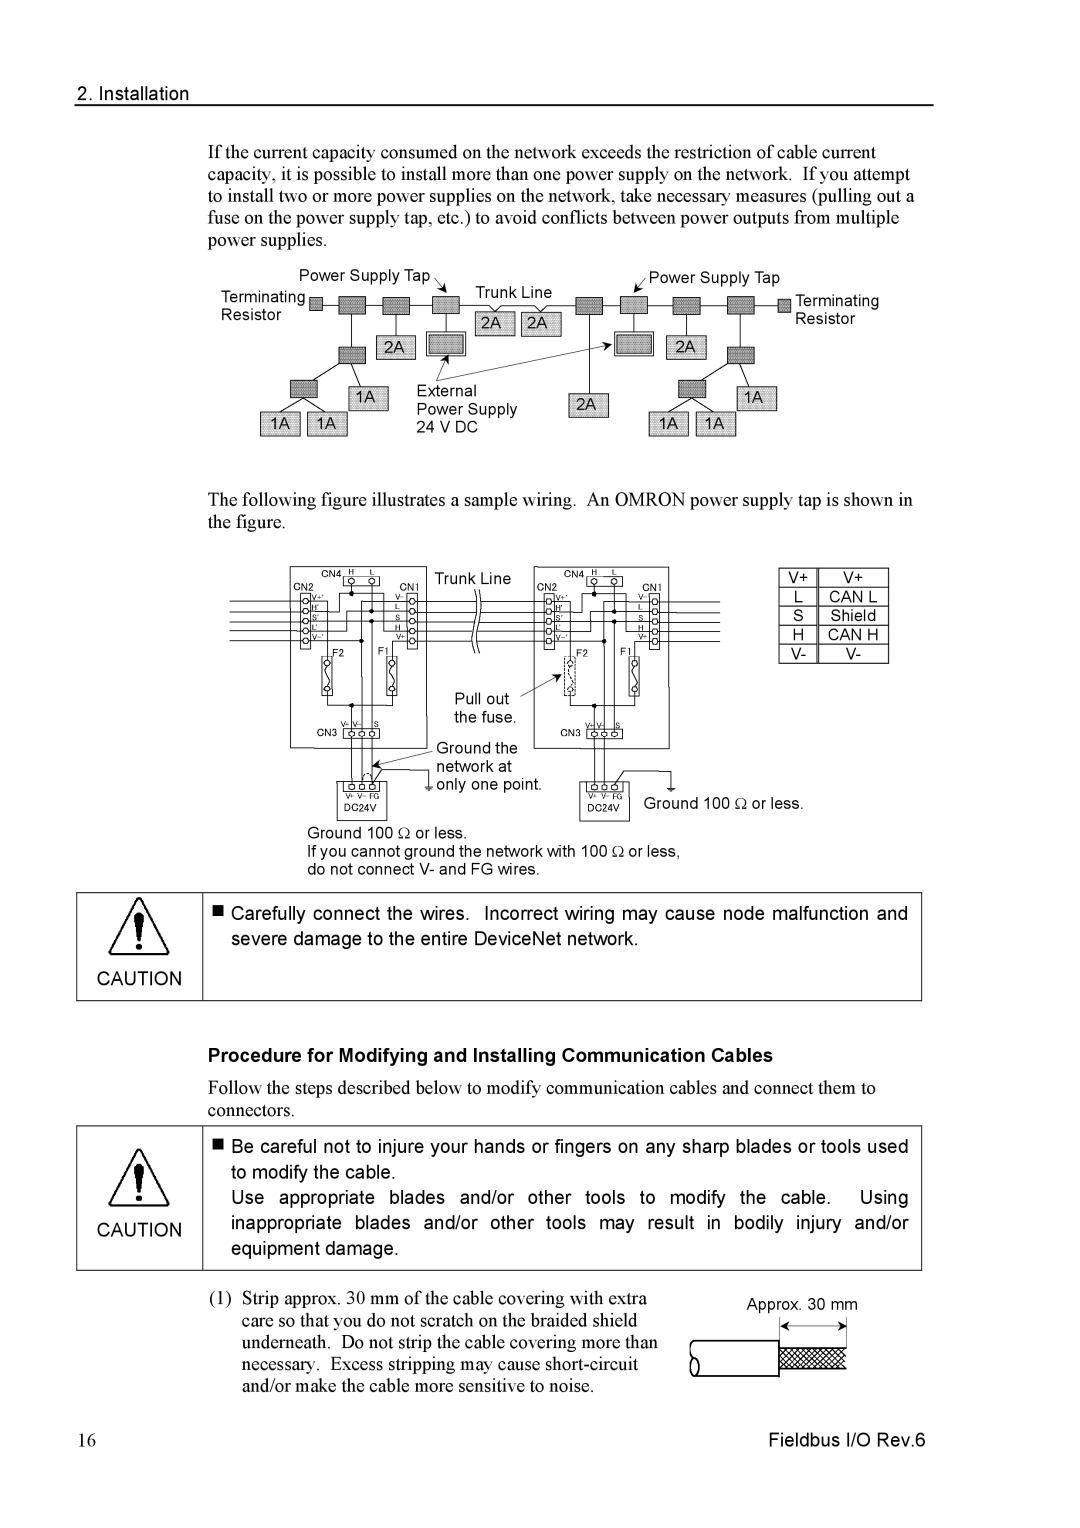
If the current capacity consumed on the network exceeds the restriction of cable current capacity, it is possible to install more than one power supply on the network. If you attempt to install two or more power supplies on the network, take necessary measures (pulling out a fuse on the power supply tap, etc.) to avoid conflicts between power outputs from multiple power supplies.
Power Supply Tap |
| Power Supply Tap | ||
Terminating |
| Trunk Line |
| Terminating |
Resistor |
| 2A 2A |
| Resistor |
|
| 2A |
| 2A |
| 1A | External | 2A | 1A |
| Power Supply | |||
1A 1A |
| 1A 1A | ||
| 24 V DC |
| ||
The following figure illustrates a sample wiring. An OMRON power supply tap is shown in the figure.
Trunk Line |
| V+ | V+ |
|
| L | CAN L |
|
| S | Shield |
|
| H | CAN H |
|
| V- | V- |
Pull out |
|
|
|
the fuse. |
|
|
|
Ground the |
|
|
|
network at |
|
|
|
only one point. | Ground 100 Ω or less. |
| |
|
| ||
Ground 100 Ω or less.
If you cannot ground the network with 100 Ω or less, do not connect V- and FG wires.
CAUTION
Carefully connect the wires. Incorrect wiring may cause node malfunction and severe damage to the entire DeviceNet network.
Procedure for Modifying and Installing Communication Cables
Follow the steps described below to modify communication cables and connect them to connectors.
| Be careful not to injure your hands or fingers on any sharp blades or tools used | |
| to modify the cable. | |
| Use appropriate blades and/or other tools to modify the cable. Using | |
CAUTION | inappropriate blades and/or other tools may result in bodily injury and/or | |
equipment damage. | ||
| ||
|
|
(1) Strip approx. 30 mm of the cable covering with extra | Approx. 30 mm | ||||
care so that you do not scratch on the braided shield |
|
|
|
|
|
|
|
|
|
| |
underneath. Do not strip the cable covering more than |
|
|
|
|
|
|
|
|
|
| |
necessary. Excess stripping may cause |
|
|
|
|
|
and/or make the cable more sensitive to noise. |
|
|
|
|
|
16 | Fieldbus I/O Rev.6 | ||||
