2. Installation
2.10 EPSON RC+ Fieldbus I/O Installation
After you have created your fieldbus network and installed the scanner board(s) in your controller, you must configure the EPSON RC+ Fieldbus I/O option.
Before continuing, the fieldbus scanner boards must have the device configuration stored in the board's flash memory, as described in the chapter Installation. Otherwise, the fieldbus boards will function improperly and EPSON RC+ cannot control them.
See the 2. Installation to store the device configuration in the flash memory.
Fieldbus I/O Software Configuration
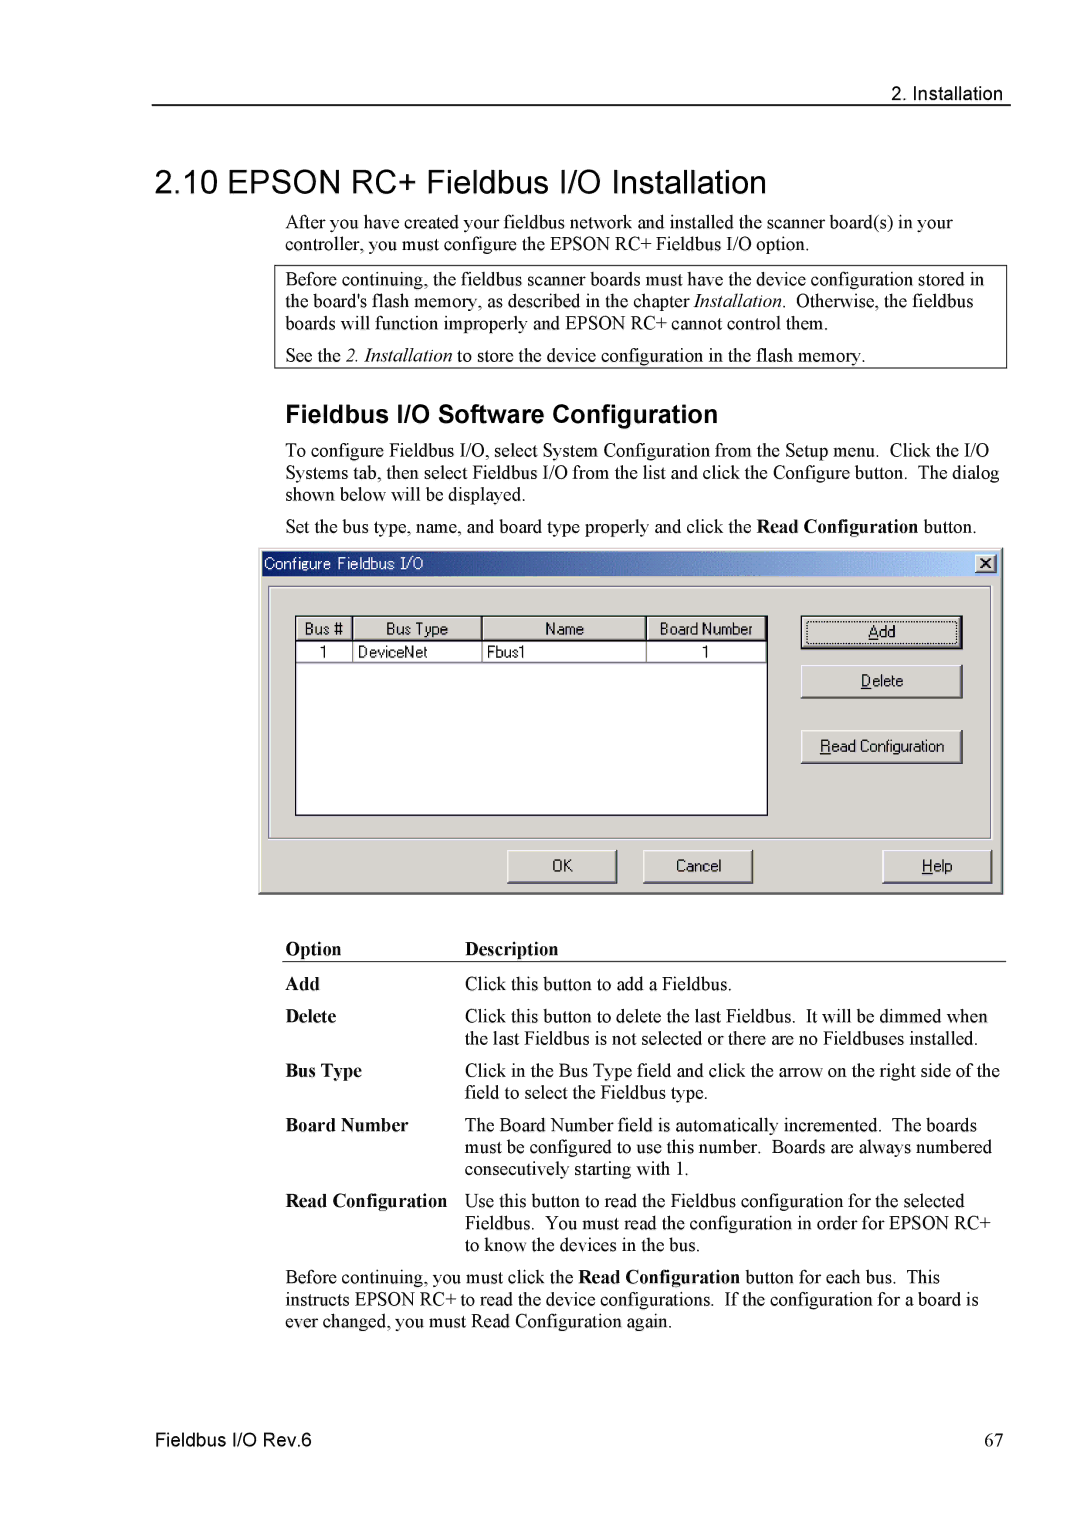
To configure Fieldbus I/O, select System Configuration from the Setup menu. Click the I/O Systems tab, then select Fieldbus I/O from the list and click the Configure button. The dialog shown below will be displayed.
Set the bus type, name, and board type properly and click the Read Configuration button.
Option | Description |
Add | Click this button to add a Fieldbus. |
Delete | Click this button to delete the last Fieldbus. It will be dimmed when |
| the last Fieldbus is not selected or there are no Fieldbuses installed. |
Bus Type | Click in the Bus Type field and click the arrow on the right side of the |
| field to select the Fieldbus type. |
Board Number | The Board Number field is automatically incremented. The boards |
| must be configured to use this number. Boards are always numbered |
| consecutively starting with 1. |
Read Configuration | Use this button to read the Fieldbus configuration for the selected |
| Fieldbus. You must read the configuration in order for EPSON RC+ |
| to know the devices in the bus. |
Before continuing, you must click the Read Configuration button for each bus. This instructs EPSON RC+ to read the device configurations. If the configuration for a board is ever changed, you must Read Configuration again.
Fieldbus I/O Rev.6 | 67 |