Selecting a PIP input
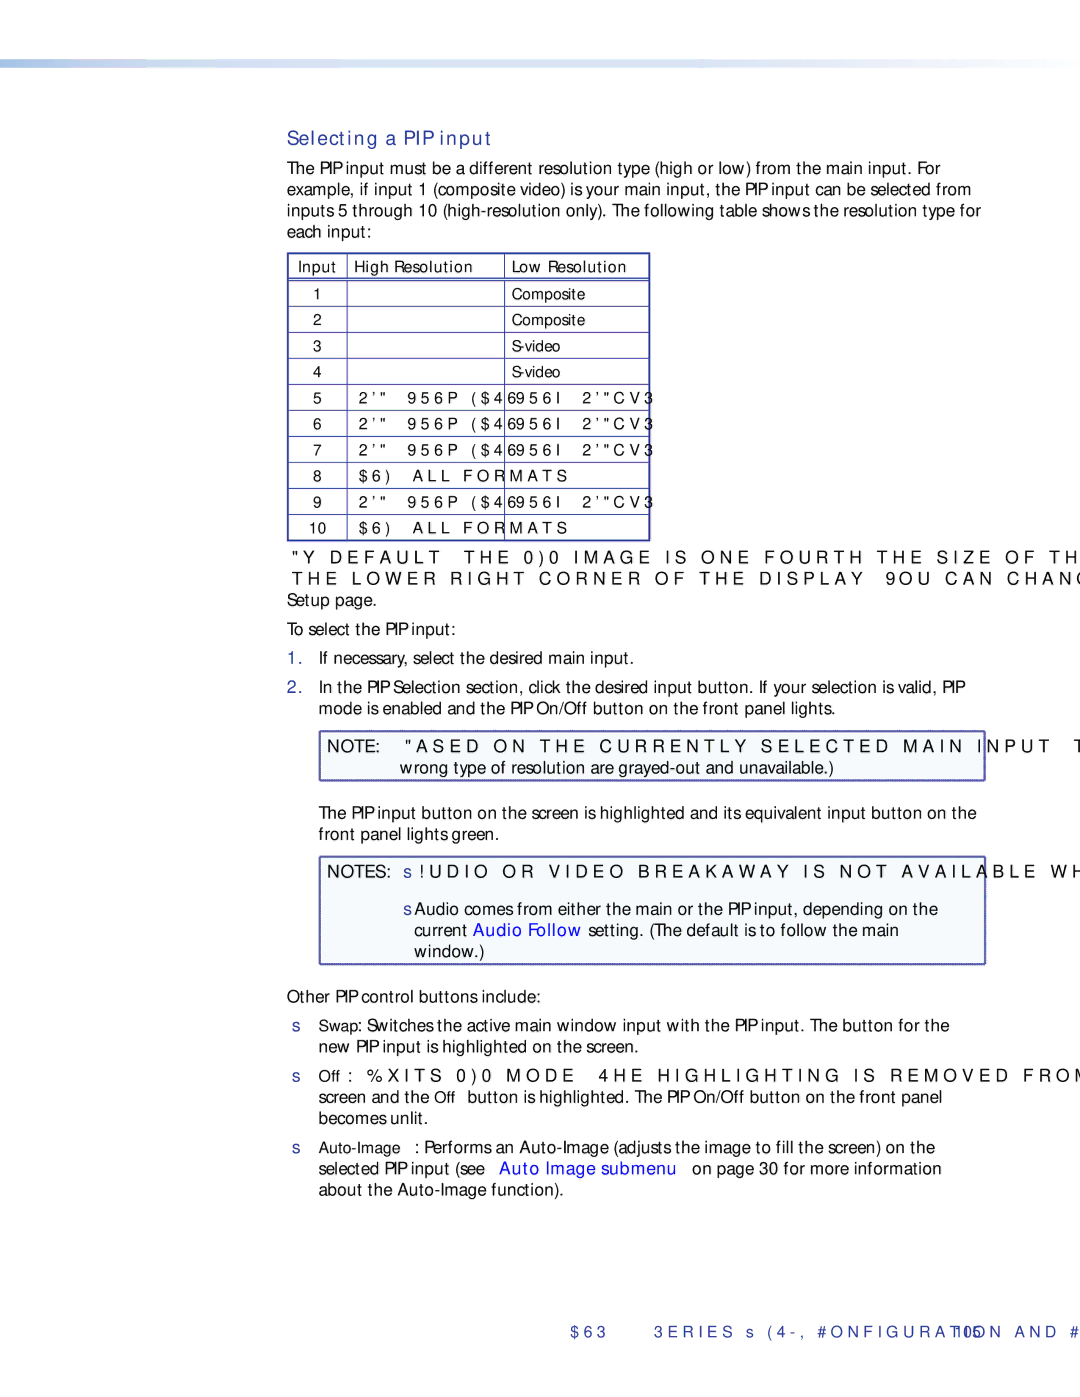
The PIP input must be a different resolution type (high or low) from the main input. For example, if input 1 (composite video) is your main input, the PIP input can be selected from inputs 5 through 10
Input | High Resolution | Low Resolution |
|
|
|
1 |
| Composite |
|
|
|
2 |
| Composite |
|
|
|
3 |
| |
|
|
|
4 |
| |
|
|
|
5 | RGB, YUVp/HDTV | YUVi, RGBcvS |
|
|
|
6 | RGB, YUVp/HDTV | YUVi, RGBcvS |
|
|
|
7 | RGB, YUVp/HDTV | YUVi, RGBcvS |
|
|
|
8 | DVI (all formats) |
|
|
|
|
9 | RGB, YUVp/HDTV | YUVi, RGBcvS |
|
|
|
10 | DVI (all formats) |
|
|
|
|
By default, the PIP image is
To select the PIP input:
1.If necessary, select the desired main input.
2.In the PIP Selection section, click the desired input button. If your selection is valid, PIP mode is enabled and the PIP On/Off button on the front panel lights.
![]() NOTE: Based on the currently selected main input, the buttons for inputs with the
NOTE: Based on the currently selected main input, the buttons for inputs with the
wrong type of resolution are
The PIP input button on the screen is highlighted and its equivalent input button on the front panel lights green.
![]() NOTES: • Audio or video breakaway is not available when the DVS is in PIP mode.
NOTES: • Audio or video breakaway is not available when the DVS is in PIP mode.
• Audio comes from either the main or the PIP input, depending on the current Audio Follow setting. (The default is to follow the main window.)
Other PIP control buttons include:
•Swap: Switches the active main window input with the PIP input. The button for the new PIP input is highlighted on the screen.
•Off: Exits PIP mode. The highlighting is removed from the PIP input button on the screen and the Off button is highlighted. The PIP On/Off button on the front panel becomes unlit.
•
DVS 510 Series • HTML Configuration and Control 105