Monitoring
Universal Monitor
Page
Table of Contents
Opening Screen Overview Main Menu Overview LCD Menu Overview
Setup System Setup I/O Matrix
Appendix B Default Settings Quick Reference Guide
Appendix a Service Terminal Interface
Figures
Page
Data Logs
Methods of Viewing and Configuring the Universal Monitor
Optional Features
Available Alarms
Transformer Module Back of LCD Controller Board
Enclosure has knockouts Access slots
Outside Enclosure Overview
On top
Digital inputs
Typical Configuration
Universal Monitor Main board RS232 Phone Line
Digital outputs
Controller board components
Controller Board Overview
Connector RS232
Of-power jumper
Connector EIA422
EIA485 connector
Expansion board components
Optional Expansion Board Overview
LED indicators summary
LED Indicators
General status LED D3 green
LED Indicators Optional Expansion Board
Color Description Power status
EIA485 status LEDs D4 yellow D5 red
Typical Sequence
Unpacking and Preliminary Inspection
Installation Considerations
Installation Main Board
Packing Contents
Bottom hole diameter
Surface-Mounting the Universal Monitor
Required tools
Mounting the Panel
Flush-Mounting the Universal Monitor
Input Power Connections Small Enclosure
Connect Power to the Universal Monitor
Connection Type
Input Power Connections
VAC Output Power Connections
Termination and Mounting Large Enclosure
Problem Possible Solution Replacement Fuse Part Numbers
Troubleshooting Transformer Module
Connecting the Battery Pack
Obtaining a Replacement Battery Pack
Packing manifest optional Expansion Board
Installation Optional Expansion Board
Surface-Mounting the Optional Expansion Board
Mounting Dimensions optional Expansion Board
Flush-Mounting the Optional Expansion Board
TM115 shown
Input Power Connections Optional Expansion Board
Pre-wired
24VAC wiring red & white 24VAC input connectors AC1 & AC2
Wiring and Connections Main Board
Wiring Specifications
Wiring specifications main board
Proceeds up numbering keys are shown at right
Connecting Digital Inputs and Digital Outputs
Connecting Digital Inputs
Connecting Digital Outputs
Setting the Digital Output Jumpers
Connecting Analog Inputs
Digital output jumper settings
Connecting the Analog Ground
Setting the 12VDC/24VDC Analog Power Jumper
Phone Line Connector
Connecting Common Alarm Outputs
EIA422 SiteScan Web Connector
1 RS232 Connector
Wiring specifications optional Expansion Board
Wiring and Connections Optional Expansion Board
Numbering keys
Connecting Inputs and Outputs
Numbering
Relay is Closed On power failure
Keys
DIP switch setting outputs wired as Normally Closed N.C
Setting the Digital Output DIP Switches
DIP switch setting outputs wired as Normally Open N.O
Enable the Connection via Firmware
Connect EIA485 Connectors to Main Board
Connect to the Universal Monitor
Guide to Universal Monitor functions
Overview of Menus
Main Menu Overview
Opening Screen Overview
LCD Menu Overview
View Status Options
Active Alarms
View Active Alarms
Active Alarms
Clearing Active Alarms
Alarm Log
View Alarm Log
Alarm Log
Alarm log conditions Main Menu
Event log conditions
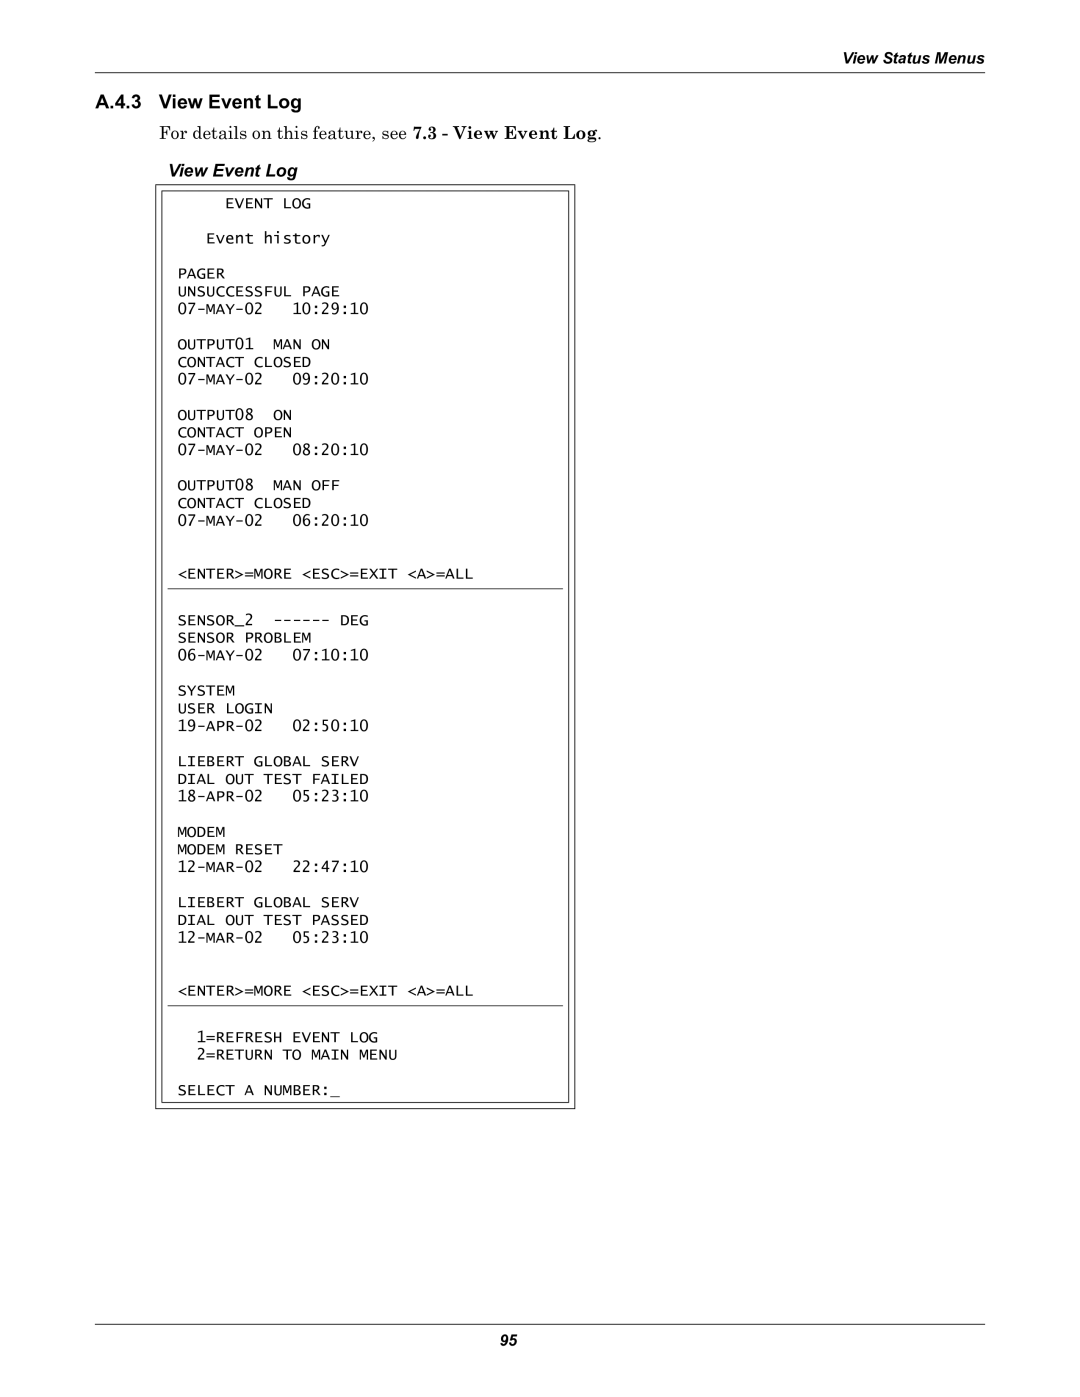
View Event Log
Event Log
Event Log
Select a Sensor
View Trend Log
View a Trend Log
Input Status
View Input Status
Viewing Additional Input Data
Digital output states
View Output Status
Output Status
Viewing Additional Output Data
View a Pager PIN
View Pager Numbers
Select a Pager
View a Pager Number
Silence Alarm Service Terminal Interface only
Silence Alarm & Backup LOG Files Service Terminal Interface
Back Up Log Files Service Terminal Interface only
Silence Alarm & Backup Log Files Service Terminal Interface
Valid characters for data entry
Login
Login
System and Control Options
System & Control menu Clear Alarms&Logs selected
Login Screen
System & Control menu Setup System selected
Setup System menu
Setup System Setup Input
Setup System Overview
Change Label Name of Input
Define Input as Alarmable or Event
Define Input as Normally Open or Normally Closed
Latched / Unlatched
Set Up Alarmable Inputs in Latched or Unlatched Mode
Set Up Delay Time
Delay Time
Setup Common Alarm Setup Sensor
Setup System Setup Common Alarm
Change to Reset Y or Not Reset N
Reset Common Alarm
Select a Sensor to Configure
Setup System Setup Sensor
Default settings analog sensor inputs
Change Sensor Label Name
Identify the Sensor as Connected
Change Units Label
Change 20 mA Value
Change 4 mA Value
Change Offset Value
Set Up Alarmable Sensors in Latched or Unlatched Mode
Define Sensor as Alarmable or Event
Message if sensor has been defined as an event
Change High Setpoint
Change Low Setpoint
Change High Setpoint
Change Low Setpoint
Sensor Delay
Set Up Mapping for a Digital Input
Setup System Setup I/O Matrix
Map Input to a Main Board Output
Map Input to Expansion Board Output
Default Mappings Digital Inputs to Outputs
Default mapping of digital inputs to digital outputs
Digital input By default, mapped to digital output
Map Sensor to Expansion Board Output
Set Up Mapping for an Analog Sensor Input
Default Mappings Analog Inputs to Outputs
Map Sensor to Main Board Output
Change Label Name of Output
Setup System Setup Output
Define Main Board Output as Normally Open / Closed
Configure Main Board Output for Loss of Power Fail-Safe
Set Expansion Board Output by DIP Switch
Message if Expansion Board output selected
Default Modem Settings
Setup System Setup Modem & Pagers
Modem Setup Initialization String
Supported Modem Settings
International Dialing
Select Modem Setup
Country codes Setup System Menu
Setup Modem Menu
Enter Universal Monitor Phone Number
Change Modem Hang Up Delay After a Call
Enable Modem Diagnostic Messages
Change Modem Dial Prefix
Pager dialing results
Pager Setup Pager Number and PIN
Select a Pager to Configure
Setup Pagers Setup Modem
Enter a Pager PIN Number
Setup Pager Menu
Enter a Pager Number
Guidelines for dialing pagers
Enter Pager NUMBER40 Characters MAX Command Successful
Enter Time To Perform Communications Check
Enable Communications Check
Setup System Info
Setup System Setup System Info
Select Setup System
Setup System Info Setup EXP Board
Change Date & Time/Automatic Daylight Saving Time
Change Password
Change the Password
Reset Password to the Factory Default Aaaa
Battery alarms
Setup Site ID
Connect Battery
Setup Site ID
Backup and Upload Configuration File
Back Up the Configuration File
Upload the Configuration File
Setup Serv Ph Num
Setup Serv Ph Num Enter Phone Number
Service phone number dialing results
Guidelines for dialing service phone number
Setup Service Phone Number Service Terminal Interface only
Factory Defaults
Factory Defaults
Factory Defaults
Firmware Update Service Terminal Interface only
System and Control Options
Disconnect
Initiate Remote Alarm Test Service Terminal Interface only
Setup EXP Board
Setup Exp Board Optional Expansion Board
Expansion Board Connected
Manual Output Ctrl
Clear Active Alarms
Clear Alarms & Logs
Clear the Alarm Log
Clear Trend Log
Clear the Event Log
Clear the Trend Logs
Clear Event Log
Specifications
Universal Monitor Specifications
Umexp
Optional Expansion Board Specifications
Comparison of Functions LCD and Service Terminal Interface
Appendix a Service Terminal Interface
Steps to set up a direct or remote connection
Connecting to the Service Terminal Interface
Connection Methods
Choose COM1 Choose the computer’s modem
Create a Connection
Direct Connection via RS232
Remote Connection via Modem
COM1 Port Setup
Set Up the COM1 Port Direct Connection Only
Settings tab
Set Up the Connection’s Properties
Properties Setup
Ascii Setup
Click on the file name for example, Universal Monitor.ht
Connect to the Service Terminal Interface
Dial button OK button
Main Menu For sample screens, see
Silence Alarm and Backup Log Files
Setup Menu Overview
View Status Overview
Main Menu
View Status Menus
Main Menu