Making the Physical Connections
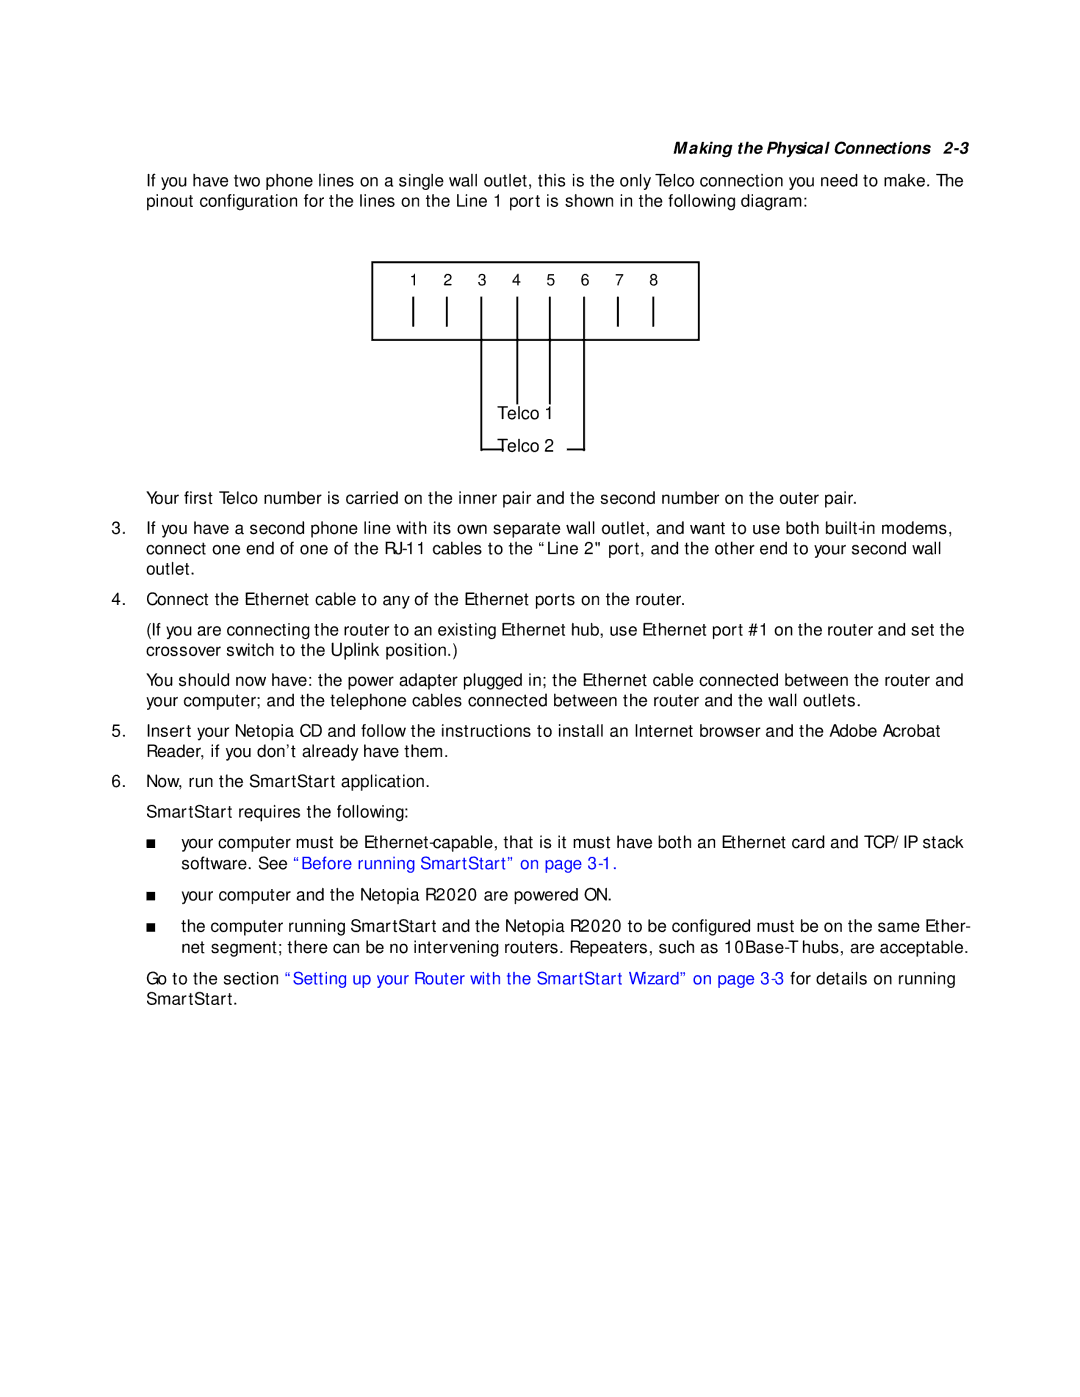
If you have two phone lines on a single wall outlet, this is the only Telco connection you need to make. The pinout configuration for the lines on the Line 1 port is shown in the following diagram:
1 | 2 | 3 | 4 | 5 | 6 | 7 | 8 |
Telco 1
Telco 2
Your first Telco number is carried on the inner pair and the second number on the outer pair.
3.If you have a second phone line with its own separate wall outlet, and want to use both
4.Connect the Ethernet cable to any of the Ethernet ports on the router.
(If you are connecting the router to an existing Ethernet hub, use Ethernet port #1 on the router and set the crossover switch to the Uplink position.)
You should now have: the power adapter plugged in; the Ethernet cable connected between the router and your computer; and the telephone cables connected between the router and the wall outlets.
5.Insert your Netopia CD and follow the instructions to install an Internet browser and the Adobe Acrobat Reader, if you don’t already have them.
6.Now, run the SmartStart application. SmartStart requires the following:
■your computer must be
■your computer and the Netopia R2020 are powered ON.
■the computer running SmartStart and the Netopia R2020 to be configured must be on the same Ether- net segment; there can be no intervening routers. Repeaters, such as
Go to the section “Setting up your Router with the SmartStart Wizard” on page