Netopia R2020 manual Viewing scheduled connections, Adding a scheduled connection

Models: R2020

1 312
Download 312 pages 50.29 Kb
Page 84
Image 84

8-8 User’s Reference Guide

Viewing scheduled connections

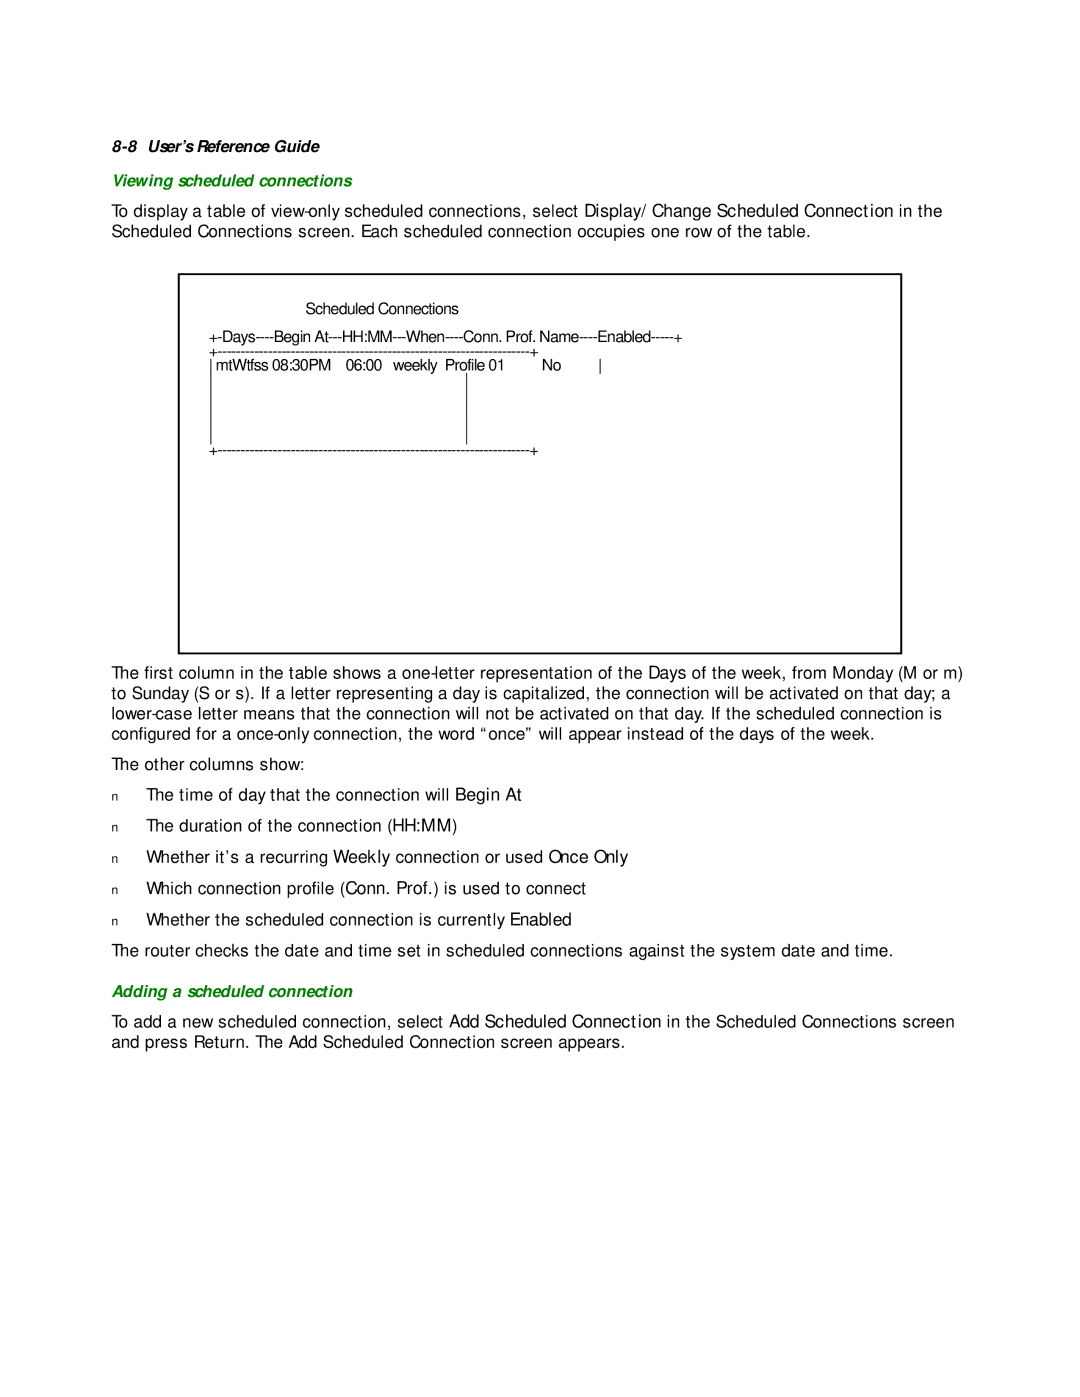
To display a table of view-only scheduled connections, select Display/Change Scheduled Connection in the Scheduled Connections screen. Each scheduled connection occupies one row of the table.


Scheduled Connections


+-Days----

Begin At---

HH:MM---

When----

Conn. Prof. Name----

Enabled-----

+

+--------------------------------------------------------------------


+

mtWtfss 08:30PM

06:00

weekly

Profile 01

No


+--------------------------------------------------------------------


+

The first column in the table shows a one-letter representation of the Days of the week, from Monday (M or m) to Sunday (S or s). If a letter representing a day is capitalized, the connection will be activated on that day; a lower-case letter means that the connection will not be activated on that day. If the scheduled connection is configured for a once-only connection, the word “once” will appear instead of the days of the week.

The other columns show:

The time of day that the connection will Begin At

The duration of the connection (HH:MM)

Whether it’s a recurring Weekly connection or used Once Only

Which connection profile (Conn. Prof.) is used to connect

Whether the scheduled connection is currently Enabled

The router checks the date and time set in scheduled connections against the system date and time.

Adding a scheduled connection

To add a new scheduled connection, select Add Scheduled Connection in the Scheduled Connections screen and press Return. The Add Scheduled Connection screen appears.

Page 84
Image 84
Netopia R2020 manual Viewing scheduled connections, Adding a scheduled connection