Set Scan Button tab | Change Port tab |
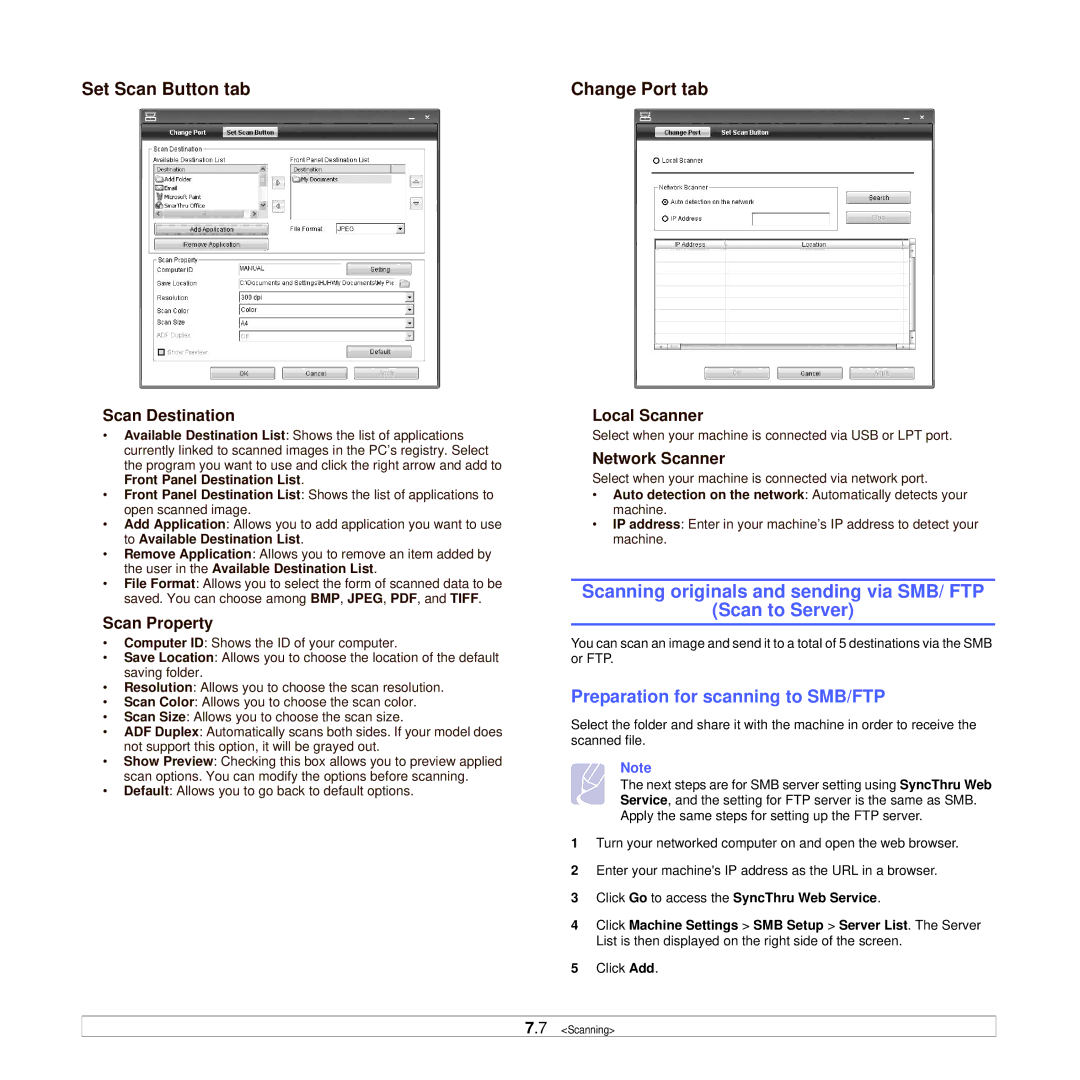
Scan Destination
•Available Destination List: Shows the list of applications currently linked to scanned images in the PC’s registry. Select the program you want to use and click the right arrow and add to Front Panel Destination List.
•Front Panel Destination List: Shows the list of applications to open scanned image.
•Add Application: Allows you to add application you want to use to Available Destination List.
•Remove Application: Allows you to remove an item added by the user in the Available Destination List.
•File Format: Allows you to select the form of scanned data to be saved. You can choose among BMP, JPEG, PDF, and TIFF.
Scan Property
•Computer ID: Shows the ID of your computer.
•Save Location: Allows you to choose the location of the default saving folder.
•Resolution: Allows you to choose the scan resolution.
•Scan Color: Allows you to choose the scan color.
•Scan Size: Allows you to choose the scan size.
•ADF Duplex: Automatically scans both sides. If your model does not support this option, it will be grayed out.
•Show Preview: Checking this box allows you to preview applied scan options. You can modify the options before scanning.
•Default: Allows you to go back to default options.
Local Scanner
Select when your machine is connected via USB or LPT port.
Network Scanner
Select when your machine is connected via network port.
•Auto detection on the network: Automatically detects your machine.
•IP address: Enter in your machine’s IP address to detect your machine.
Scanning originals and sending via SMB/ FTP
(Scan to Server)
You can scan an image and send it to a total of 5 destinations via the SMB or FTP.
Preparation for scanning to SMB/FTP
Select the folder and share it with the machine in order to receive the scanned file.
Note
The next steps are for SMB server setting using SyncThru Web Service, and the setting for FTP server is the same as SMB. Apply the same steps for setting up the FTP server.
1Turn your networked computer on and open the web browser.
2Enter your machine's IP address as the URL in a browser.
3Click Go to access the SyncThru Web Service.
4Click Machine Settings > SMB Setup > Server List. The Server List is then displayed on the right side of the screen.
5Click Add.
7.7 <Scanning>