Sending a fax in toll save time
You can set the machine to send a fax in toll save time to save a telephone fee. If you send a fax after setting this feature, fax data will be stored in machine's memory and the machine will start to send fax in toll save time.
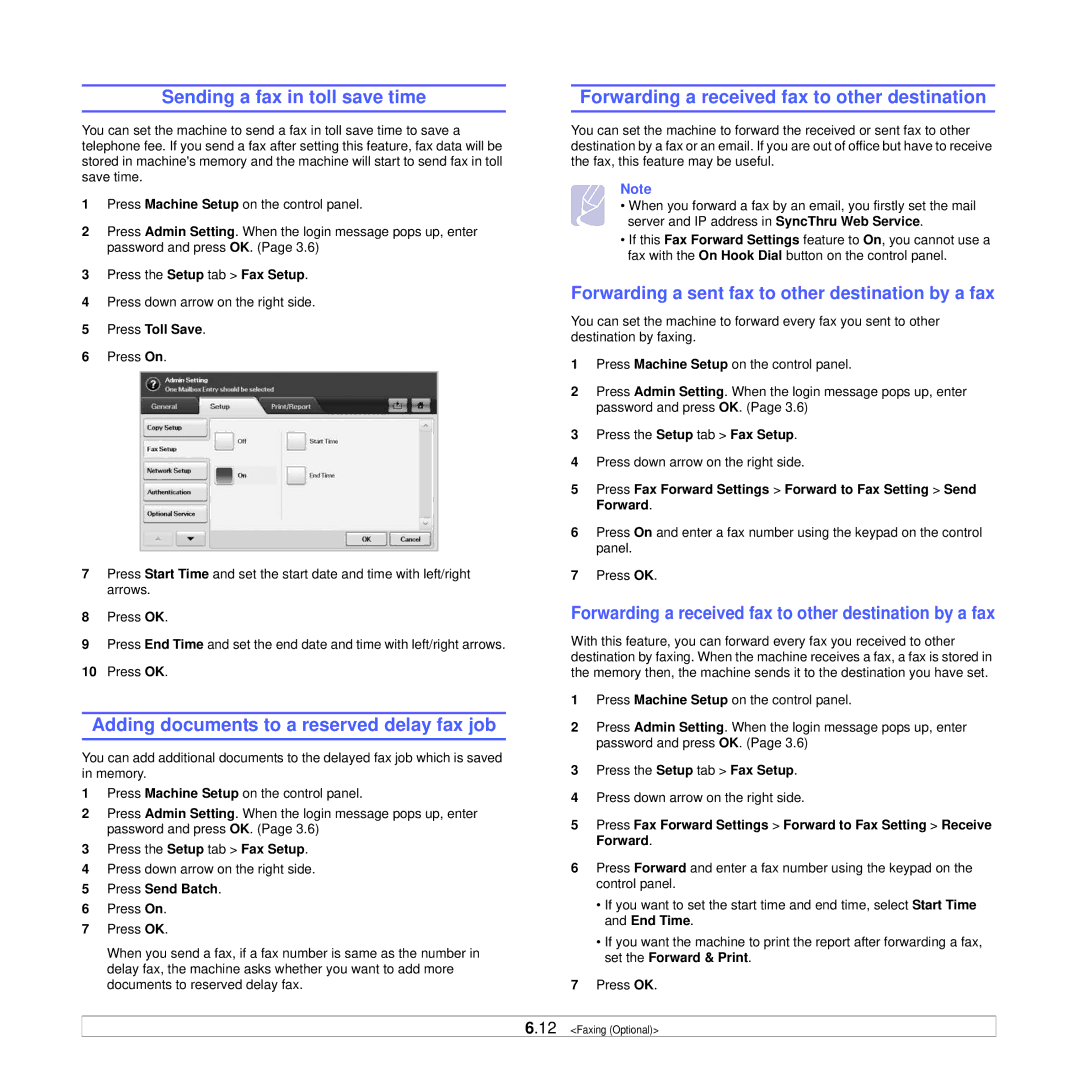
1Press Machine Setup on the control panel.
2Press Admin Setting. When the login message pops up, enter password and press OK. (Page 3.6)
3Press the Setup tab > Fax Setup.
4Press down arrow on the right side.
5Press Toll Save.
6Press On.
7Press Start Time and set the start date and time with left/right arrows.
8Press OK.
9Press End Time and set the end date and time with left/right arrows.
10Press OK.
Adding documents to a reserved delay fax job
You can add additional documents to the delayed fax job which is saved in memory.
1Press Machine Setup on the control panel.
2Press Admin Setting. When the login message pops up, enter password and press OK. (Page 3.6)
3Press the Setup tab > Fax Setup.
4Press down arrow on the right side.
5Press Send Batch.
6Press On.
7Press OK.
When you send a fax, if a fax number is same as the number in delay fax, the machine asks whether you want to add more documents to reserved delay fax.
Forwarding a received fax to other destination
You can set the machine to forward the received or sent fax to other destination by a fax or an email. If you are out of office but have to receive the fax, this feature may be useful.
Note
• When you forward a fax by an email, you firstly set the mail server and IP address in SyncThru Web Service.
•If this Fax Forward Settings feature to On, you cannot use a fax with the On Hook Dial button on the control panel.
Forwarding a sent fax to other destination by a fax
You can set the machine to forward every fax you sent to other destination by faxing.
1Press Machine Setup on the control panel.
2Press Admin Setting. When the login message pops up, enter password and press OK. (Page 3.6)
3Press the Setup tab > Fax Setup.
4Press down arrow on the right side.
5Press Fax Forward Settings > Forward to Fax Setting > Send Forward.
6Press On and enter a fax number using the keypad on the control panel.
7Press OK.
Forwarding a received fax to other destination by a fax
With this feature, you can forward every fax you received to other destination by faxing. When the machine receives a fax, a fax is stored in the memory then, the machine sends it to the destination you have set.
1Press Machine Setup on the control panel.
2Press Admin Setting. When the login message pops up, enter password and press OK. (Page 3.6)
3Press the Setup tab > Fax Setup.
4Press down arrow on the right side.
5Press Fax Forward Settings > Forward to Fax Setting > Receive Forward.
6Press Forward and enter a fax number using the keypad on the control panel.
•If you want to set the start time and end time, select Start Time and End Time.
•If you want the machine to print the report after forwarding a fax, set the Forward & Print.
7Press OK.
6.12 <Faxing (Optional)>