6SAVING (COPYING) RECORDED VIDEO
Copying video to CD-R/RW
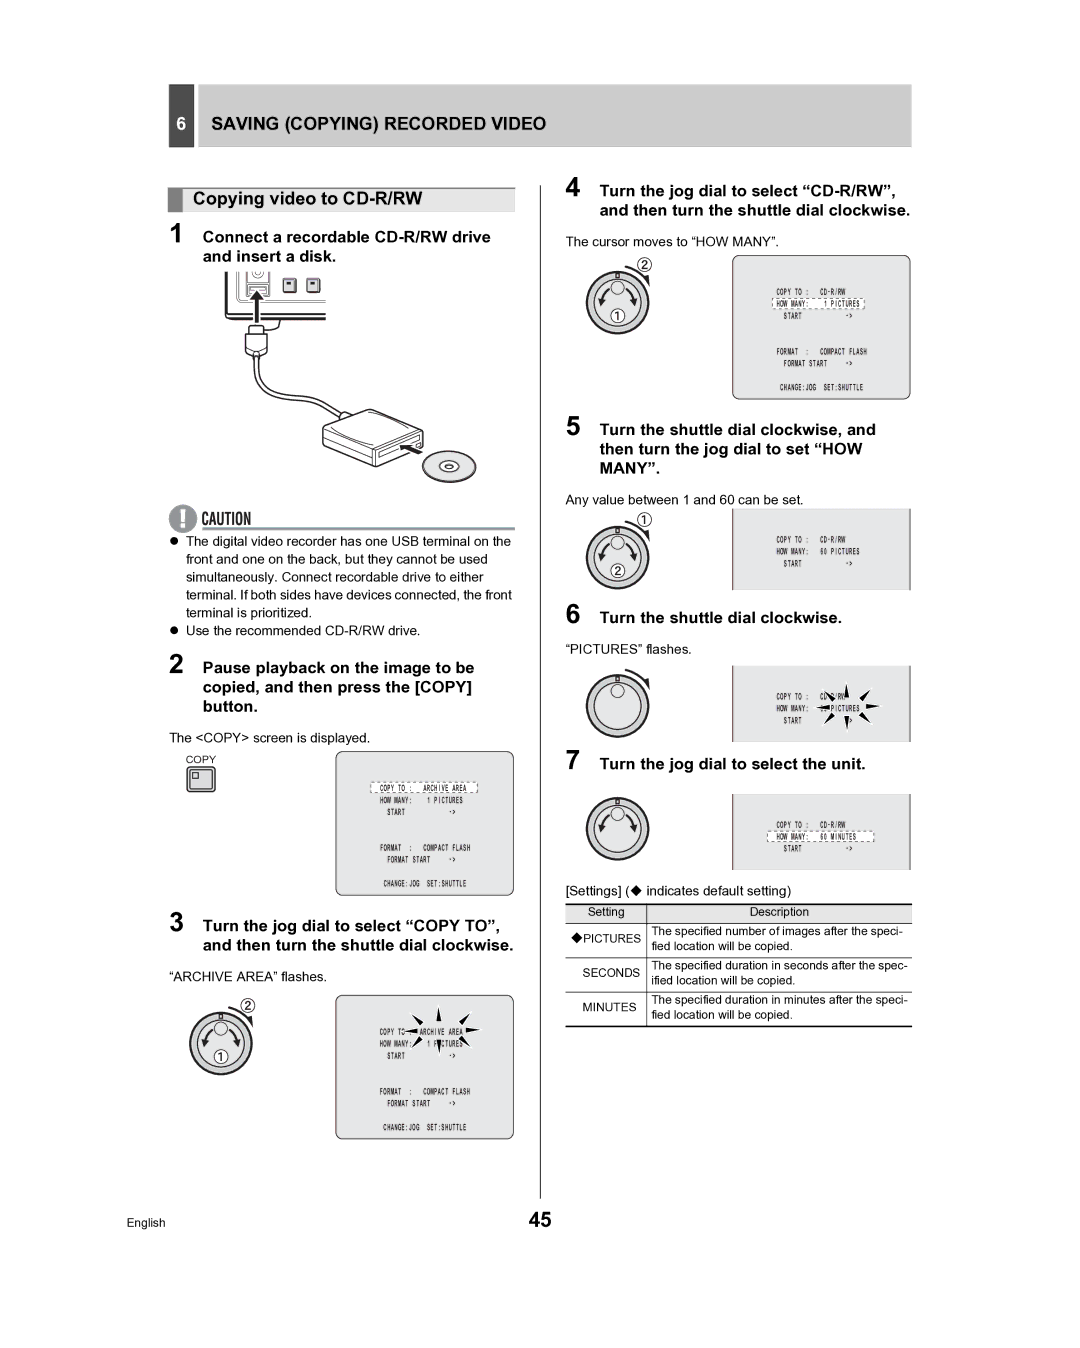
1 Connect a recordable CD-R/RW drive and insert a disk.
zThe digital video recorder has one USB terminal on the front and one on the back, but they cannot be used simultaneously. Connect recordable drive to either terminal. If both sides have devices connected, the front terminal is prioritized.
zUse the recommended
2 Pause playback on the image to be copied, and then press the [COPY] button.
The <COPY> screen is displayed.
COPY
COPY TO : ARCHIVE AREA
HOW MANY: 1 PICTURES
START
FORMAT : COMPACT FLASH
FORMAT START |
CHANGE:JOG SET:SHUTTLE
3 Turn the jog dial to select “COPY TO”, and then turn the shuttle dial clockwise.
“ARCHIVE AREA” flashes.
COPY ![]() ARCHIVE AREA
ARCHIVE AREA![]()
HOW MANY: 1 PICTURES
START
FORMAT : COMPACT FLASH
FORMAT START |
CHANGE:JOG SET:SHUTTLE
4 Turn the jog dial to select
The cursor moves to “HOW MANY”.
COPY TO : | |||
HOW MANY: | 1 | PICTURES |
|
START |
|
| |
FORMAT : | COMPACT FLASH | ||
FORMAT START |
| ||
CHANGE:JOG SET:SHUTTLE
5 Turn the shuttle dial clockwise, and then turn the jog dial to set “HOW MANY”.
Any value between 1 and 60 can be set.
COPY TO :
HOW MANY: 60 PICTURES
START
6 Turn the shuttle dial clockwise.
“PICTURES” flashes.
COPY TO : CD
HOW MANY: 60 PICTURES ![]()
START ![]()
7 Turn the jog dial to select the unit.
COPY TO :
HOW MANY: 60 MINUTES
START
[Settings] ( indicates default setting)
Setting | Description |
The specified number of images after the speci- PICTURES fied location will be copied.
SECONDS | The specified duration in seconds after the spec- | |
ified location will be copied. | ||
|
| |
MINUTES | The specified duration in minutes after the speci- | |
fied location will be copied. | ||
|
English | 45 |
