4GENERAL SET
3 Turn the shuttle dial clockwise.
The first password character
ADMIN 
-------- OFF
4 Set a character (0 to 9, A to Z) with the jog dial or numeric keys.
Example:
Display “1” with the jog dial or numeric keys.
ADMIN | OFF |
5 Turn the shuttle dial clockwise.
The second password character
6 Use the same procedure to set “123456AB”.
zTo set a
Turn the shuttle dial clockwise when
7 Following this, turn the shuttle dial clockwise.
The cursor moves to “OFF” (flashing).
| <SECURITY LOCK SET> | ||
LEVEL | USE | ||
ADMIN | 123456AB | OFF | |
USER | OFF | ||
REC CONTROL | : ADMIN | ||
CAMERA CONTROL | : ADMIN | ||
8 Turn the jog dial to select “ON”.
zIf you select “OFF” for the “ADMIN” setting, you cannot set the “USER” password.
9 Turn the shuttle dial clockwise.
The cursor moves to “USER”.
If you do not want to set a user password, the password setting procedure can now be ended. Turn the jog dial to move the cursor to “REC CONTROL” so that authorization for recording and playback operations may be set.
Setting the user password
Example: Setting “AB123456”
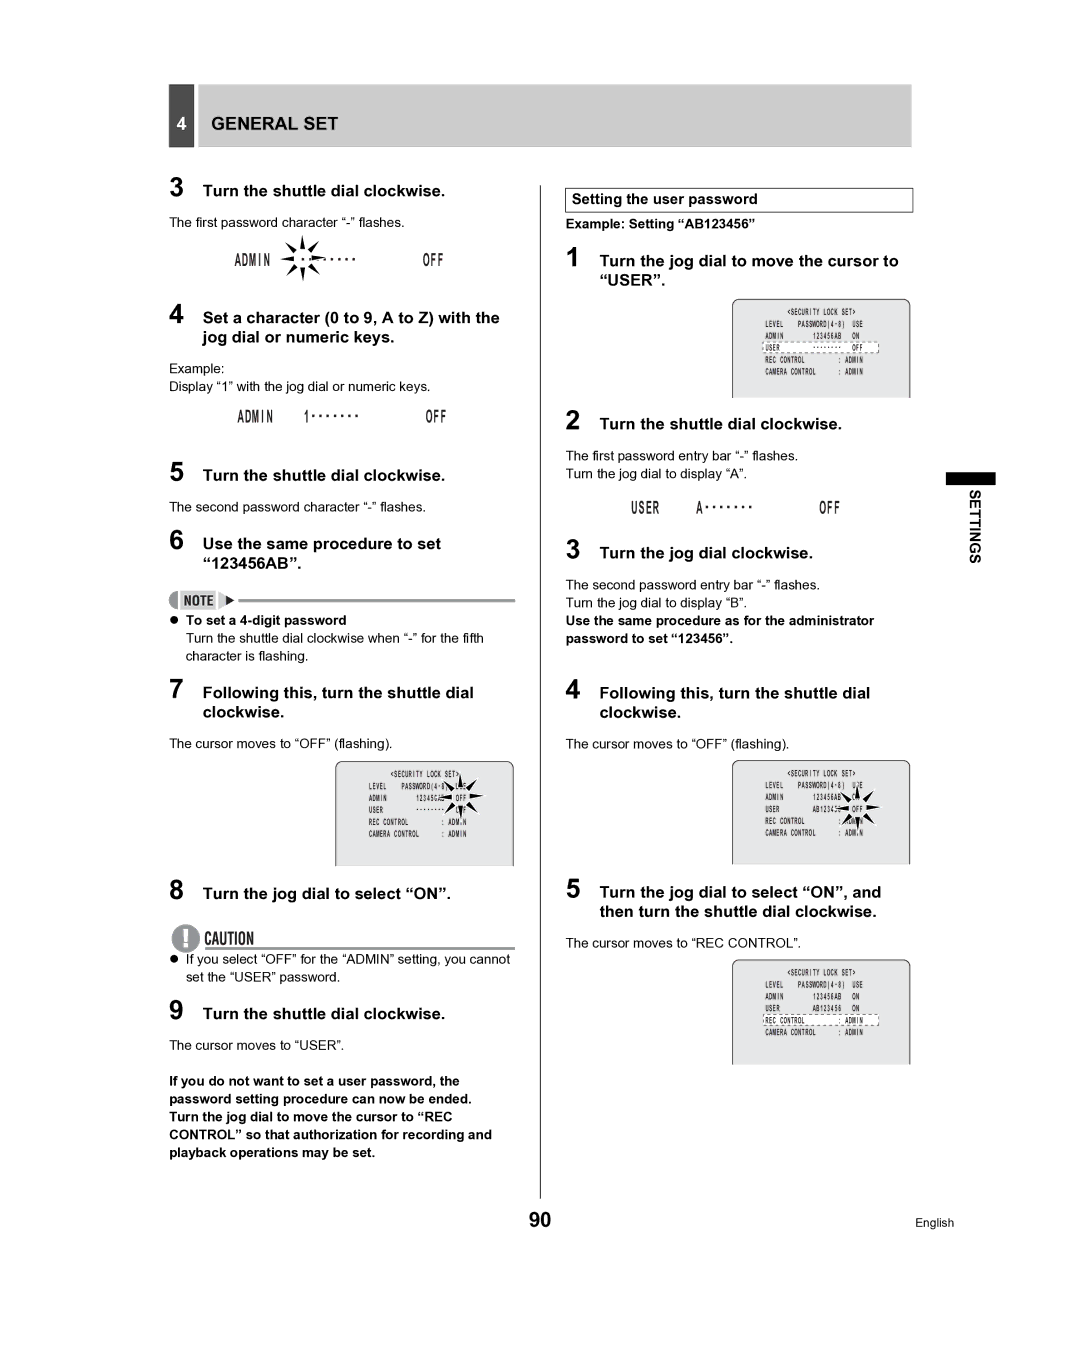
1 Turn the jog dial to move the cursor to “USER”.
| <SECURITY LOCK SET> | ||
LEVEL | USE | ||
ADMIN | 123456AB | ON | |
USER | OFF | ||
REC CONTROL | : ADMIN | ||
CAMERA CONTROL | : ADMIN | ||
2 Turn the shuttle dial clockwise.
The first password entry bar
Turn the jog dial to display “A”.
USER | OFF |
3 Turn the jog dial clockwise.
The second password entry bar
Use the same procedure as for the administrator password to set “123456”.
4 Following this, turn the shuttle dial clockwise.
The cursor moves to “OFF” (flashing).
| <SECURITY LOCK SET> | ||
LEVEL | USE | ||
ADMIN | 123456AB | ON | |
USER | AB123456 | OFF | |
REC CONTROL | : |
| |
CAMERA CONTROL | : ADMIN | ||
5 Turn the jog dial to select “ON”, and then turn the shuttle dial clockwise.
The cursor moves to “REC CONTROL”.
| <SECURITY LOCK SET> | ||
LEVEL | USE | ||
ADMIN | 123456AB | ON | |
USER | AB123456 | ON | |
REC CONTROL | : ADMIN | ||
CAMERA CONTROL | : ADMIN | ||
SETTINGS
90 | English |