3RECORD SET
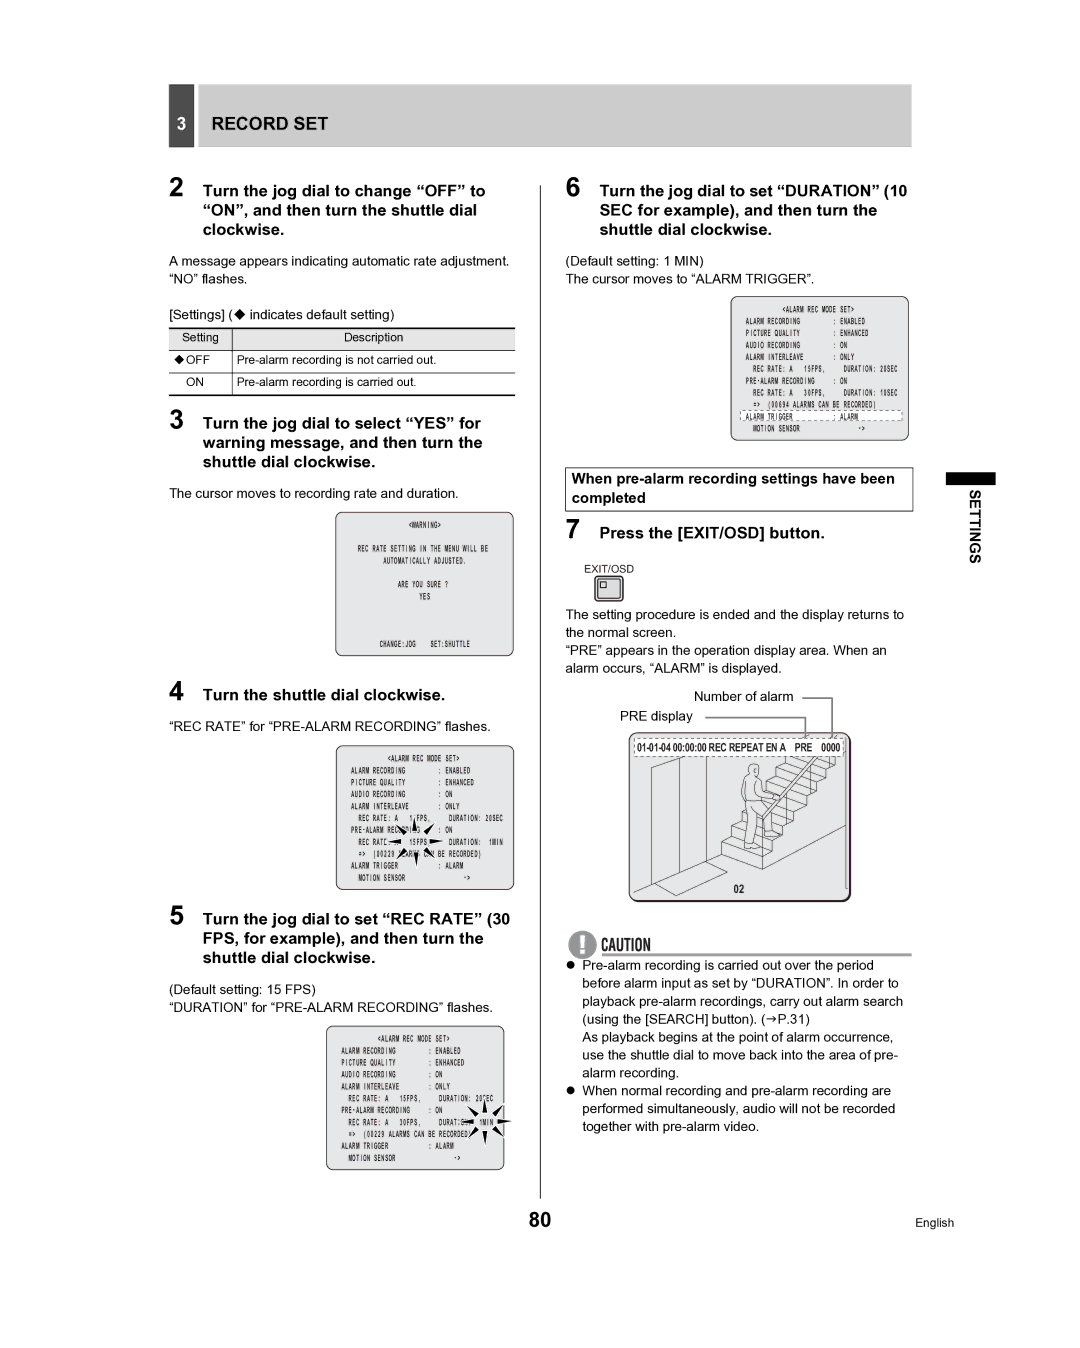
2 Turn the jog dial to change “OFF” to “ON”, and then turn the shuttle dial clockwise.
A message appears indicating automatic rate adjustment. “NO” flashes.
[Settings] ( indicates default setting)
Setting | Description |
|
|
OFF | |
|
|
ON | |
|
|
3 Turn the jog dial to select “YES” for warning message, and then turn the shuttle dial clockwise.
The cursor moves to recording rate and duration.
<WARNING>
REC RATE SETTING IN THE MENU WILL BE
AUTOMATICALLY ADJUSTED.
ARE YOU SURE ?
YES
CHANGE:JOG SET:SHUTTLE
4 Turn the shuttle dial clockwise.
“REC RATE” for “PRE-ALARM RECORDING” flashes.
<ALARM REC MODE | SET> | ||
ALARM RECORDING |
| : ENABLED | |
PICTURE QUALITY |
| : ENHANCED | |
AUDIO RECORDING |
| : ON | |
ALARM INTERLEAVE | : ONLY | ||
REC RATE: A | 15FPS, |
| DURATION: 20SEC |
: ON | |||
REC RATE: A | 15FPS, |
| DURATION: 1MIN |
=> (00229 ALARMS CAN BE RECORDED) | |||
ALARM TRIGGER |
| : ALARM | |
MOTION SENSOR |
|
| |
5 Turn the jog dial to set “REC RATE” (30 FPS, for example), and then turn the shuttle dial clockwise.
(Default setting: 15 FPS)
“DURATION” for
<ALARM REC MODE | SET> | ||
ALARM RECORDING |
| : ENABLED | |
PICTURE QUALITY |
| : ENHANCED | |
AUDIO RECORDING |
| : ON | |
ALARM INTERLEAVE | : ONLY | ||
REC RATE: A | 15FPS, |
| DURATION: 20SEC |
: ON | |||
REC RATE: A | 30FPS, |
| DURATION: 1MIN |
=> (00229 ALARMS CAN BE RECORDED) | |||
ALARM TRIGGER |
| : ALARM | |
MOTION SENSOR |
|
| |
6 Turn the jog dial to set “DURATION” (10 SEC for example), and then turn the shuttle dial clockwise.
(Default setting: 1 MIN)
The cursor moves to “ALARM TRIGGER”.
<ALARM REC MODE | SET> | ||
ALARM RECORDING |
| : ENABLED | |
PICTURE QUALITY |
| : ENHANCED | |
AUDIO RECORDING |
| : ON | |
ALARM INTERLEAVE | : ONLY | ||
REC RATE: A | 15FPS, |
| DURATION: 20SEC |
: ON | |||
REC RATE: A | 30FPS, |
| DURATION: 10SEC |
=> (00694 ALARMS CAN BE RECORDED) | |||
ALARM TRIGGER |
| : ALARM | |
MOTION SENSOR |
|
| |
When pre-alarm recording settings have been completed
7 Press the [EXIT/OSD] button.
EXIT/OSD
The setting procedure is ended and the display returns to the normal screen.
“PRE” appears in the operation display area. When an alarm occurs, “ALARM” is displayed.
Number of alarm
PRE display
02
z
As playback begins at the point of alarm occurrence, use the shuttle dial to move back into the area of pre- alarm recording.
zWhen normal recording and
SETTINGS
80 | English |
