4GENERAL SET
zIf an administrator password was entered, the security lock is cancelled and the indicator is turned off.
zIf a user password was entered, the security lock is partially cancelled and the indicator remains lit.
Setting and initializing the hard disk
This section describes how to initialize and expand the hard disk.
When a single hard disk is installed, the hard disk capacity is displayed for DISK 1; when two hard disks are installed, the capacity is displayed for “DISK 1” and “DISK 2”.
Initializing the hard disk
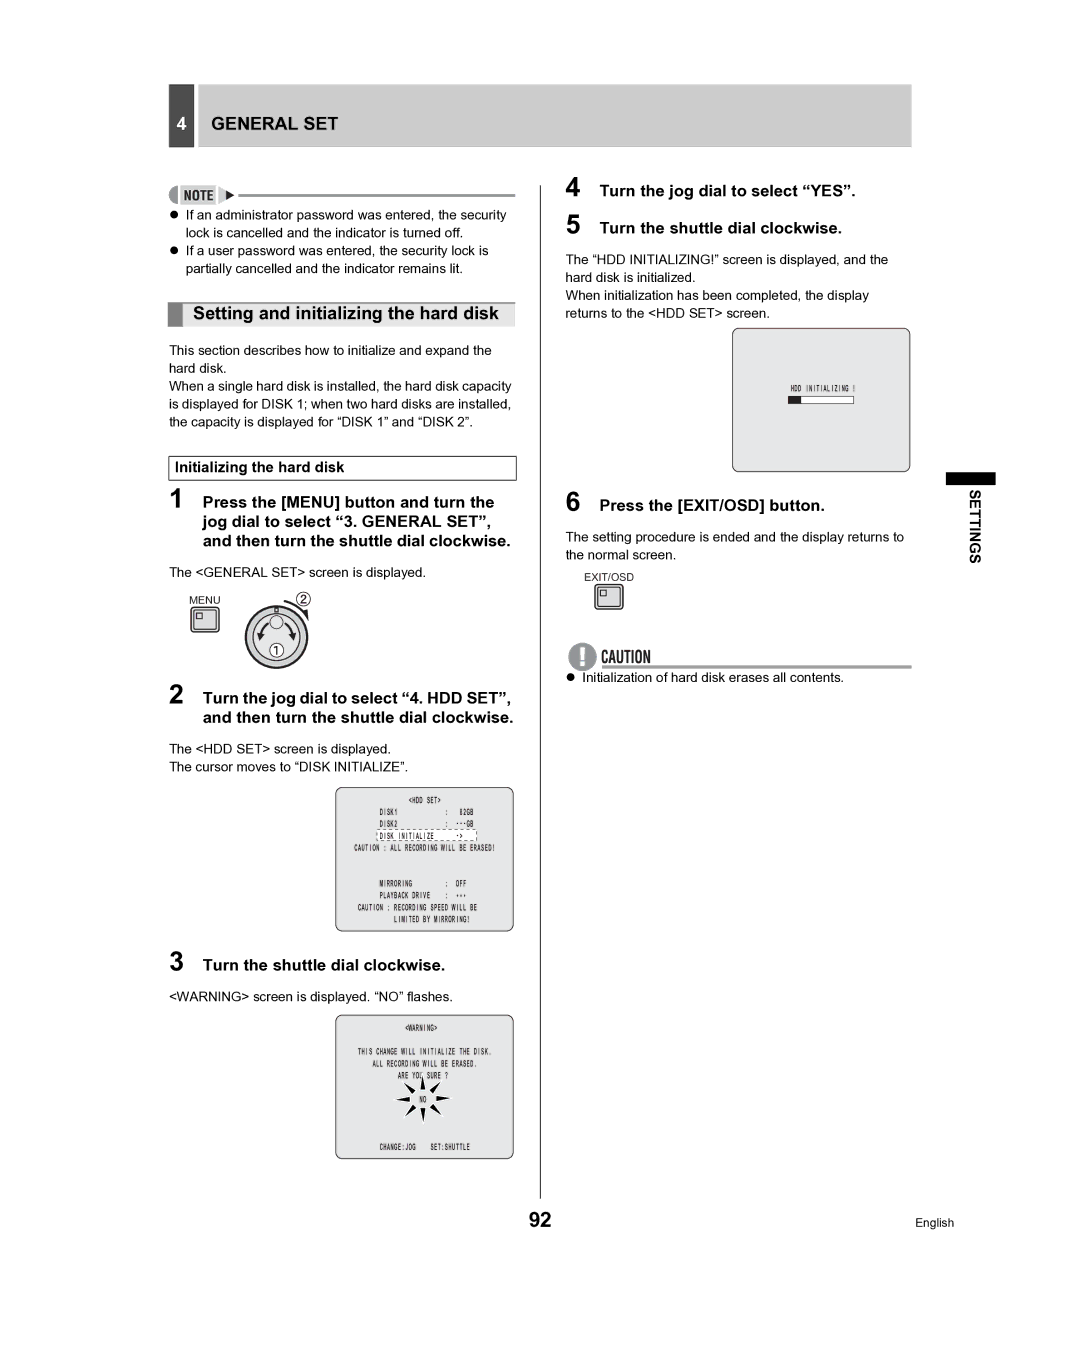
1 Press the [MENU] button and turn the jog dial to select “3. GENERAL SET”, and then turn the shuttle dial clockwise.
The <GENERAL SET> screen is displayed.
MENU
2 Turn the jog dial to select “4. HDD SET”, and then turn the shuttle dial clockwise.
The <HDD SET> screen is displayed.
The cursor moves to “DISK INITIALIZE”.
| <HDD SET> |
|
|
|
| DISK1 | : | 82GB | |
| DISK2 | : | ||
| DISK INITIALIZE |
|
| |
CAUTION : ALL RECORDING WILL BE ERASED! | ||||
| MIRRORING | : | OFF | |
| PLAYBACK DRIVE | : | *** |
|
CAUTION : RECORDING SPEED WILL BE
LIMITED BY MIRRORING!
3 Turn the shuttle dial clockwise.
<WARNING> screen is displayed. “NO” flashes.
<WARNING>
THIS CHANGE WILL INITIALIZE THE DISK.
ALL RECORDING WILL BE ERASED.
ARE YOU![]() SURE ?
SURE ?
NO
CHANGE:JOG SET:SHUTTLE
4 Turn the jog dial to select “YES”.
5 Turn the shuttle dial clockwise.
The “HDD INITIALIZING!” screen is displayed, and the hard disk is initialized.
When initialization has been completed, the display returns to the <HDD SET> screen.
HDD INITIALIZING !
6 Press the [EXIT/OSD] button.
The setting procedure is ended and the display returns to the normal screen.
EXIT/OSD
zInitialization of hard disk erases all contents.
SETTINGS
92 | English |
