| ||
. Side Panel |
| . Before adjustment, be sure to perform |
GAIN switch: | LOW (0 dB) | up. |
OUTPUT/DL/DCC +switch: | CAM/DCC + | . When using the SERVICE menu and FILE menu, refer |
W. BAL switch: | PRESET | to |
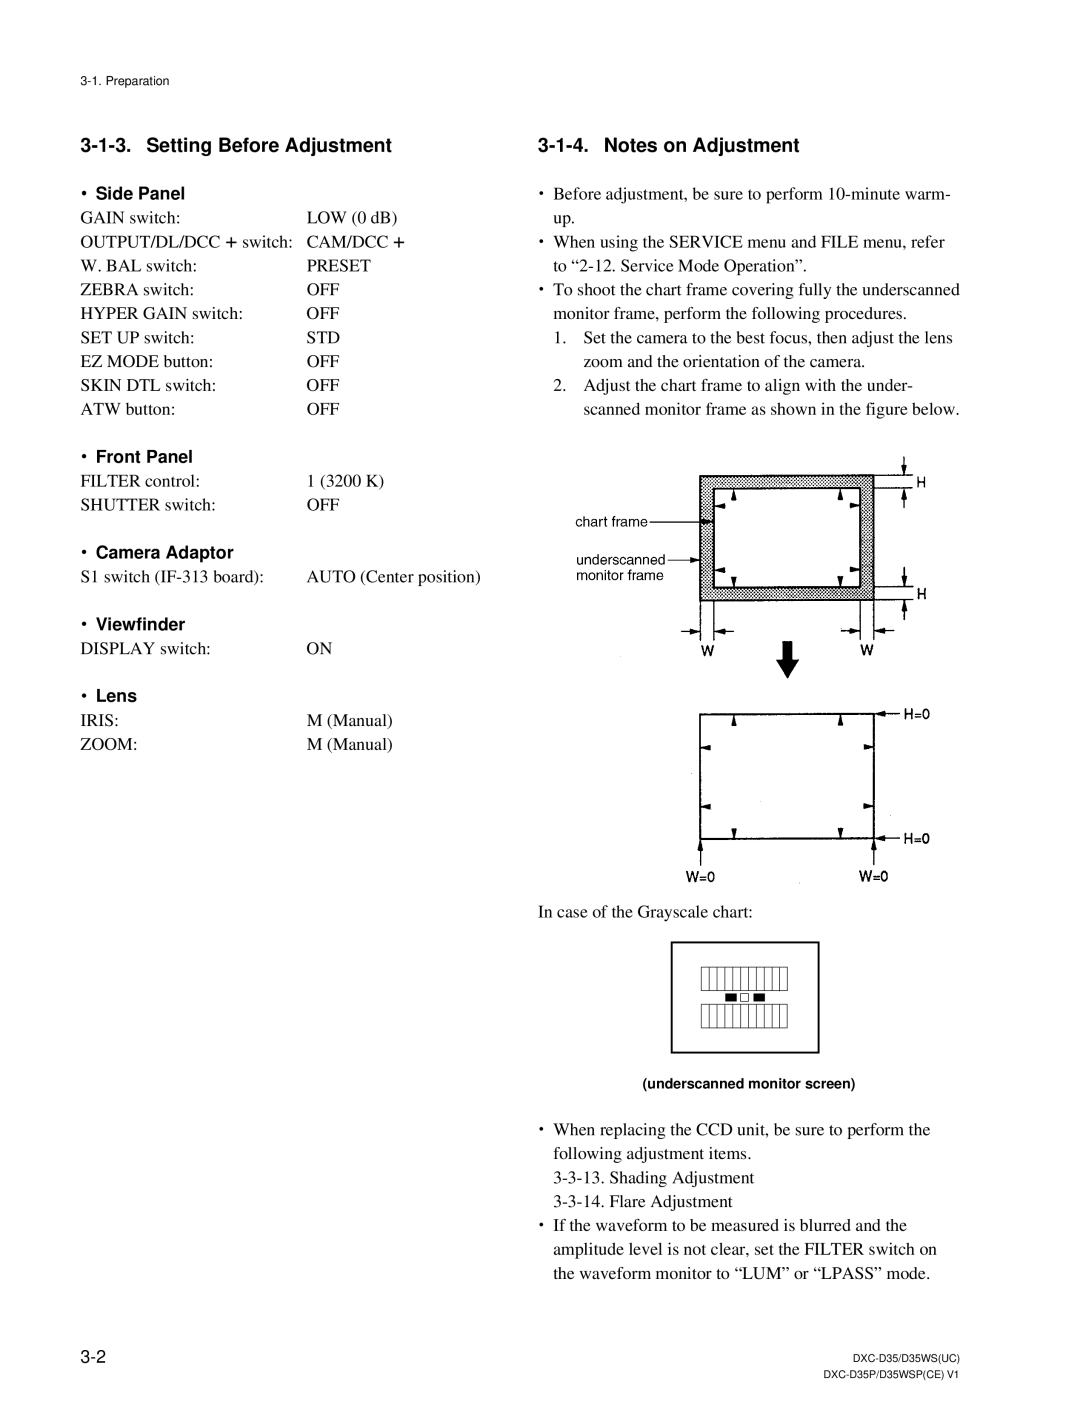
ZEBRA switch: | OFF | . To shoot the chart frame covering fully the underscanned |
HYPER GAIN switch: | OFF | monitor frame, perform the following procedures. |
SET UP switch: | STD | 1. Set the camera to the best focus, then adjust the lens |
EZ MODE button: | OFF | zoom and the orientation of the camera. |
SKIN DTL switch: | OFF | 2. Adjust the chart frame to align with the under- |
ATW button: | OFF | scanned monitor frame as shown in the figure below. |
. Front Panel |
|
|
FILTER control: | 1 (3200 K) |
|
SHUTTER switch: | OFF |
|
. Camera Adaptor |
|
|
S1 switch | AUTO (Center position) |
|
. Viewfinder |
|
|
DISPLAY switch: | ON |
|
. Lens |
|
|
IRIS: | M (Manual) |
|
ZOOM: | M (Manual) |
|
In case of the Grayscale chart:
(underscanned monitor screen)
. When replacing the CCD unit, be sure to perform the following adjustment items.
. If the waveform to be measured is blurred and the amplitude level is not clear, set the FILTER switch on the waveform monitor to “LUM” or “LPASS” mode.