V1 |
|
Setup Files
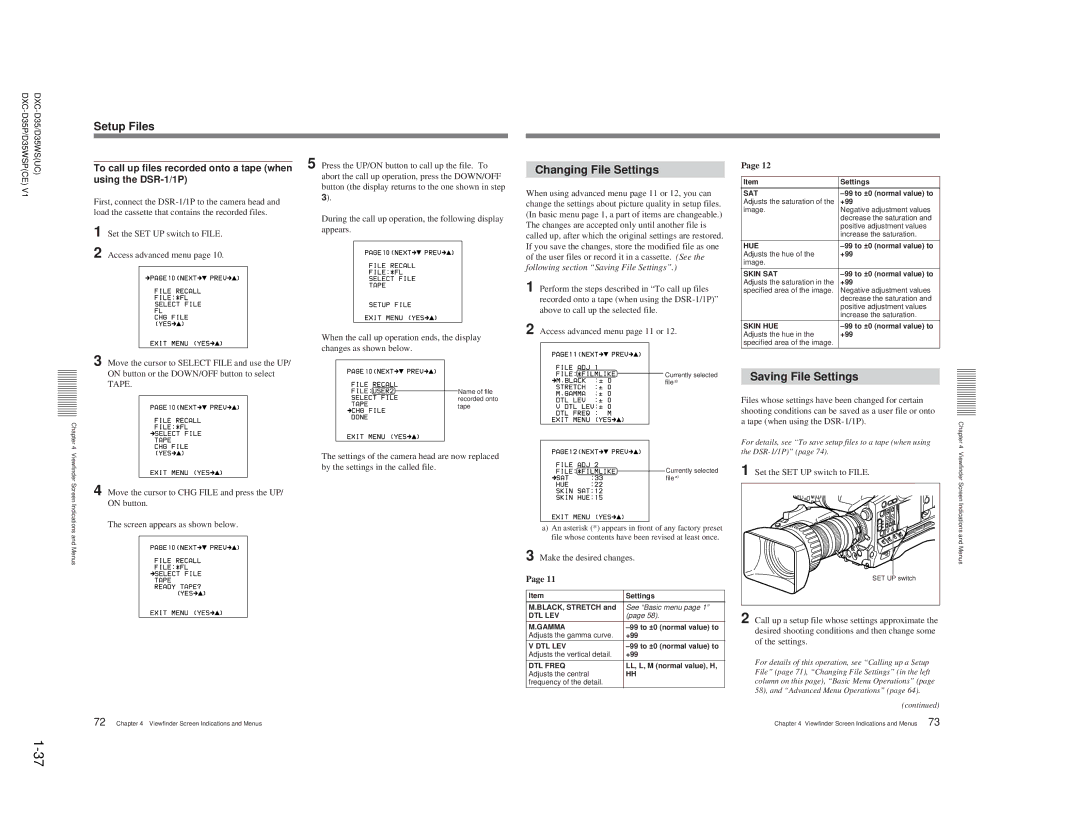
To call up files recorded onto a tape (when | 5 Press the UP/ON button to call up the file. To | |
using the | abort the call up operation, press the DOWN/OFF | |
| button (the display returns to the one shown in step | |
First, connect the | 3). | |
| ||
load the cassette that contains the recorded files. | During the call up operation, the following display | |
1 Set the SET UP switch to FILE. | ||
appears. | ||
| ||
2 Access advanced menu page 10. |
|
When the call up operation ends, the display changes as shown below.
3 Move the cursor to SELECT FILE and use the UP/
ON button or the DOWN/OFF button to select TAPE.
Name of file recorded onto tape
Chapter 4
Changing File Settings
When using advanced menu page 11 or 12, you can change the settings about picture quality in setup files. (In basic menu page 1, a part of items are changeable.) The changes are accepted only until another file is called up, after which the original settings are restored. If you save the changes, store the modified file as one of the user files or record it in a cassette. (See the following section “Saving File Settings”.)
1 Perform the steps described in “To call up files recorded onto a tape (when using the
2 Access advanced menu page 11 or 12.
Currently selected file a)
Page 12
Item | Settings |
SAT | |
Adjusts the saturation of the | +99 |
image. | Negative adjustment values |
| decrease the saturation and |
| positive adjustment values |
| increase the saturation. |
HUE | |
Adjusts the hue of the | +99 |
image. |
|
SKIN SAT | |
Adjusts the saturation in the | +99 |
specified area of the image. | Negative adjustment values |
| decrease the saturation and |
| positive adjustment values |
| increase the saturation. |
SKIN HUE | |
Adjusts the hue in the | +99 |
specified area of the image. |
|
Saving File Settings
Files whose settings have been changed for certain shooting conditions can be saved as a user file or onto a tape (when using the
For details, see “To save setup files to a tape (when using the
Chapter 4
Viewfinder Screen Indications and Menus
4 Move the cursor to CHG FILE and press the UP/ ON button.
The screen appears as shown below.
The settings of the camera head are now replaced by the settings in the called file.
Currently selected file a)
a)An asterisk (*) appears in front of any factory preset file whose contents have been revised at least once.
3 Make the desired changes.
Page 11
Item | Settings |
M.BLACK, STRETCH and | See “Basic menu page 1” |
DTL LEV | (page 58). |
M.GAMMA | |
Adjusts the gamma curve. | +99 |
V DTL LEV | |
Adjusts the vertical detail. | +99 |
DTL FREQ | LL, L, M (normal value), H, |
Adjusts the central | HH |
frequency of the detail. |
|
1 Set the SET UP switch to FILE.
SET UP switch
2 Call up a setup file whose settings approximate the desired shooting conditions and then change some of the settings.
For details of this operation, see “Calling up a Setup File” (page 71), “Changing File Settings” (in the left column on this page), “Basic Menu Operations” (page 58), and “Advanced Menu Operations” (page 64).
(continued)
Viewfinder Screen Indications and Menus
72 Chapter 4 Viewfinder Screen Indications and Menus
Chapter 4 Viewfinder Screen Indications and Menus 73
