V1 |
|
Using Accessories
Using the Viewfinder
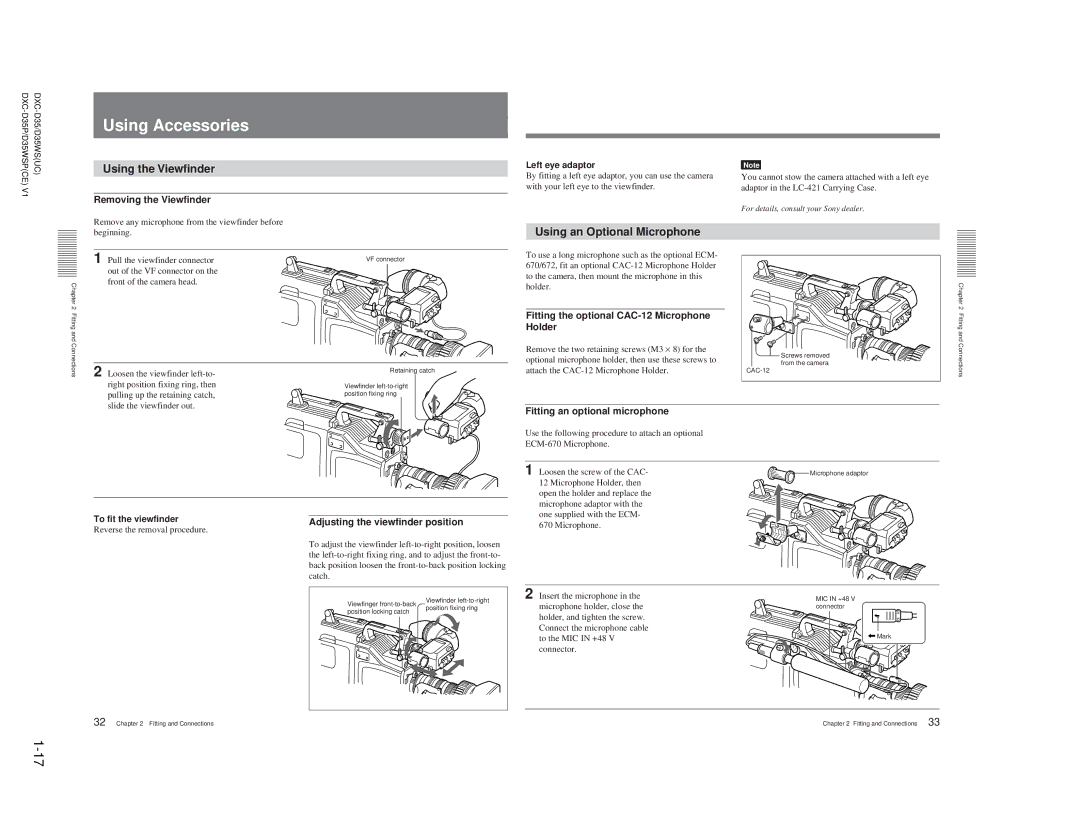
Removing the Viewfinder |
Remove any microphone from the viewfinder before |
Left eye adaptor | Note |
By fitting a left eye adaptor, you can use the camera | You cannot stow the camera attached with a left eye |
with your left eye to the viewfinder. | adaptor in the |
| For details, consult your Sony dealer. |
| beginning. | |
| ||
| 1 | Pull the viewfinder connector |
| ||
| ||
| ||
| ||
| ||
| ||
| ||
| ||
| ||
| ||
| ||
| ||
|
| out of the VF connector on the |
|
| |
|
| |
|
| |
|
| front of the camera head. |
Chapter2 |
|
|
Fitting and Connections | 2 | Loosen the viewfinder |
|
| right position fixing ring, then |
|
| pulling up the retaining catch, |
|
| slide the viewfinder out. |
To fit the viewfinder
Reverse the removal procedure.
VF connector
Retaining catch
Viewfinder
Adjusting the viewfinder position
To adjust the viewfinder
Using an Optional Microphone
To use a long microphone such as the optional ECM- 670/672, fit an optional
Fitting the optional CAC-12 Microphone Holder
Remove the two retaining screws (M3 × 8) for the optional microphone holder, then use these screws to attach the
Fitting an optional microphone
Use the following procedure to attach an optional
1 Loosen the screw of the CAC-
12 Microphone Holder, then open the holder and replace the microphone adaptor with the one supplied with the ECM- 670 Microphone.
|
| Chapter 2 |
|
| Fitting and |
| Screws removed | Connections |
| from the camera |
|
|
|
![]()
![]() Microphone adaptor
Microphone adaptor
Viewfinger
Viewfinder
2 Insert the microphone in the microphone holder, close the
MIC IN +48 V connector
32 | Chapter 2 Fitting and Connections |
position locking catch
position fixing ring
holder, and tighten the screw. Connect the microphone cable to the MIC IN +48 V connector.
![]() Mark
Mark
Chapter 2 Fitting and Connections | 33 |