Setup Files
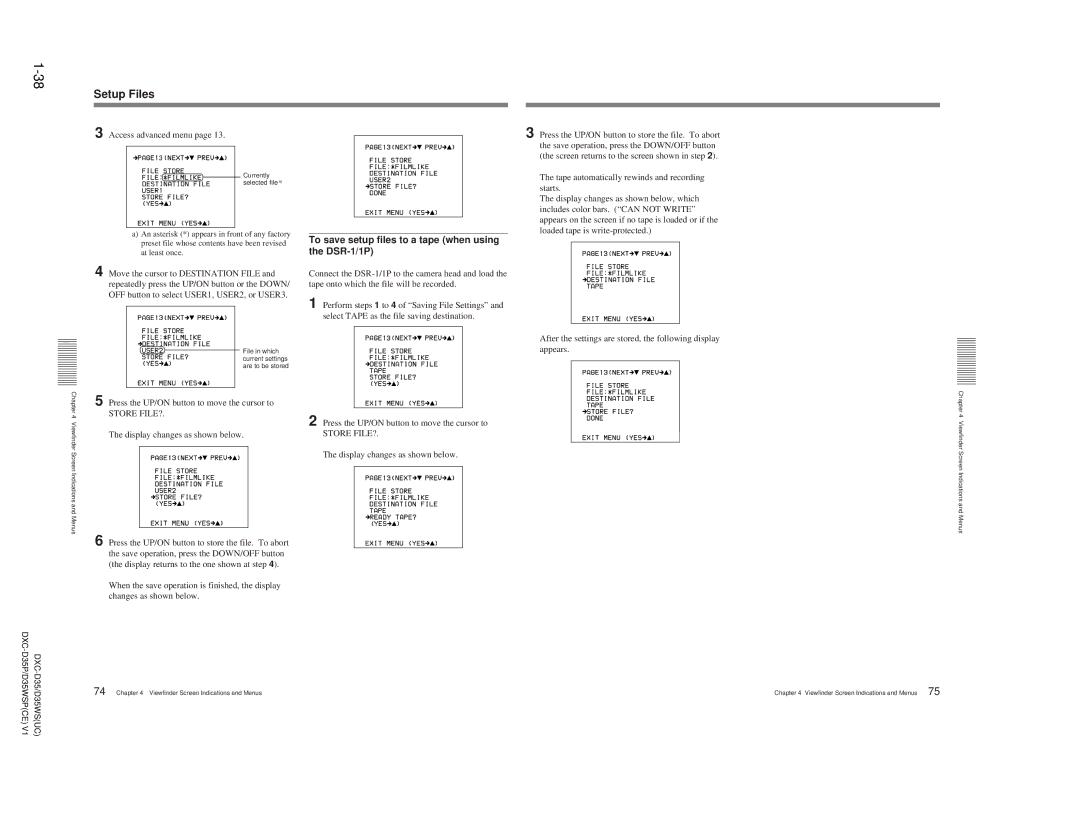
3 Access advanced menu page 13.
Currently selected file a)
a)An asterisk (*) appears in front of any factory preset file whose contents have been revised at least once.
4 Move the cursor to DESTINATION FILE and repeatedly press the UP/ON button or the DOWN/ OFF button to select USER1, USER2, or USER3.
File in which current settings are to be stored
Chapter4 | 5 | STORE FILE?. |
ViewfinderScreenIndicationsandMenus | Press the UP/ON button to move the cursor to | |
| The display changes as shown below. | |
|
|
6 Press the UP/ON button to store the file. To abort the save operation, press the DOWN/OFF button (the display returns to the one shown at step 4).
When the save operation is finished, the display changes as shown below.
To save setup files to a tape (when using the DSR-1/1P)
Connect the
1 Perform steps 1 to 4 of “Saving File Settings” and select TAPE as the file saving destination.
2 Press the UP/ON button to move the cursor to
STORE FILE?.
The display changes as shown below.
3 Press the UP/ON button to store the file. To abort the save operation, press the DOWN/OFF button (the screen returns to the screen shown in step 2).
The tape automatically rewinds and recording starts.
The display changes as shown below, which includes color bars. (“CAN NOT WRITE” appears on the screen if no tape is loaded or if the loaded tape is
After the settings are stored, the following display appears.
Chapter 4 Viewfinder Screen Indications and Menus
DXC- |
| |
D35P/D35WSP(CE)V1 | Chapter 4 Viewfinder Screen Indications and Menus 75 | |
| 74 Chapter 4 Viewfinder Screen Indications and Menus |