153
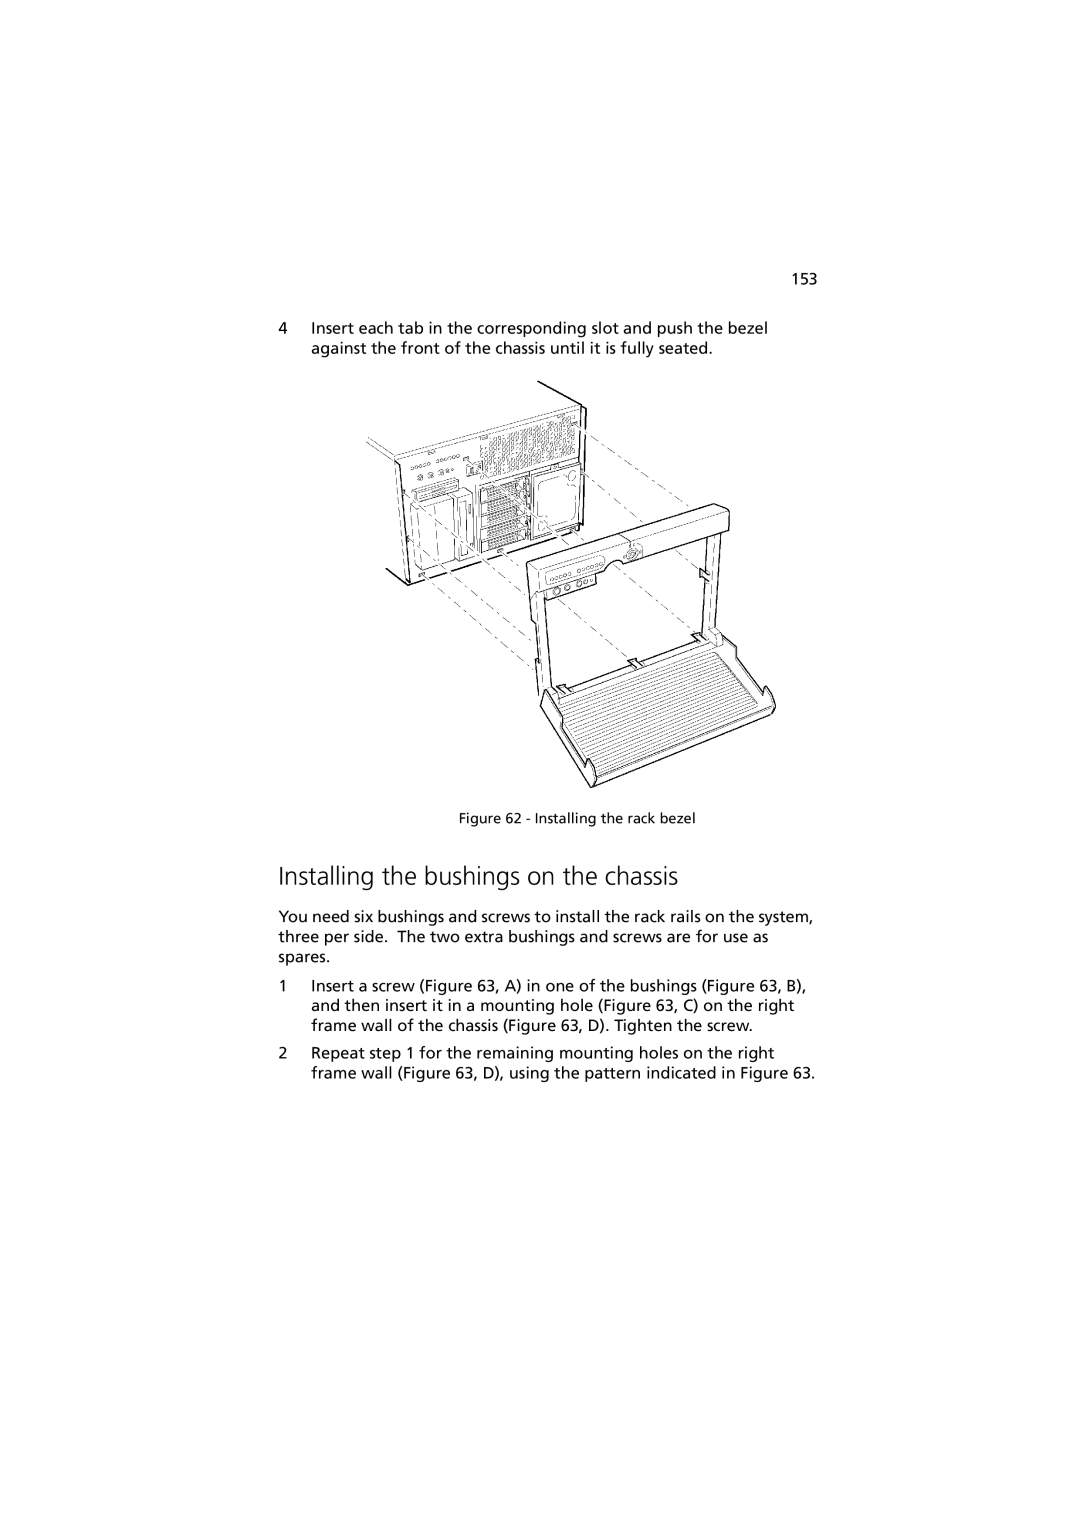
4Insert each tab in the corresponding slot and push the bezel against the front of the chassis until it is fully seated.
Figure 62 - Installing the rack bezel
Installing the bushings on the chassis
You need six bushings and screws to install the rack rails on the system, three per side. The two extra bushings and screws are for use as spares.
1Insert a screw (Figure 63, A) in one of the bushings (Figure 63, B), and then insert it in a mounting hole (Figure 63, C) on the right frame wall of the chassis (Figure 63, D). Tighten the screw.
2Repeat step 1 for the remaining mounting holes on the right frame wall (Figure 63, D), using the pattern indicated in Figure 63.