77
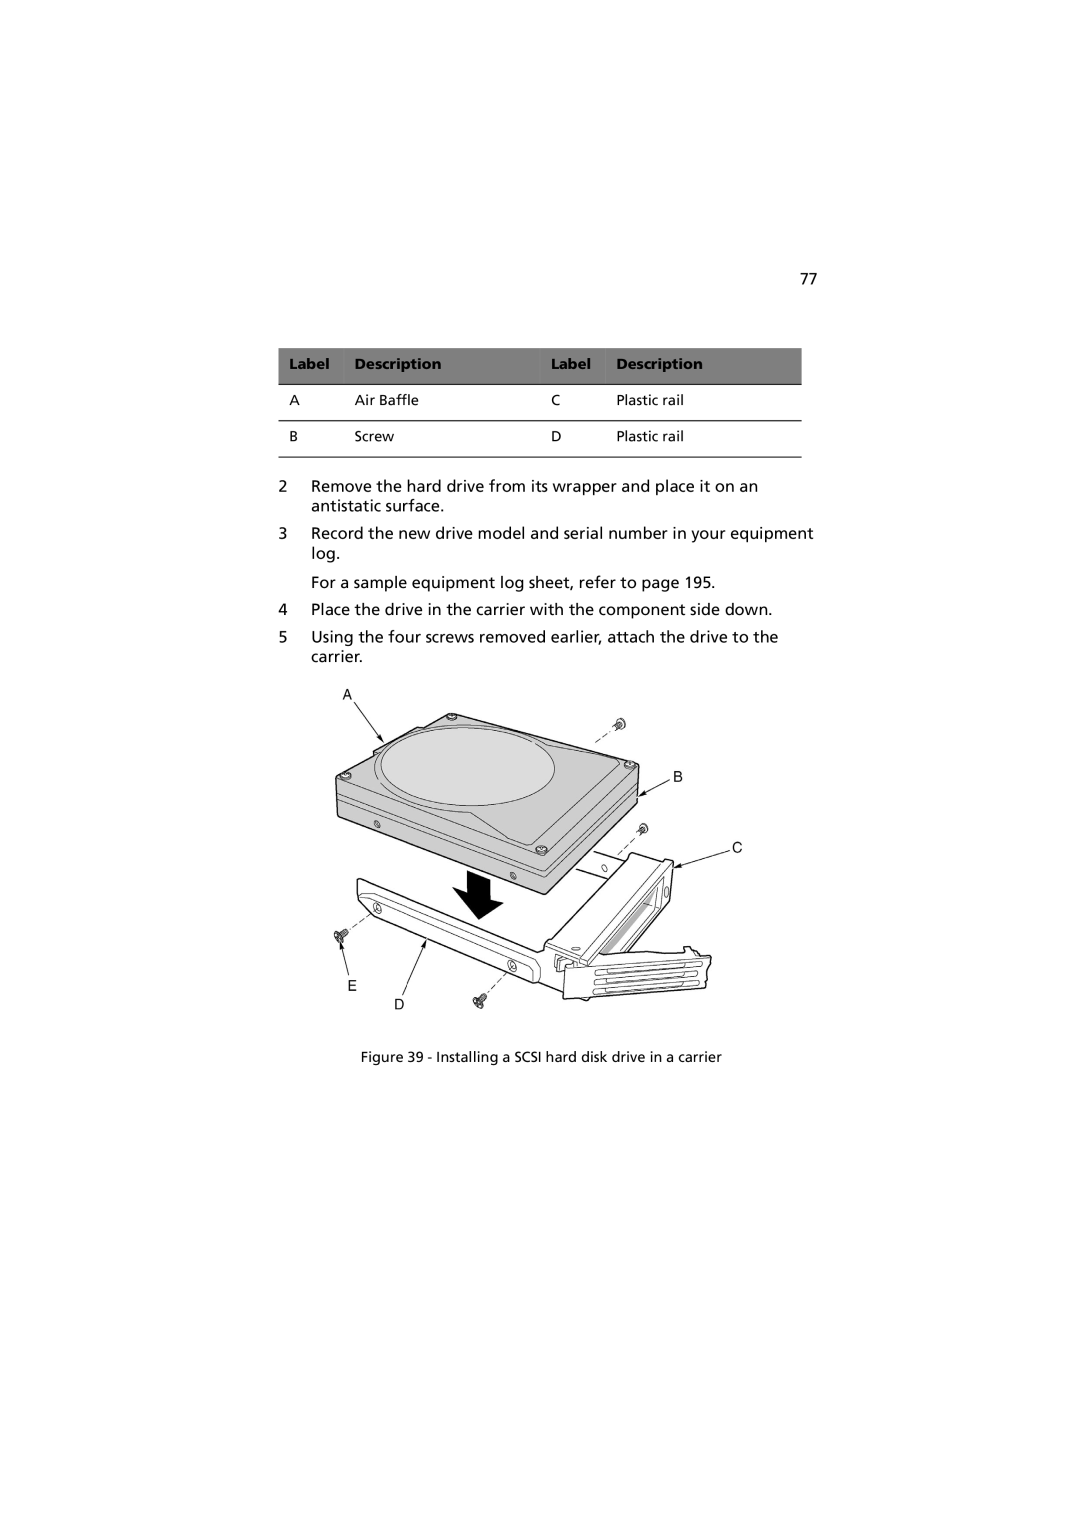
Label | Description | Label | Description |
|
|
|
|
A | Air Baffle | C | Plastic rail |
|
|
|
|
B | Screw | D | Plastic rail |
|
|
|
|
2Remove the hard drive from its wrapper and place it on an antistatic surface.
3Record the new drive model and serial number in your equipment log.
For a sample equipment log sheet, refer to page 195.
4Place the drive in the carrier with the component side down.
5Using the four screws removed earlier, attach the drive to the carrier.