152 | Appendix A: System rack installation |
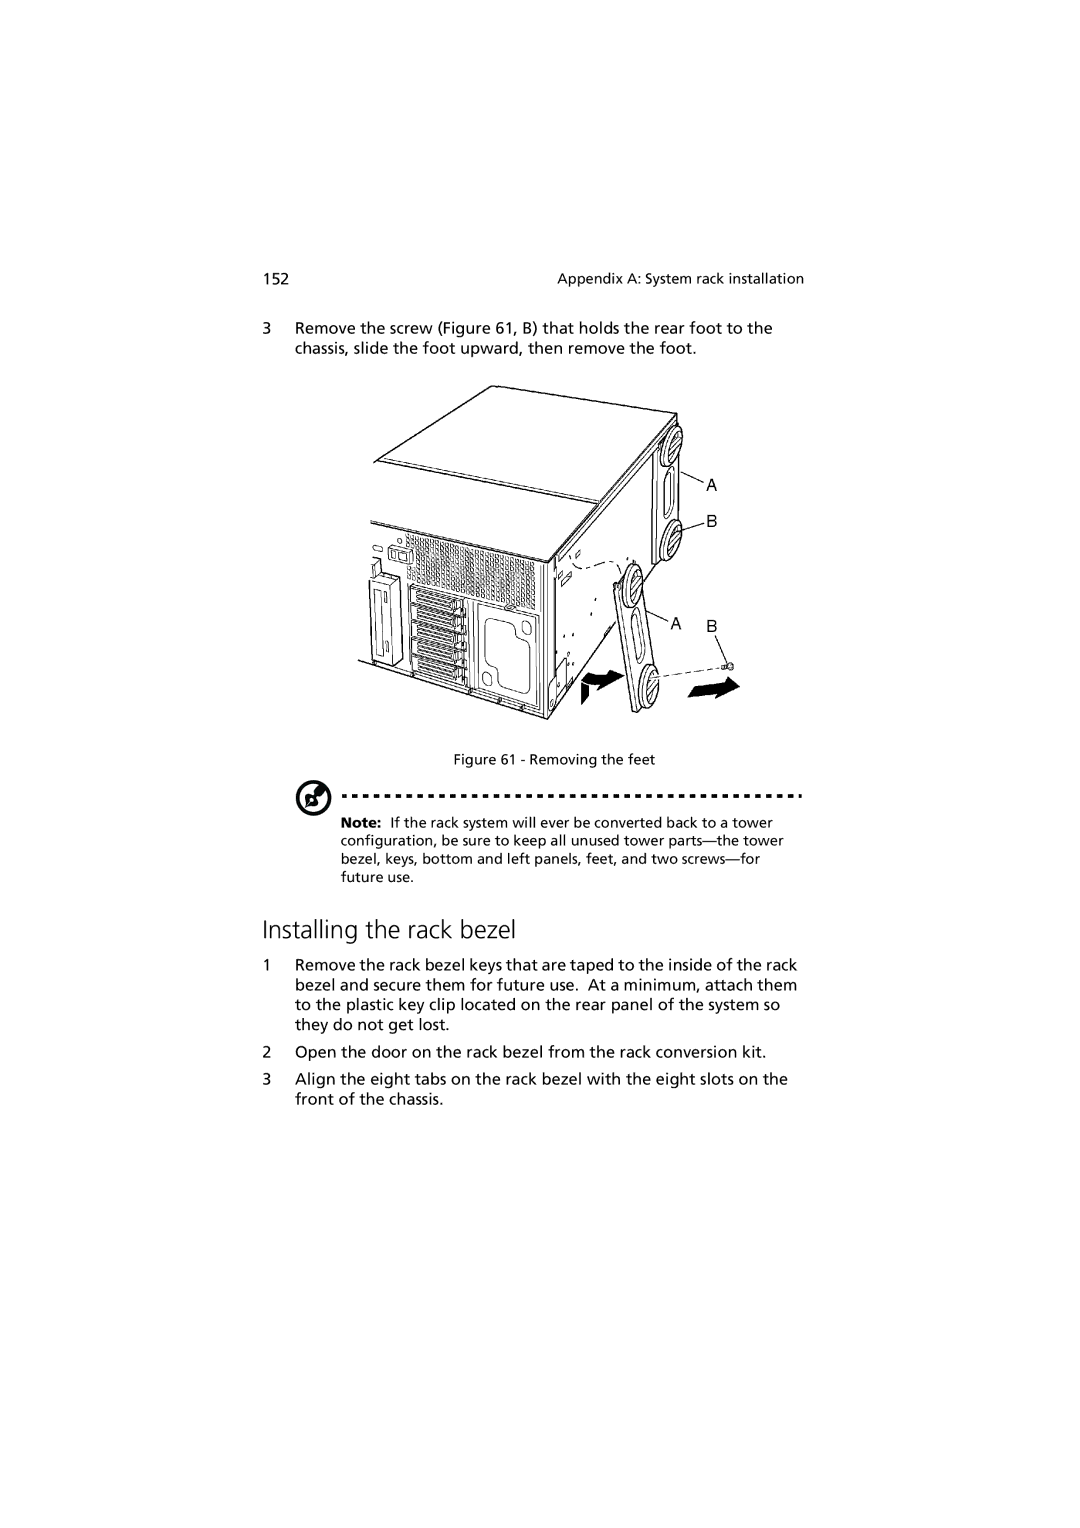
3Remove the screw (Figure 61, B) that holds the rear foot to the chassis, slide the foot upward, then remove the foot.
Figure 61 - Removing the feet
Note: If the rack system will ever be converted back to a tower configuration, be sure to keep all unused tower
Installing the rack bezel
1Remove the rack bezel keys that are taped to the inside of the rack bezel and secure them for future use. At a minimum, attach them to the plastic key clip located on the rear panel of the system so they do not get lost.
2Open the door on the rack bezel from the rack conversion kit.
3Align the eight tabs on the rack bezel with the eight slots on the front of the chassis.