BIOS CONFIGURATION
Controller I/O Port:F3000000h, F2: Select Controller, F10: Reboot System
Areca Technology Corporation RAID Controller
Main Menu
Quick Volume/Raid Setup
Raid Set Function
Volume Set Function
Physical Drives
Raid System Function
Ethernet Configuration
View System Events
Clear Event Buffer
Hardware Monitor
System information
ArrowKey Or AZ:Move Cursor, Enter: Select, ESC: Escape, L:Line Draw, X: Redraw
3.7.2.1 Create Raid Set
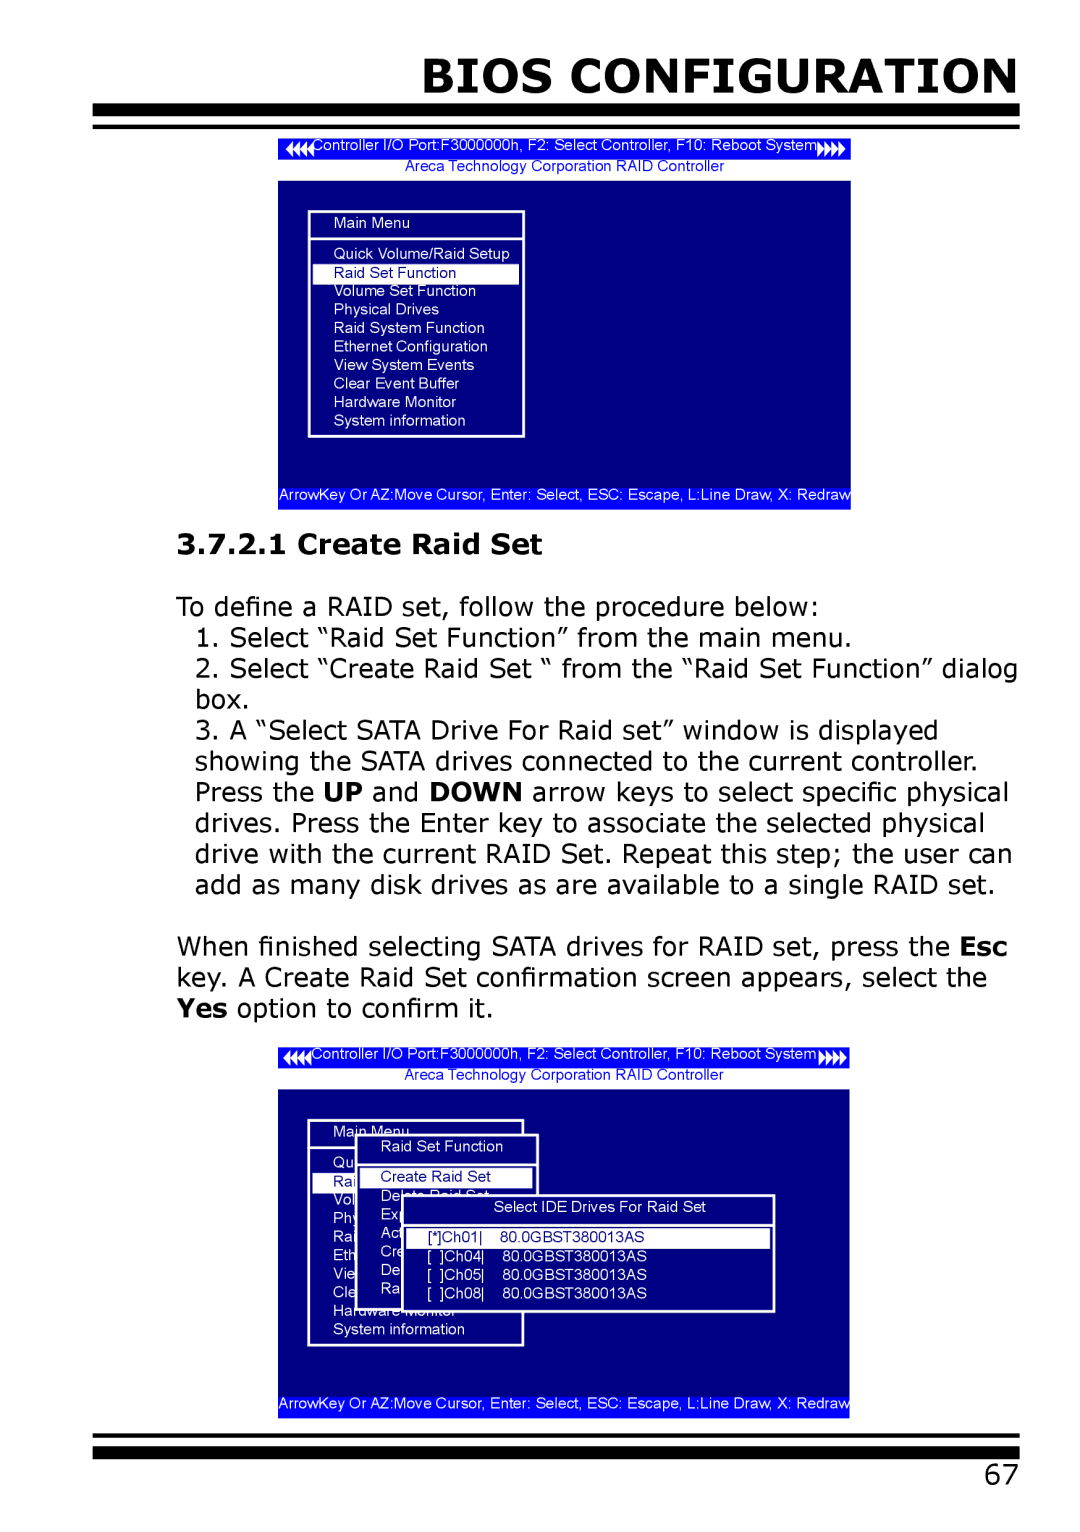
To define a RAID set, follow the procedure below:
1.Select “Raid Set Function” from the main menu.
2.Select “Create Raid Set “ from the “Raid Set Function” dialog box.
3.A “Select SATA Drive For Raid set” window is displayed showing the SATA drives connected to the current controller. Press the UP and DOWN arrow keys to select specific physical drives. Press the Enter key to associate the selected physical drive with the current RAID Set. Repeat this step; the user can add as many disk drives as are available to a single RAID set.
When finished selecting SATA drives for RAID set, press the Esc key. A Create Raid Set confirmation screen appears, select the Yes option to confirm it.
Controller I/O Port:F3000000h, F2: Select Controller, F10: Reboot System
Areca Technology Corporation RAID Controller
Main Menu |
| |
| Raid Set Function | |
Quick Volume/Raid Setup | ||
Raid | Create Raid Set |
|
| Delete Raid Set |
|
Volume Set Function |
| |
| Expand Raid SetSelect IDE Drives For Raid Set | |
Physical Drives |
| |
| Activate | 80.0GBST380013AS |
Raid System [*]Ch01 | ||
| Create Hot Spare | 80.0GBST380013AS |
Ethernet Configuration[ ]Ch04 | ||
| Delete Hot Spare | 80.0GBST380013AS |
View System Events[ ]Ch05 | ||
| Raid Set Information | |
Clear Event Buffer[ ]Ch08 | 80.0GBST380013AS | |
Hardware Monitor |
| |
System information |
| |
ArrowKey Or AZ:Move Cursor, Enter: Select, ESC: Escape, L:Line Draw, X: Redraw
67
