BIOS CONFIGURATION
configure the IP address of the controller, move the cursor bar to the Main menu “Ethernet Configuration Function” item and then press the Enter key. The “Ethernet Configuration” menu appears on the screen. Move the cursor bar to DHCP Function item, then press Enter key to show the DHCP setting. Select the “Disabled’ or ‘Enabled” option to enable or disable the DHCP function. If DHCP is disabled, it will be necessary to manually enter a static IP address that does not conflict with other de- vices on the network.
3.7.6.2 Local IP address
If you intend to set up your client computers manually (no DHCP), make sure that the assigned IP address is in the same range as the default router address and that it is unique to your private network. However, it is highly recommend to use DHCP if that option is available on your network. An IP address alloca- tion scheme will reduce the time it takes to
![]()
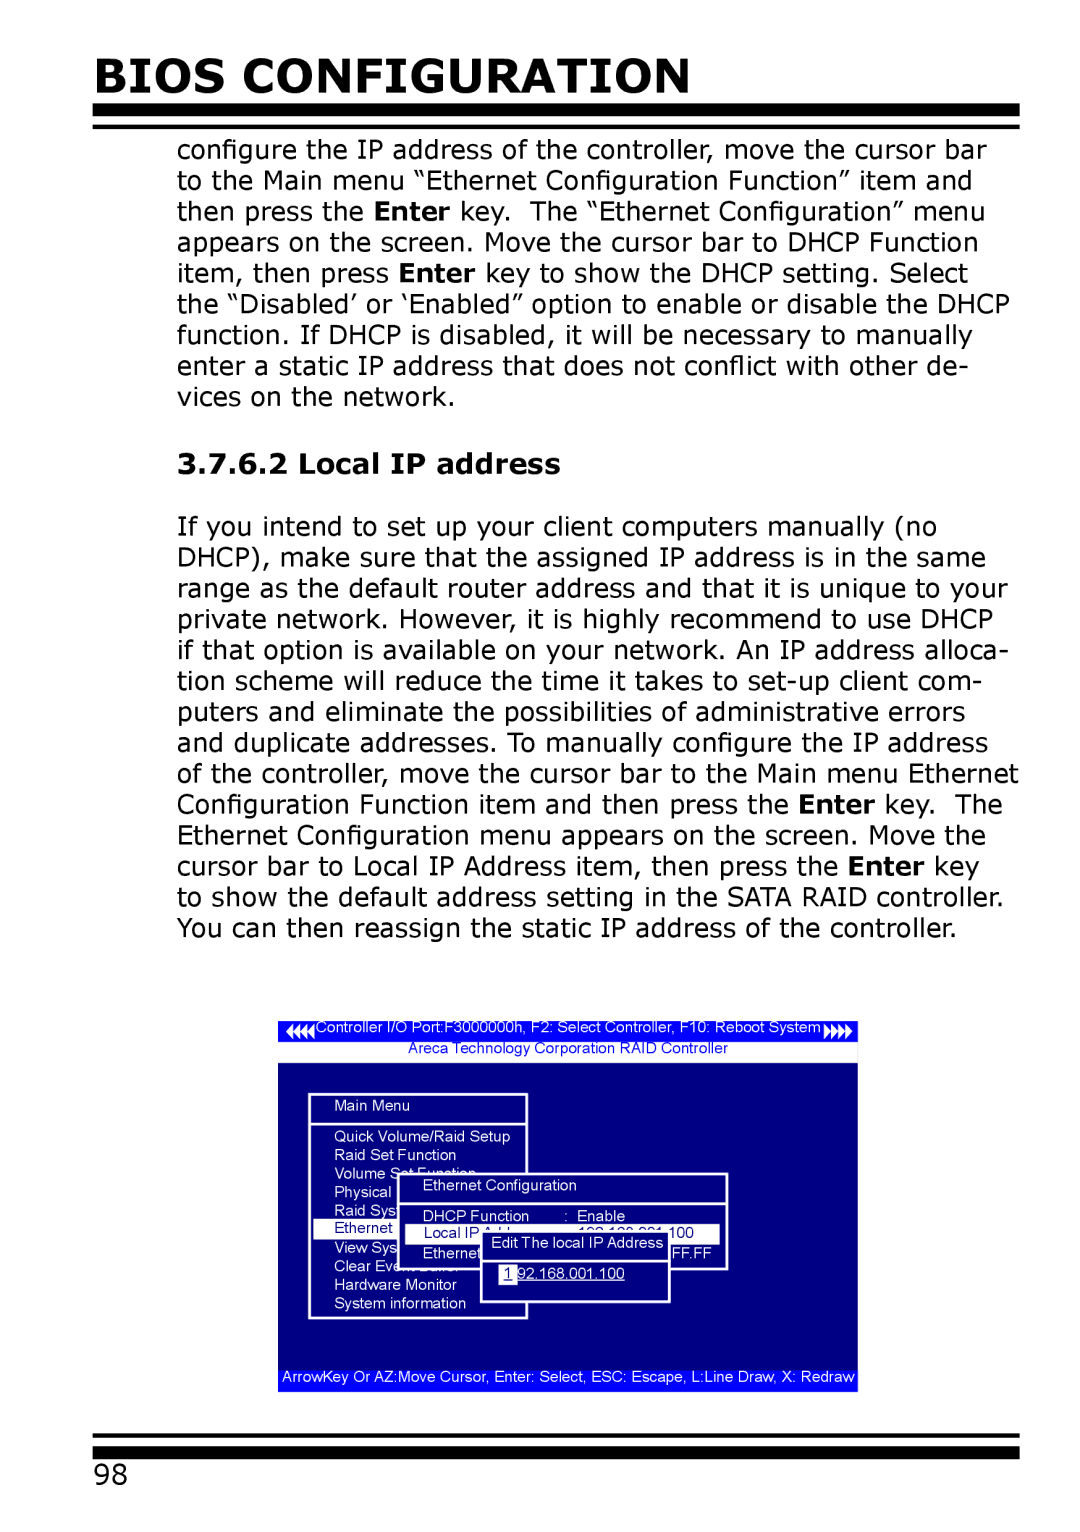
![]() Controller I/O Port:F3000000h, F2: Select Controller, F10: Reboot System
Controller I/O Port:F3000000h, F2: Select Controller, F10: Reboot System ![]()
![]()
Areca Technology Corporation RAID Controller
Main Menu |
|
|
| |
Quick Volume/Raid Setup |
|
| ||
Raid Set Function |
|
|
| |
Volume Set Function |
|
|
| |
Ethernet Configuration | ||||
Physical Drives |
|
|
| |
Raid System Function |
|
| : Enable | |
DHCP Function | ||||
Ethernet Configuration |
|
| : 192.168.001.100 | |
Local IP Address | ||||
View System Events | Edit The local IP Address | |||
Ethernet Address | : 00.04.D9.7F.FF.FF | |||
Clear Event Buffer | 1 | 92.168.001.100 | ||
Hardware Monitor | ||||
|
|
| ||
System information |
|
|
| |
ArrowKey Or AZ:Move Cursor, Enter: Select, ESC: Escape, L:Line Draw, X: Redraw | ||||
98