Chapter 4 Installing and Removing SFCs, RPs, MSCs, PLIMs, and Associated Components
How to Install or Remove a Pillow Block
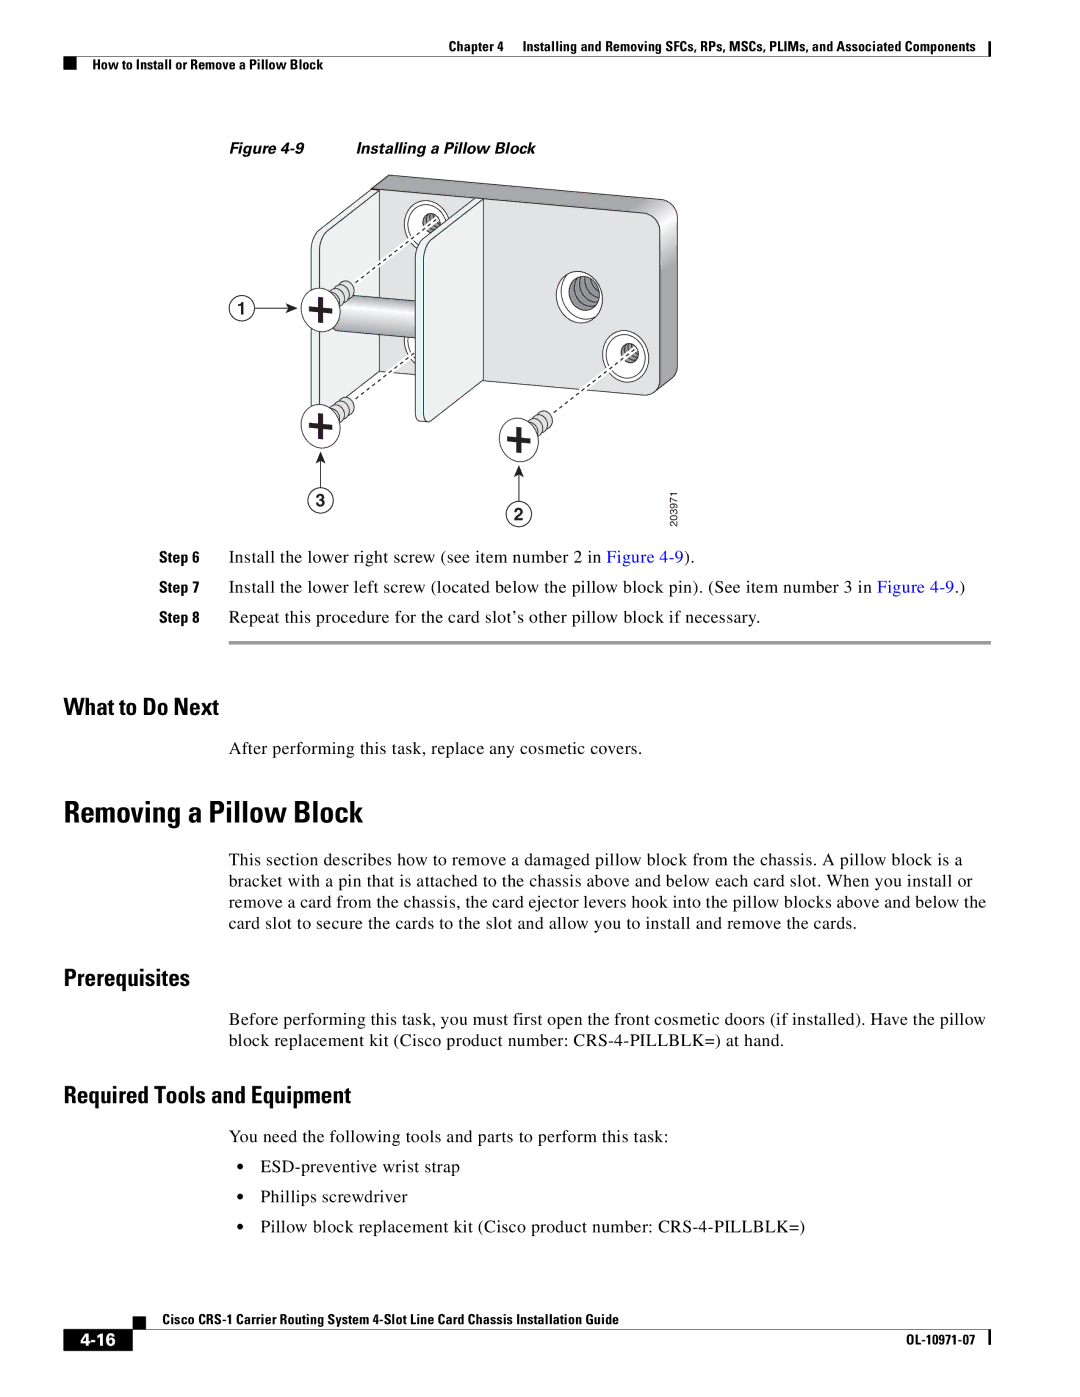
Figure 4-9 Installing a Pillow Block
1
3
2
203971
Step 6 Install the lower right screw (see item number 2 in Figure
Step 7 Install the lower left screw (located below the pillow block pin). (See item number 3 in Figure
Step 8 Repeat this procedure for the card slot’s other pillow block if necessary.
What to Do Next
After performing this task, replace any cosmetic covers.
Removing a Pillow Block
This section describes how to remove a damaged pillow block from the chassis. A pillow block is a bracket with a pin that is attached to the chassis above and below each card slot. When you install or remove a card from the chassis, the card ejector levers hook into the pillow blocks above and below the card slot to secure the cards to the slot and allow you to install and remove the cards.
Prerequisites
Before performing this task, you must first open the front cosmetic doors (if installed). Have the pillow block replacement kit (Cisco product number:
Required Tools and Equipment
You need the following tools and parts to perform this task:
•
•Phillips screwdriver
•Pillow block replacement kit (Cisco product number:
| Cisco |
|