Chapter 4 Installing and Removing SFCs, RPs, MSCs, PLIMs, and Associated Components
How to Install or Remove a Switch Fabric Card
Steps
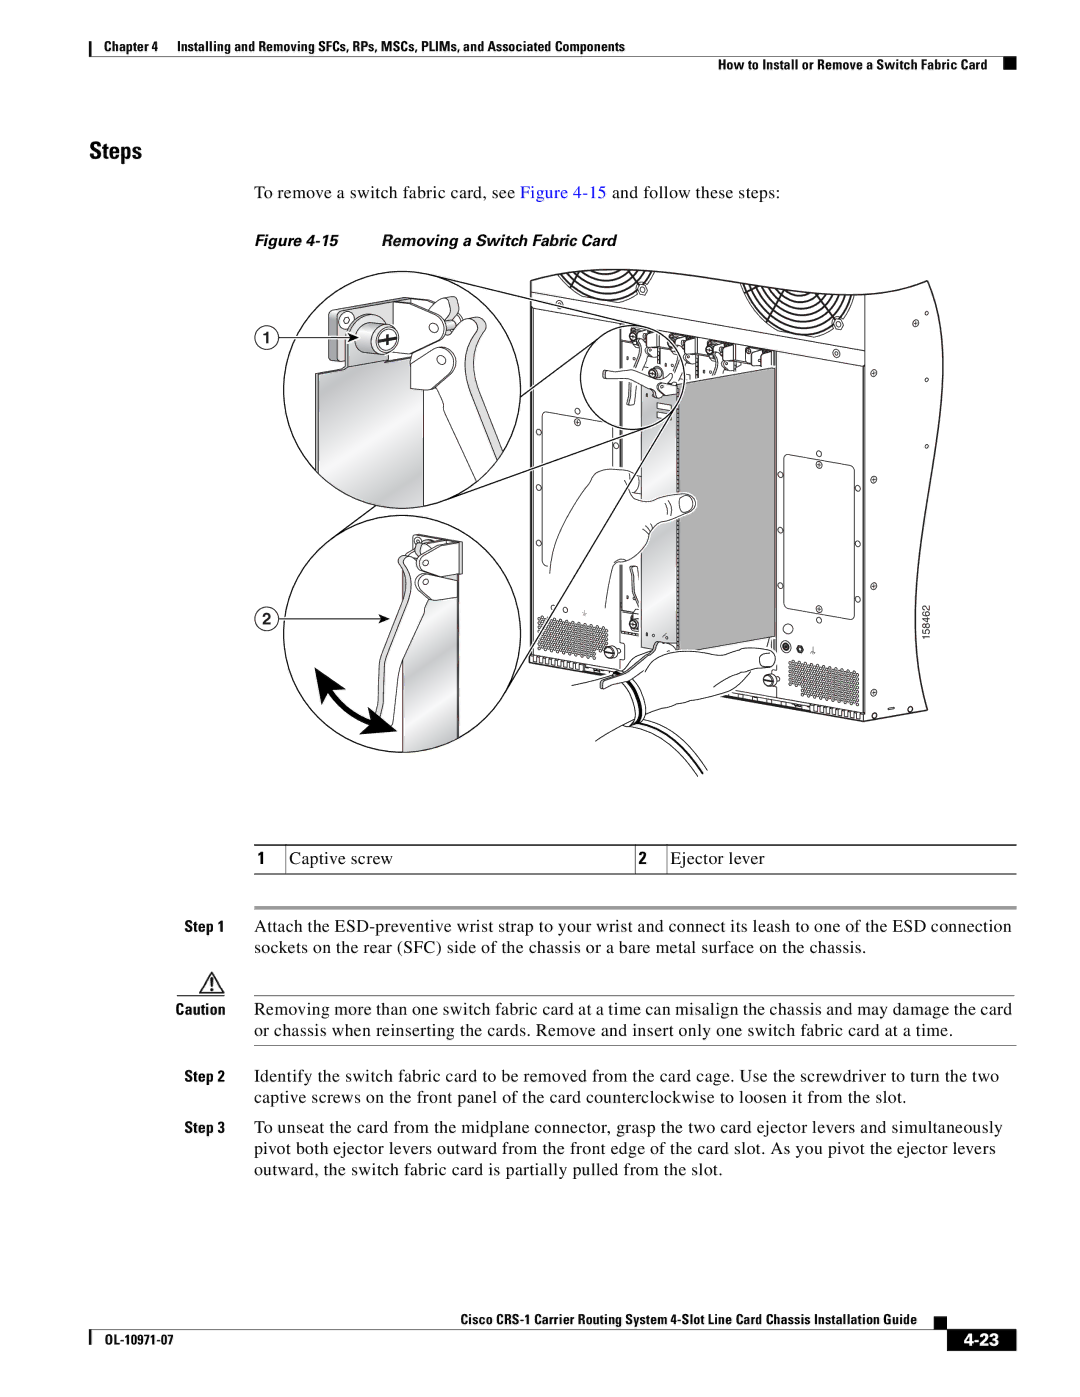
To remove a switch fabric card, see Figure
Figure 4-15 Removing a Switch Fabric Card
1
2
158462
1
Captive screw
2
Ejector lever
Step 1 Attach the
Caution Removing more than one switch fabric card at a time can misalign the chassis and may damage the card or chassis when reinserting the cards. Remove and insert only one switch fabric card at a time.
Step 2 Identify the switch fabric card to be removed from the card cage. Use the screwdriver to turn the two captive screws on the front panel of the card counterclockwise to loosen it from the slot.
Step 3 To unseat the card from the midplane connector, grasp the two card ejector levers and simultaneously pivot both ejector levers outward from the front edge of the card slot. As you pivot the ejector levers outward, the switch fabric card is partially pulled from the slot.
|
| Cisco |
|
| |
|
|
| |||
|
|
|
| ||
|
|
|
| ||