Chapter 2 Installing and Removing Power Components
Removing a Power Supply
Steps
To remove a power supply, follow these steps:
Step 1 Attach the
Step 2 To unseat the power supply from the power shelf connector, unlatch the power supply’s door grille latch and open it completely.
Note The power supply fans may continue to turn at high speed for a few seconds after they are unseated from the power shelf.
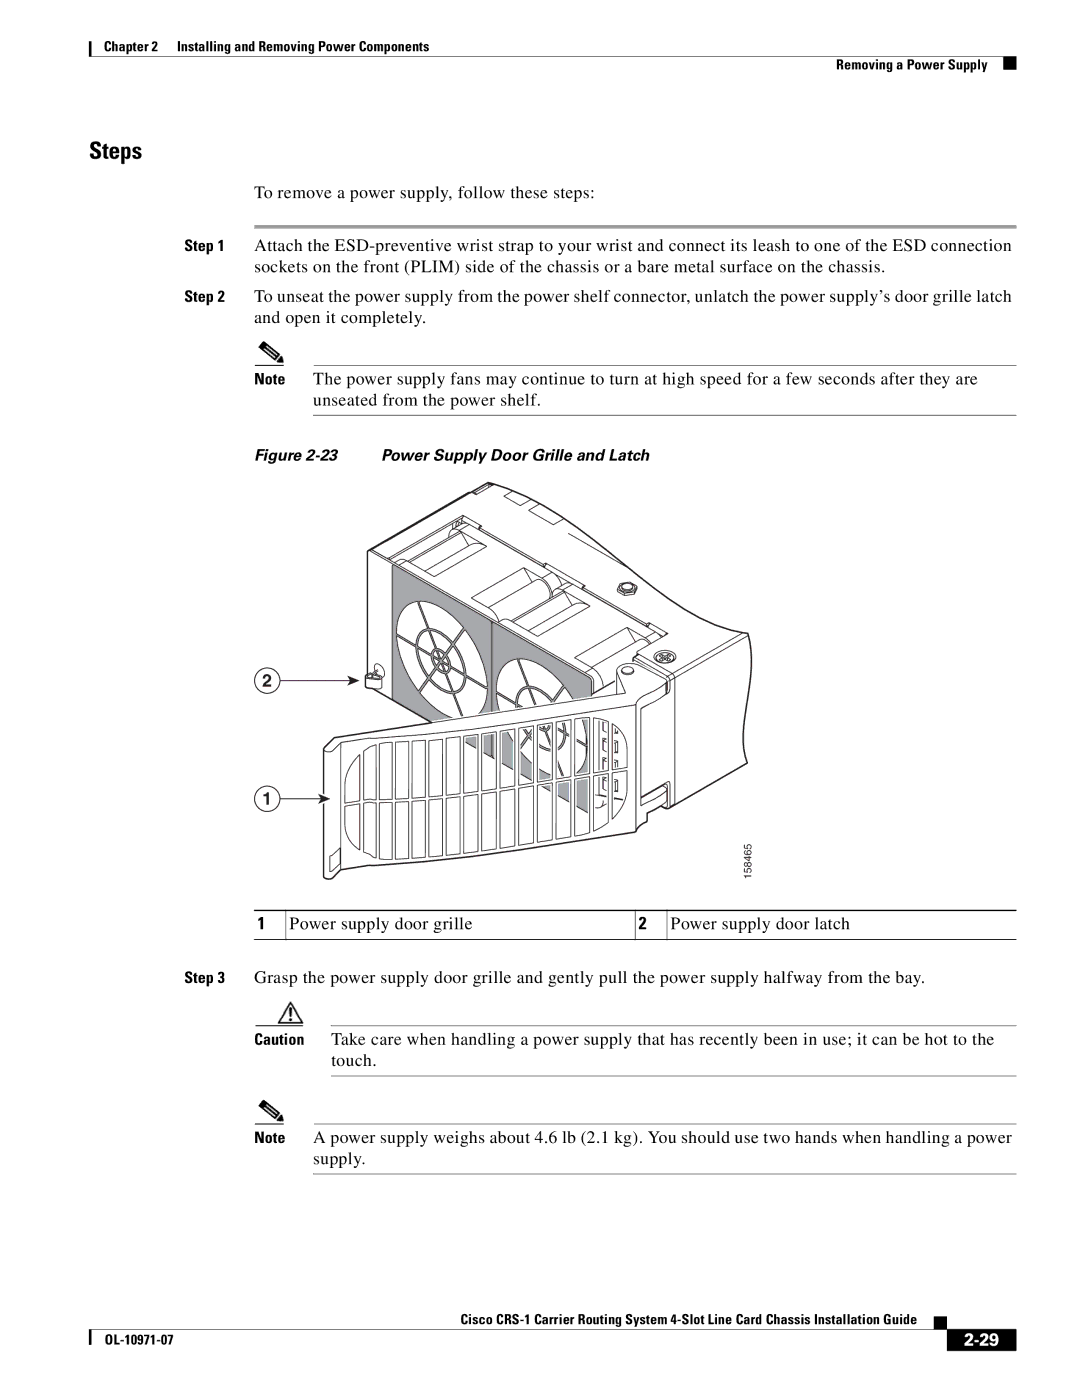
Figure 2-23 Power Supply Door Grille and Latch
2
1
158465
1
Power supply door grille
2
Power supply door latch
Step 3 Grasp the power supply door grille and gently pull the power supply halfway from the bay.
Caution Take care when handling a power supply that has recently been in use; it can be hot to the touch.
Note A power supply weighs about 4.6 lb (2.1 kg). You should use two hands when handling a power supply.
|
| Cisco |
|
| |
|
|
| |||
|
|
|
| ||
|
|
|
| ||