Chapter 3 Installing and Removing Air Circulation Components
How to Install or Remove Air Circulation Components
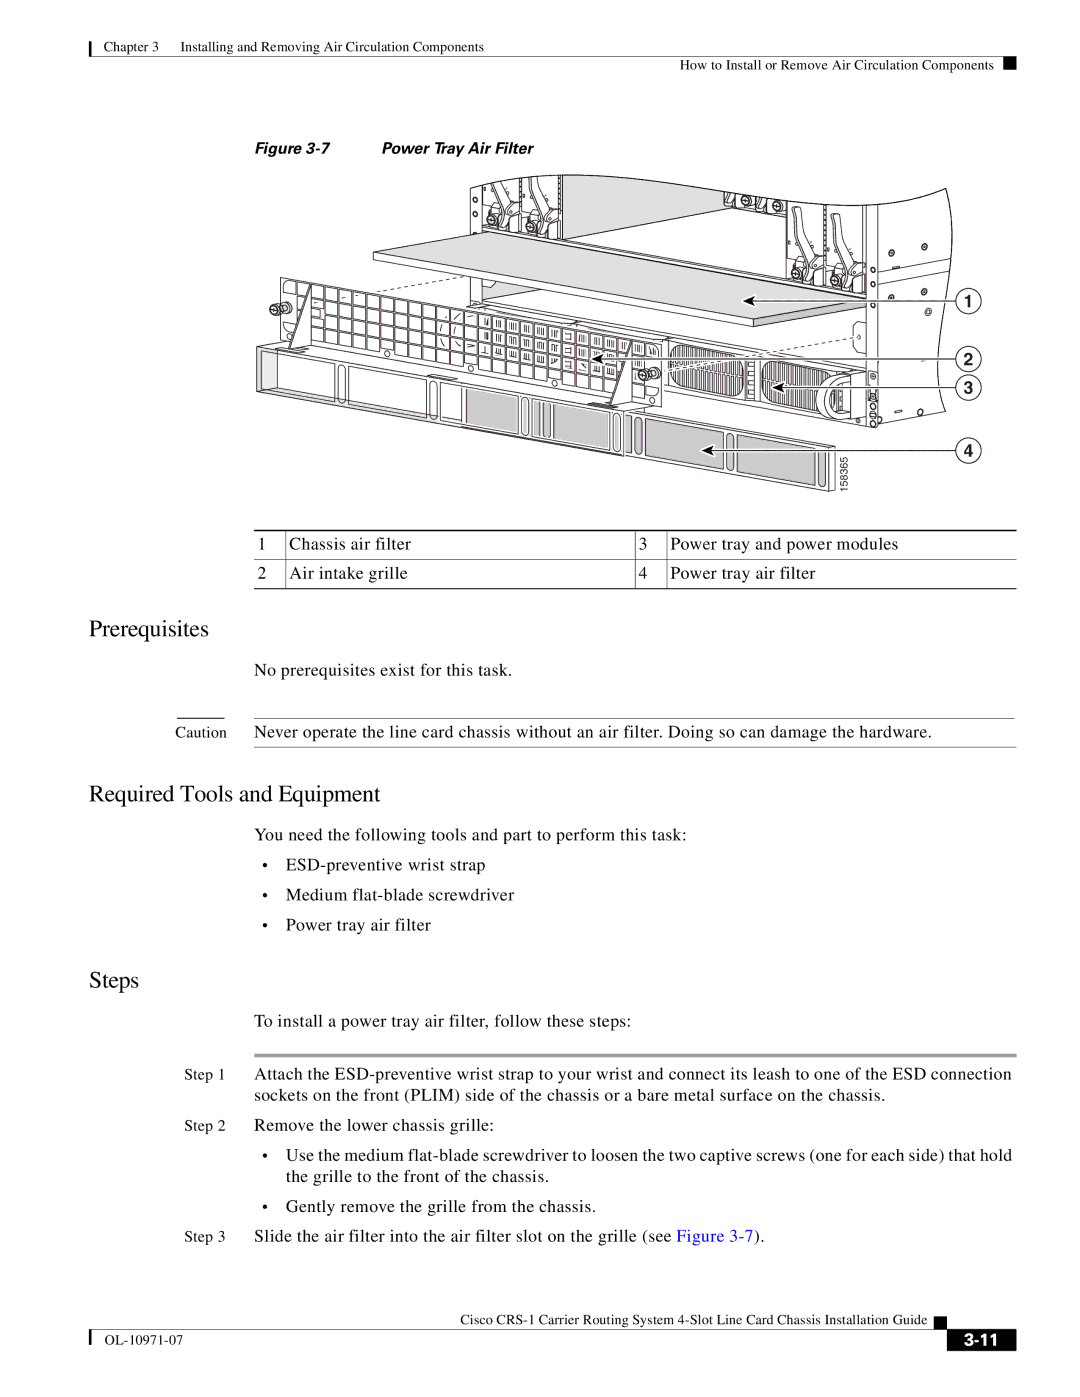
Figure 3-7 Power Tray Air Filter
 158365
1
2
3
4
1 | Chassis air filter | 3 | Power tray and power modules |
|
|
|
|
2 | Air intake grille | 4 | Power tray air filter |
|
|
|
|
Prerequisites
No prerequisites exist for this task.
Caution Never operate the line card chassis without an air filter. Doing so can damage the hardware.
Required Tools and Equipment
You need the following tools and part to perform this task:
•
•Medium
•Power tray air filter
Steps
To install a power tray air filter, follow these steps:
Step 1 Attach the
Step 2 Remove the lower chassis grille:
•Use the medium
•Gently remove the grille from the chassis.
Step 3 Slide the air filter into the air filter slot on the grille (see Figure
|
| Cisco |
|
| |
|
|
| |||
|
|
|
| ||
|
|
|
| ||