Chapter 5 Installing and Removing the Doors and Grille
Removing the Inlet Grille
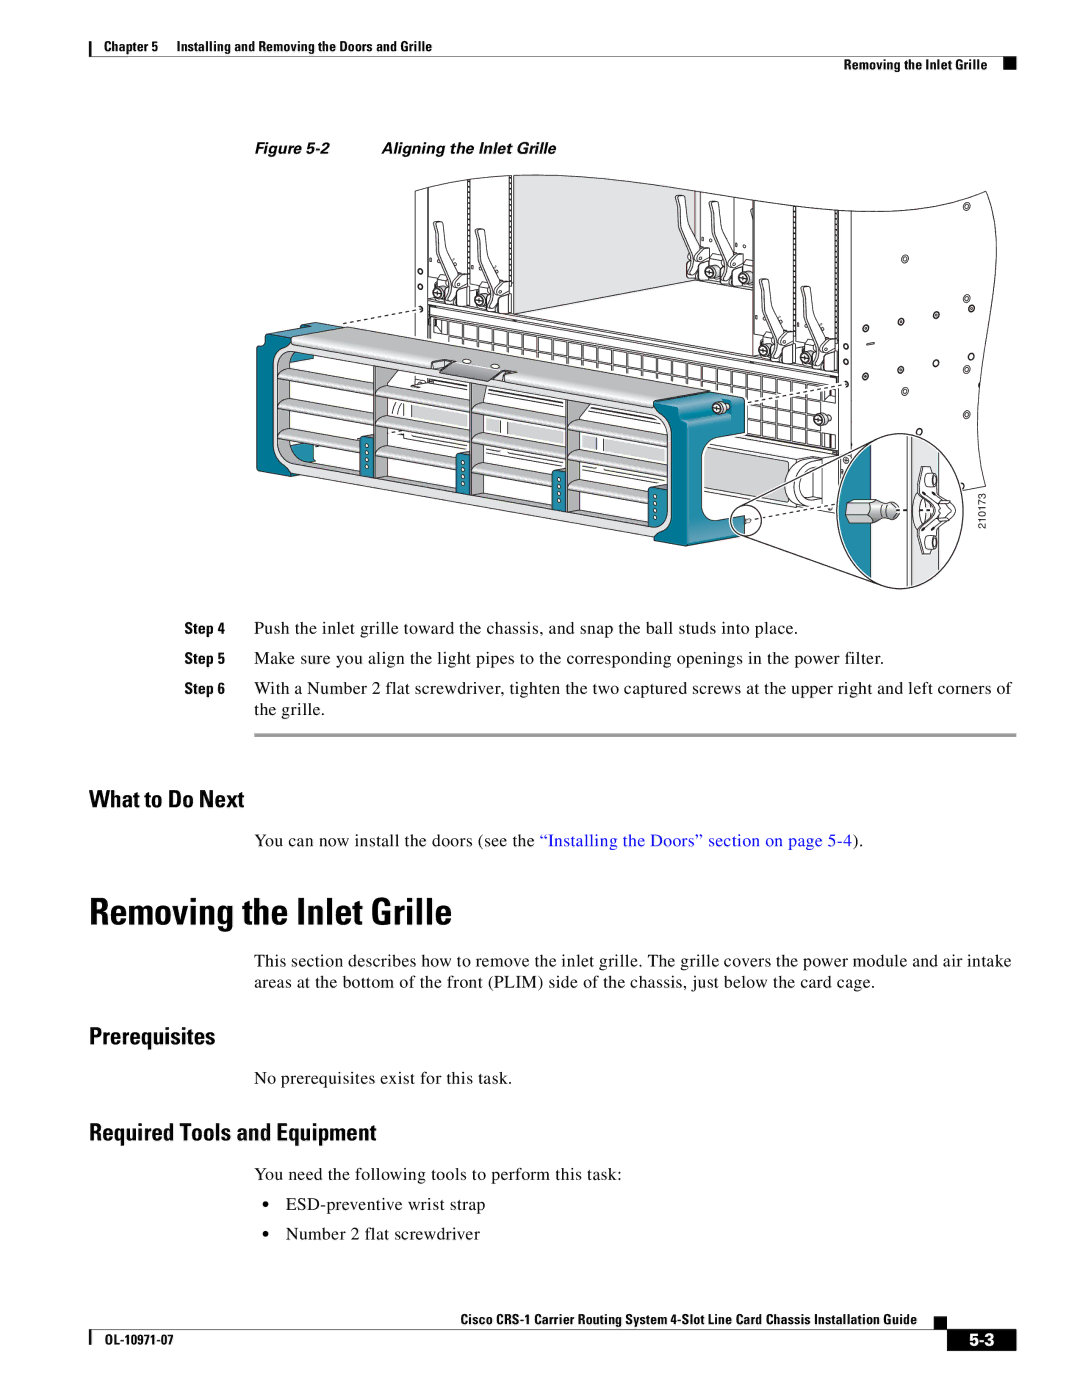
Figure 5-2 Aligning the Inlet Grille
210173
Step 4 Push the inlet grille toward the chassis, and snap the ball studs into place.
Step 5 Make sure you align the light pipes to the corresponding openings in the power filter.
Step 6 With a Number 2 flat screwdriver, tighten the two captured screws at the upper right and left corners of the grille.
What to Do Next
You can now install the doors (see the “Installing the Doors” section on page
Removing the Inlet Grille
This section describes how to remove the inlet grille. The grille covers the power module and air intake areas at the bottom of the front (PLIM) side of the chassis, just below the card cage.
Prerequisites
No prerequisites exist for this task.
Required Tools and Equipment
You need the following tools to perform this task:
•
•Number 2 flat screwdriver
Cisco
|
| ||
|
|