Chapter 2 Installing and Removing Power Components
Installing a DC Power Shelf
Step 6 Reinsert the No. 2 Phillips screws taken from the rear power access panels into their respective holes: one on each side, three in front, and one underneath the chassis.
Installing the DC Power Input Shelf
Caution The DC power input shelf can only be inserted into the chassis when all power is removed from the chassis.
Step 7 Go to the front of the chassis. To install the DC power input shelf, follow these steps:
a.To prepare the chassis for installing the DC power input shelf, remove the inlet grille from the bottom of the chassis (for the procedure, see the “Removing the Inlet Grille” section on page
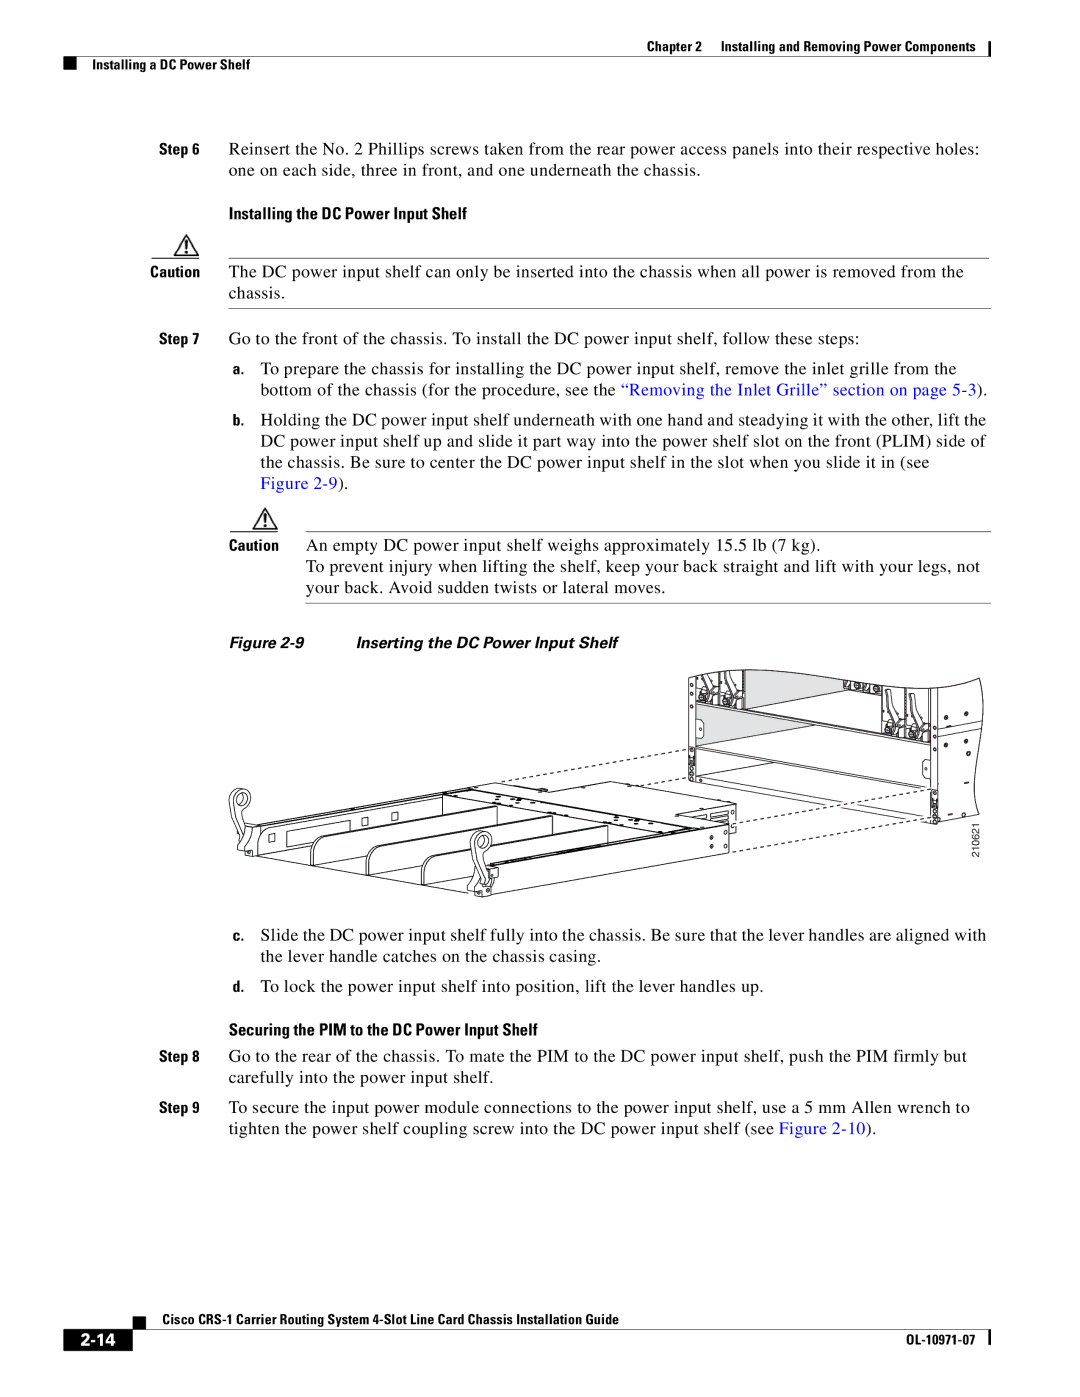
b.Holding the DC power input shelf underneath with one hand and steadying it with the other, lift the DC power input shelf up and slide it part way into the power shelf slot on the front (PLIM) side of the chassis. Be sure to center the DC power input shelf in the slot when you slide it in (see Figure
Caution An empty DC power input shelf weighs approximately 15.5 lb (7 kg).
To prevent injury when lifting the shelf, keep your back straight and lift with your legs, not your back. Avoid sudden twists or lateral moves.
Figure 2-9 Inserting the DC Power Input Shelf
210621
c.Slide the DC power input shelf fully into the chassis. Be sure that the lever handles are aligned with the lever handle catches on the chassis casing.
d.To lock the power input shelf into position, lift the lever handles up.
Securing the PIM to the DC Power Input Shelf
Step 8 Go to the rear of the chassis. To mate the PIM to the DC power input shelf, push the PIM firmly but carefully into the power input shelf.
Step 9 To secure the input power module connections to the power input shelf, use a 5 mm Allen wrench to tighten the power shelf coupling screw into the DC power input shelf (see Figure
| Cisco |
