Customer Installation
Setting Up the Display Station
1)Place the Display element on top of the Logic element and place both within connecting distance of an appropriate AC power outlet.
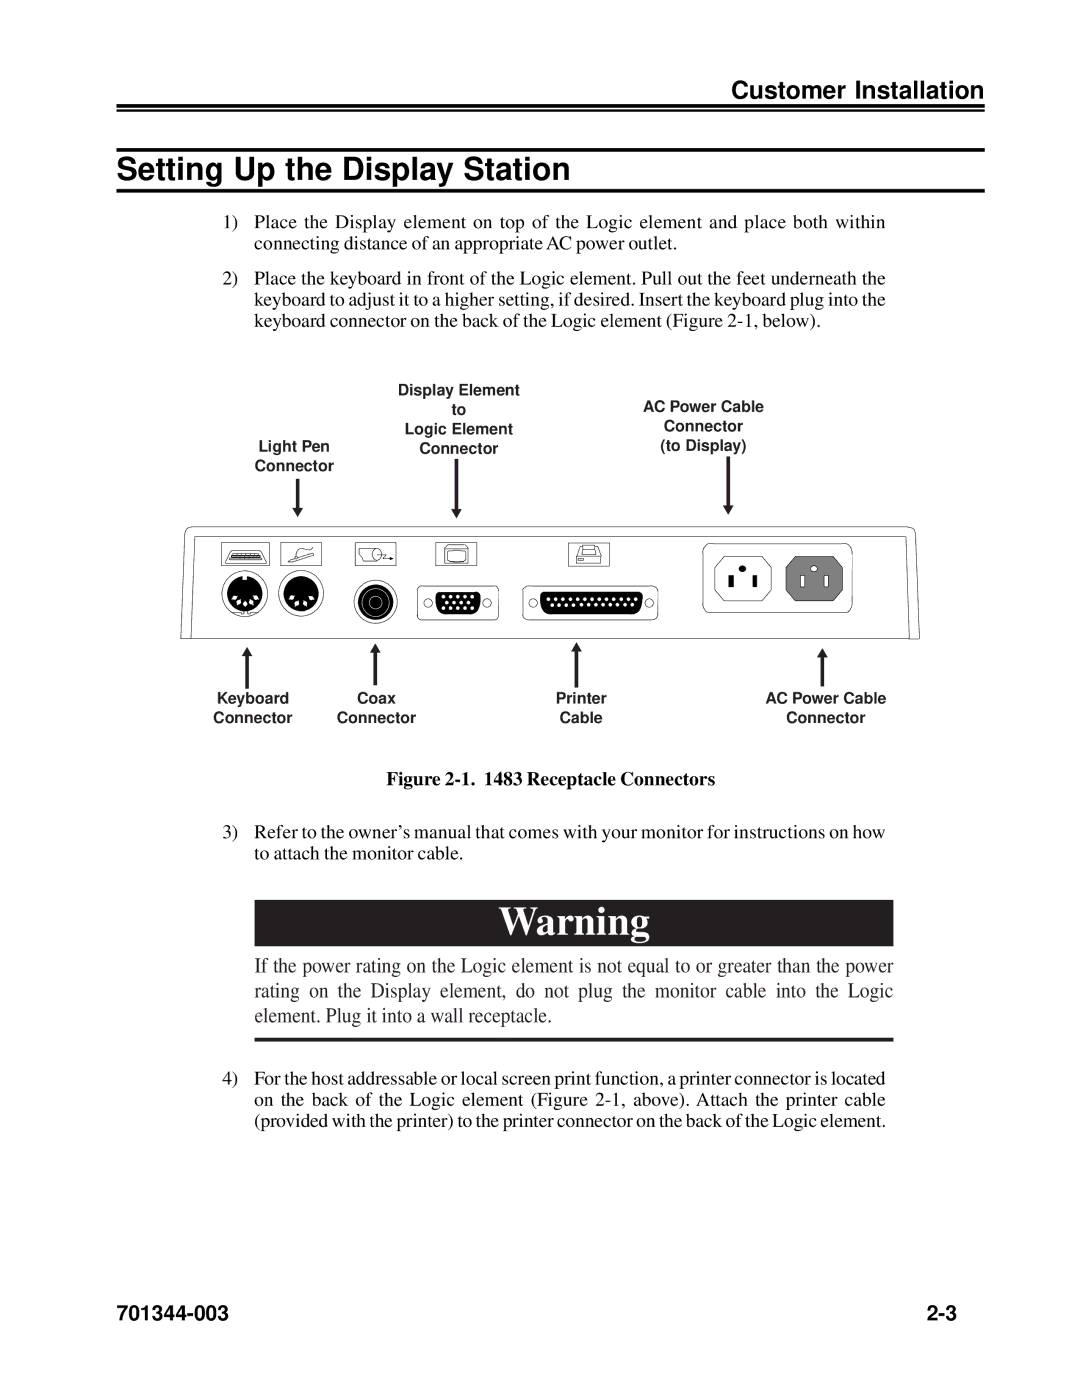
2)Place the keyboard in front of the Logic element. Pull out the feet underneath the keyboard to adjust it to a higher setting, if desired. Insert the keyboard plug into the keyboard connector on the back of the Logic element (Figure
|
|
| Display Element | AC Power Cable | ||
|
|
| to | |||
|
|
| Logic Element | Connector | ||
Light Pen | Connector | (to Display) | ||||
Connector |
|
|
|
| ||
|
|
|
|
|
|
|
|
|
|
|
|
|
|
|
|
|
|
|
|
|
Keyboard | Coax | Printer | AC Power Cable |
Connector | Connector | Cable | Connector |
Figure 2-1. 1483 Receptacle Connectors
3)Refer to the owner’s manual that comes with your monitor for instructions on how to attach the monitor cable.
Warning
If the power rating on the Logic element is not equal to or greater than the power rating on the Display element, do not plug the monitor cable into the Logic element. Plug it into a wall receptacle.
4)For the host addressable or local screen print function, a printer connector is located on the back of the Logic element (Figure
