Guide to the Printer
Exterior-Rear View
|
|
|
2 | 1 | 1 |
3
4
5 6 | 7 | TFWX040E |
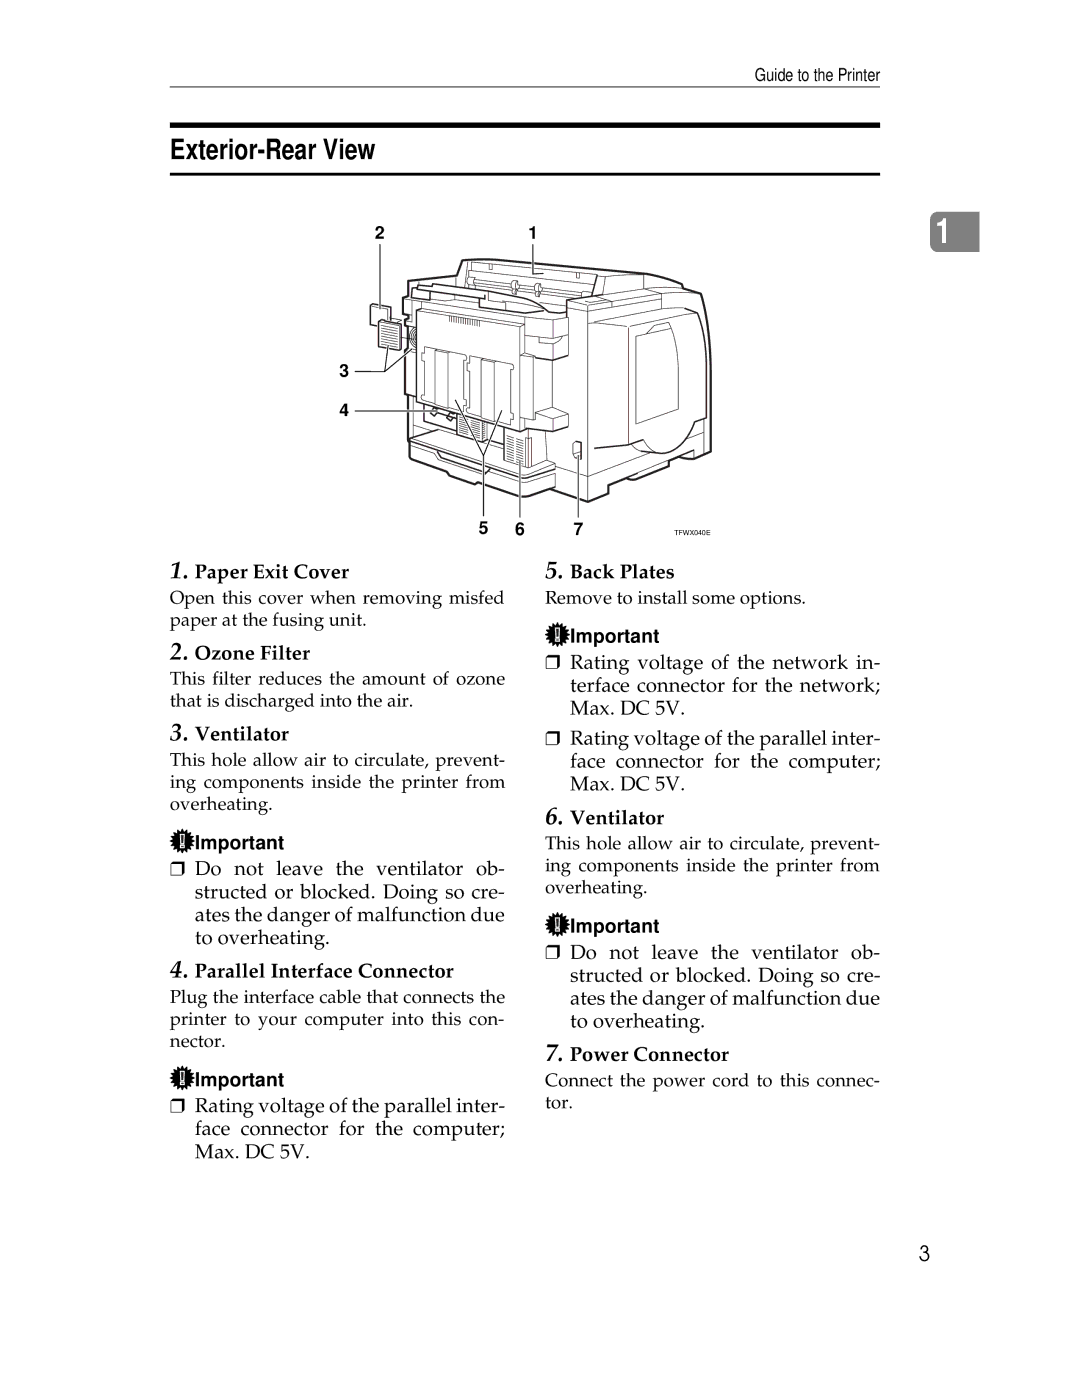
1.Paper Exit Cover
Open this cover when removing misfed paper at the fusing unit.
2.Ozone Filter
This filter reduces the amount of ozone that is discharged into the air.
3.Ventilator
This hole allow air to circulate, prevent- ing components inside the printer from overheating.
![]() Important
Important
❒Do not leave the ventilator ob- structed or blocked. Doing so cre- ates the danger of malfunction due to overheating.
4.Parallel Interface Connector
Plug the interface cable that connects the printer to your computer into this con- nector.
![]() Important
Important
❒Rating voltage of the parallel inter- face connector for the computer; Max. DC 5V.
5.Back Plates
Remove to install some options.
![]() Important
Important
❒Rating voltage of the network in- terface connector for the network; Max. DC 5V.
❒Rating voltage of the parallel inter- face connector for the computer; Max. DC 5V.
6.Ventilator
This hole allow air to circulate, prevent- ing components inside the printer from overheating.
![]() Important
Important
❒Do not leave the ventilator ob- structed or blocked. Doing so cre- ates the danger of malfunction due to overheating.
7.Power Connector
Connect the power cord to this connec- tor.
3