Chapter 3 Basic operation (as a replacement for a tape MTR)
■Recording additional tracks while listening to the perfor-
mance (Overdubbing)
The process of newly recording a track while playing back previously recorded tracks is called Òoverdubbing.Ó Here we will explain the procedure using the example of playing back a stereo recording that was recorded on tracks 1 and 2, and recording other instruments on tracks 3 and 4. Connect INPUT 3Ð4 jacks to the instruments that you wish to newly record.
1.Make sure that the mixer mode is set to INPUT➝TRACK mode (the INPUT➝TRACK indicator is lit). If another mixer mode is selected, hold down [SHIFT] and press [SELECT].
2.Make sure that the track status for tracks 1/2 (the tracks for playback) is set to PLAY (the STATUS indicator is lit green). If the status is not PLAY, press the [STATUS] button for that channel several times.
3.Set the track status for tracks 3/4 (the tracks for record- ing) to REC (the STATUS indicator is blinking red). For track 3, press [STATUS 3] several times, and for track 4 press [STATUS 4].
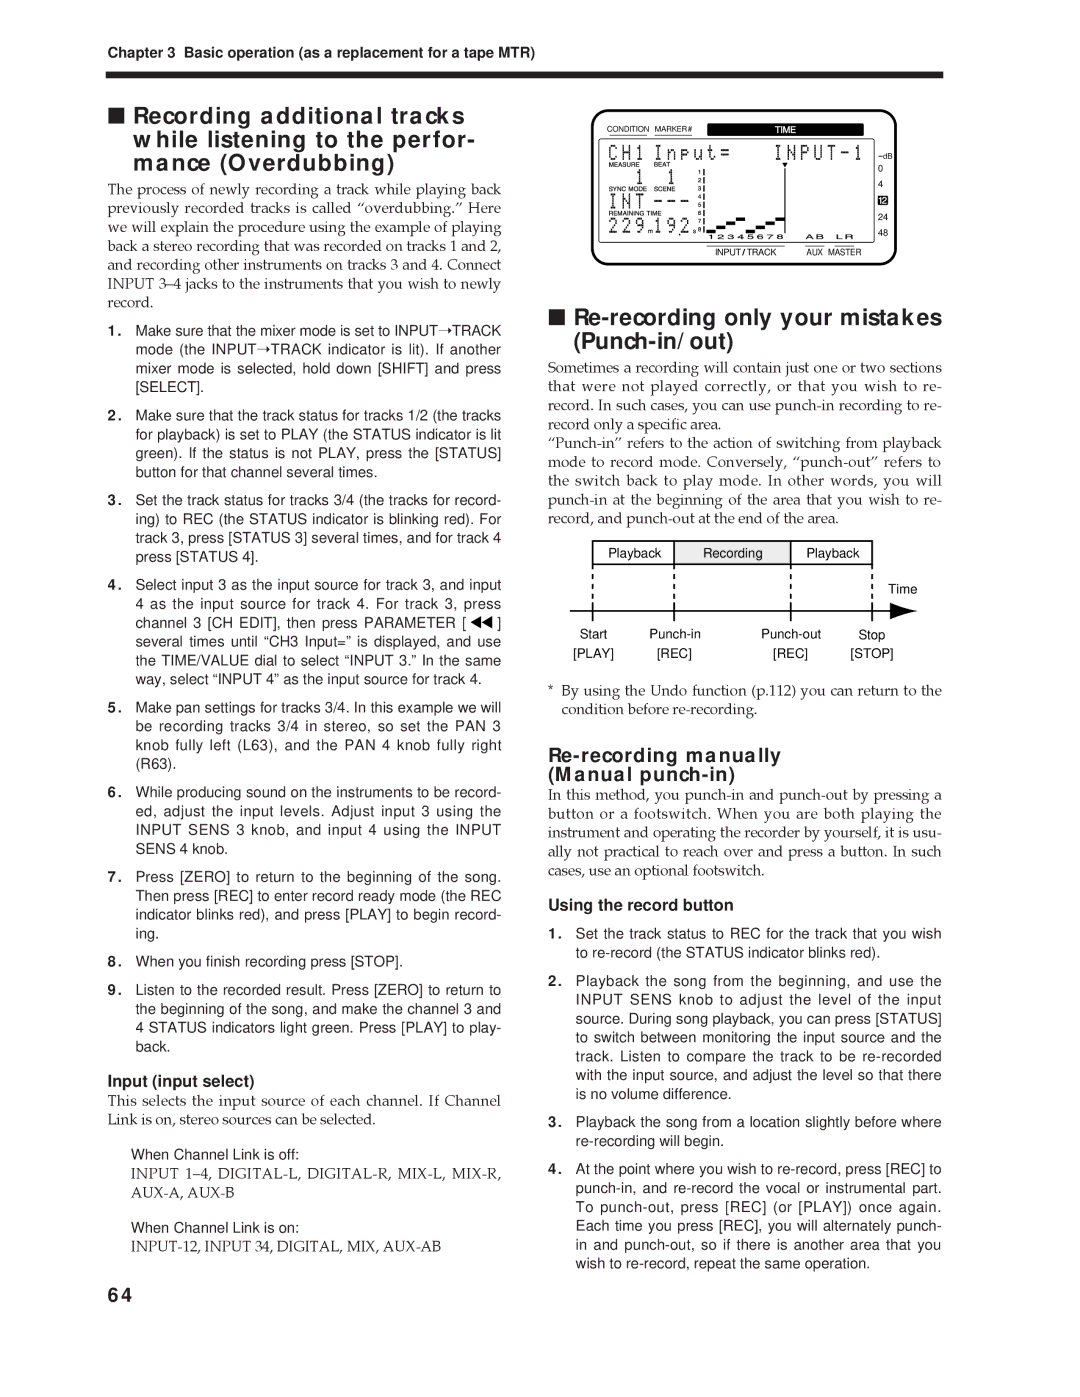
4.Select input 3 as the input source for track 3, and input 4 as the input source for track 4. For track 3, press
channel 3 [CH EDIT], then press PARAMETER [ ![]()
![]() ] several times until “CH3 Input=” is displayed, and use the TIME/VALUE dial to select “INPUT 3.” In the same way, select “INPUT 4” as the input source for track 4.
] several times until “CH3 Input=” is displayed, and use the TIME/VALUE dial to select “INPUT 3.” In the same way, select “INPUT 4” as the input source for track 4.
5.Make pan settings for tracks 3/4. In this example we will be recording tracks 3/4 in stereo, so set the PAN 3 knob fully left (L63), and the PAN 4 knob fully right (R63).
6.While producing sound on the instruments to be record- ed, adjust the input levels. Adjust input 3 using the INPUT SENS 3 knob, and input 4 using the INPUT SENS 4 knob.
7.Press [ZERO] to return to the beginning of the song. Then press [REC] to enter record ready mode (the REC indicator blinks red), and press [PLAY] to begin record- ing.
8.When you finish recording press [STOP].
9.Listen to the recorded result. Press [ZERO] to return to the beginning of the song, and make the channel 3 and 4 STATUS indicators light green. Press [PLAY] to play- back.
Input (input select)
This selects the input source of each channel. If Channel Link is on, stereo sources can be selected.
When Channel Link is off:
INPUT 1Ð4,
When Channel Link is on:
CONDITION MARKER# | TIME | ||||
|
|
|
|
|
|
dB
0
4
12
24
48
INPUT TRACK | AUX MASTER |
■Re-recording only your mistakes
(Punch-in/out)
Sometimes a recording will contain just one or two sections that were not played correctly, or that you wish to re- record. In such cases, you can use
Playback | Recording | Playback |
|
|
|
Time
Start | Stop | ||
[PLAY] | [REC] | [REC] | [STOP] |
*By using the Undo function (p.112) you can return to the condition before
Re-recording manually (Manual punch-in)
In this method, you
Using the record button
1.Set the track status to REC for the track that you wish to
2.Playback the song from the beginning, and use the INPUT SENS knob to adjust the level of the input source. During song playback, you can press [STATUS] to switch between monitoring the input source and the track. Listen to compare the track to be
3.Playback the song from a location slightly before where
4.At the point where you wish to
64