Chapter 4 Editing a recorded performance (track editing)
Deleting a portion of a performance (Cut)
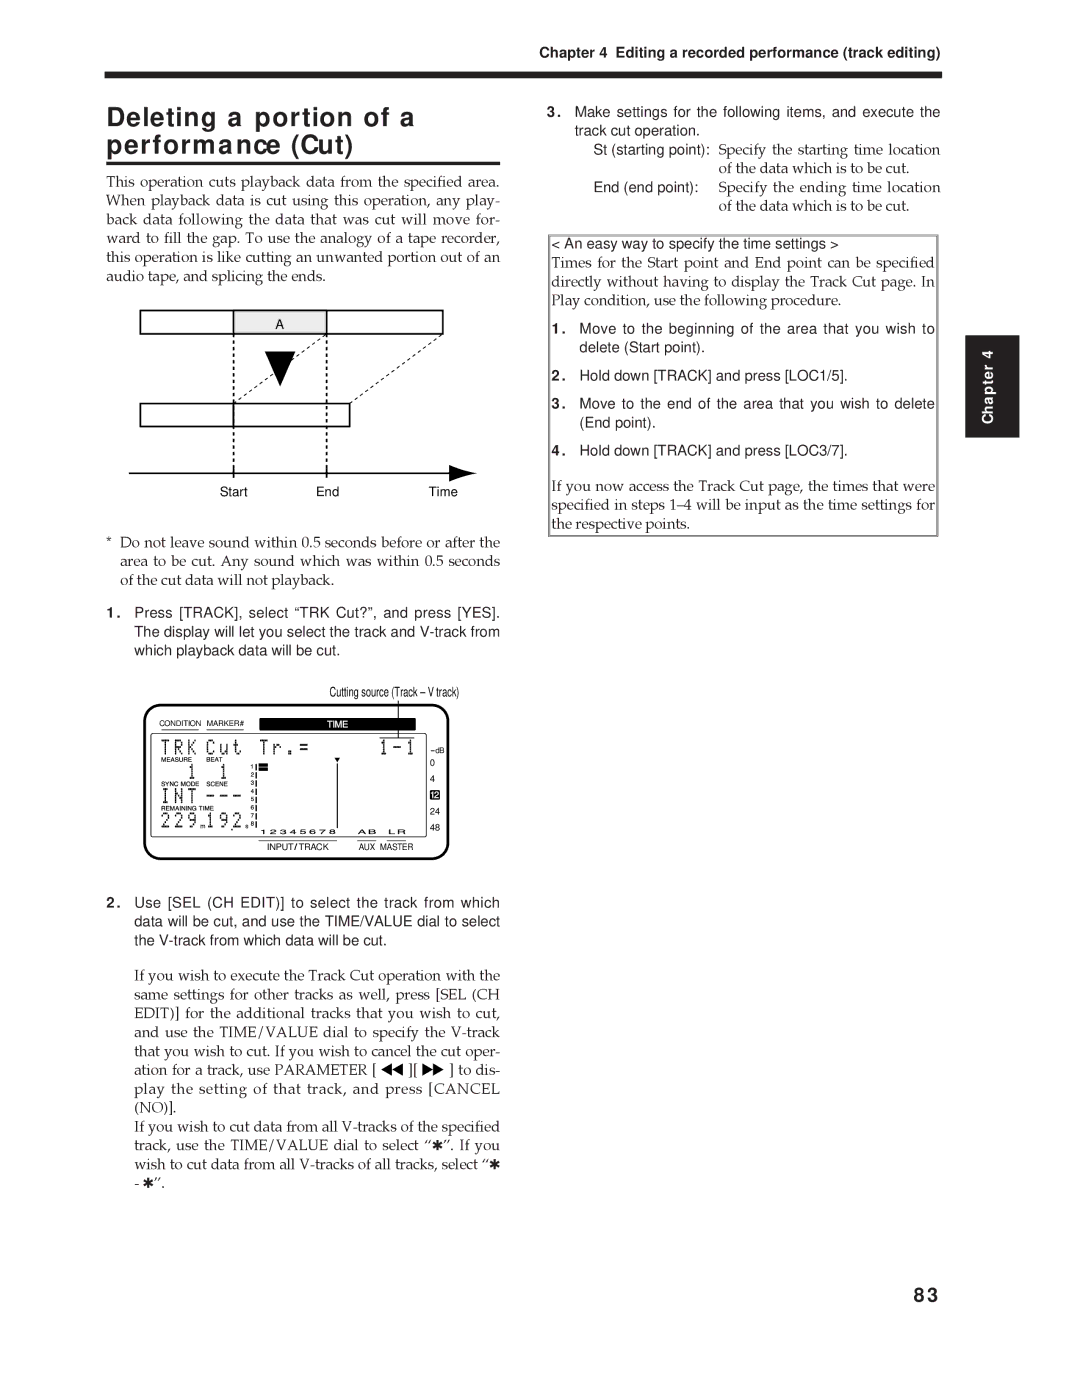
This operation cuts playback data from the specified area. When playback data is cut using this operation, any play- back data following the data that was cut will move for- ward to fill the gap. To use the analogy of a tape recorder, this operation is like cutting an unwanted portion out of an audio tape, and splicing the ends.
A
Start | End | Time |
*Do not leave sound within 0.5 seconds before or after the area to be cut. Any sound which was within 0.5 seconds of the cut data will not playback.
1.Press [TRACK], select “TRK Cut?”, and press [YES]. The display will let you select the track and
Cutting source (Track – V track)
CONDITION MARKER# | TIME | ||||
|
|
|
|
|
|
dB
0
4
12
24
48
INPUT TRACK | AUX MASTER |
3.Make settings for the following items, and execute the track cut operation.
St (starting point): Specify the starting time location of the data which is to be cut.
End (end point): Specify the ending time location of the data which is to be cut.
< An easy way to specify the time settings >
Times for the Start point and End point can be specified directly without having to display the Track Cut page. In Play condition, use the following procedure.
1.Move to the beginning of the area that you wish to delete (Start point).
2.Hold down [TRACK] and press [LOC1/5].
3.Move to the end of the area that you wish to delete (End point).
4.Hold down [TRACK] and press [LOC3/7].
If you now access the Track Cut page, the times that were specified in steps 1Ð4 will be input as the time settings for the respective points.
Chapter 4
2.Use [SEL (CH EDIT)] to select the track from which data will be cut, and use the TIME/VALUE dial to select the
If you wish to execute the Track Cut operation with the same settings for other tracks as well, press [SEL (CH EDIT)] for the additional tracks that you wish to cut, and use the TIME/VALUE dial to specify the ![]()
![]() ][
][ ![]()
![]() ] to dis- play the setting of that track, and press [CANCEL (NO)].
] to dis- play the setting of that track, and press [CANCEL (NO)].
If you wish to cut data from all
83
