Chapter 4 Editing a recorded performance (track editing)
*If playback data exists at the copy destination, that data will be overwritten.
*Playback data of a channel for which Channel Link is ON cannot be copied to a track whose channel has a Channel Link setting of OFF. Nor is the converse possible.
*The length of the data to be copied must be greater than 0.5 seconds. If data shorter than 0.5 seconds is copied, the sound will not playback.
1.Select the
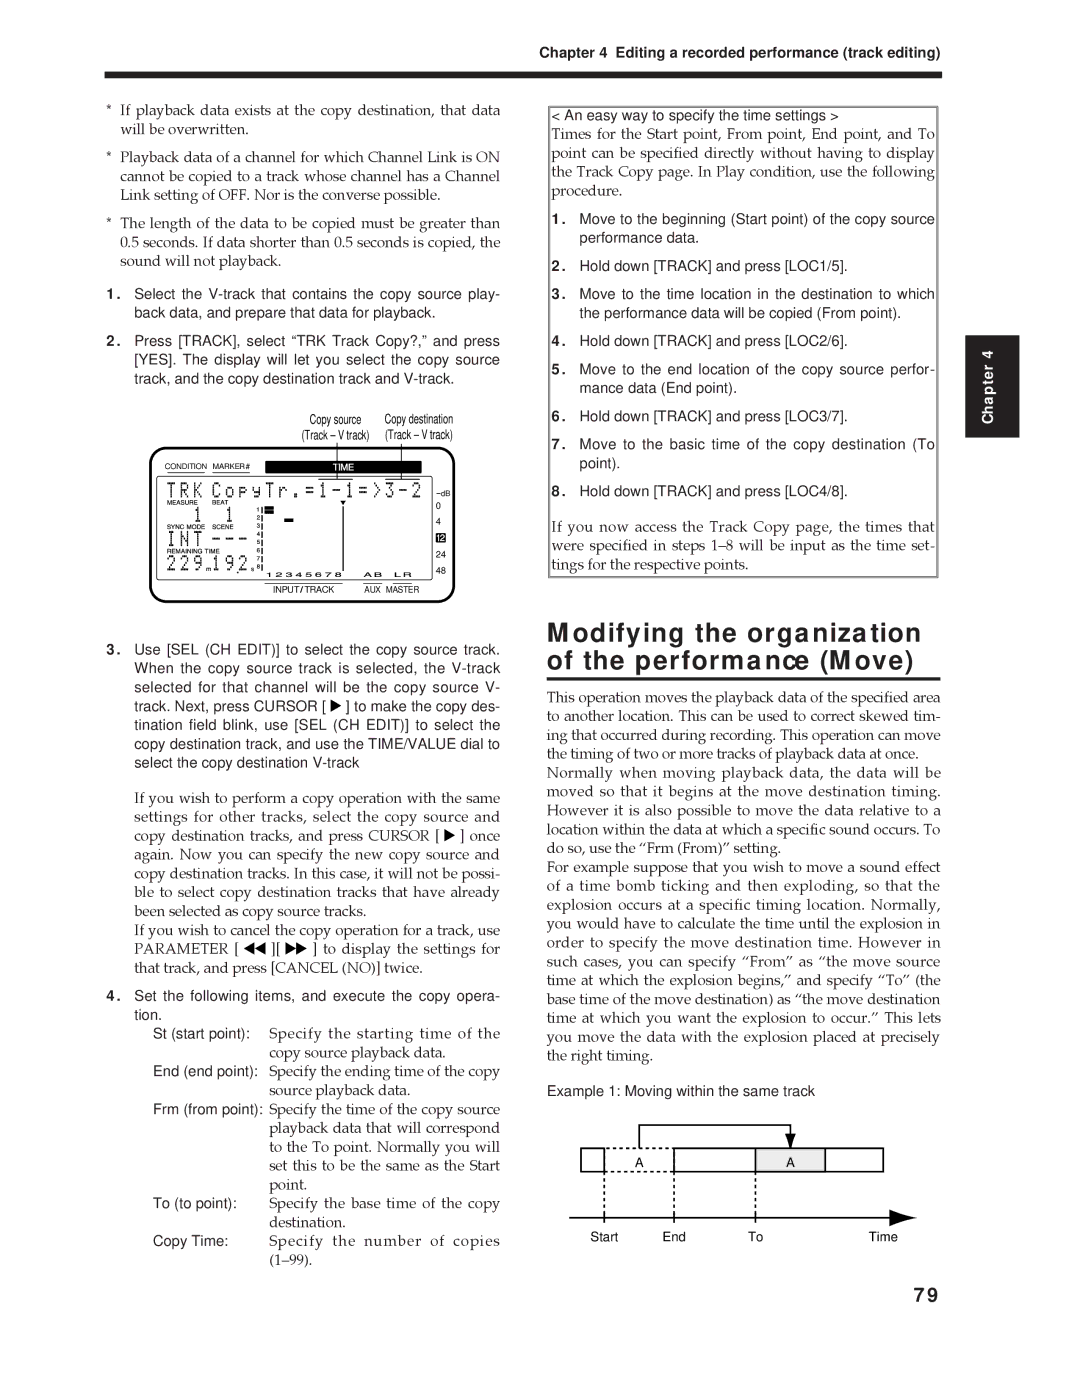
2.Press [TRACK], select “TRK Track Copy?,” and press [YES]. The display will let you select the copy source track, and the copy destination track and
|
|
|
|
| Copy source | Copy destination | |||||
|
|
|
|
| (Track – V track) | (Track – V track) | |||||
CONDITION MARKER# |
|
| TIME |
|
|
| |||||
|
|
|
|
|
|
|
|
|
|
|
|
dB
0
4
12
24
48
INPUT TRACK | AUX MASTER |
3.Use [SEL (CH EDIT)] to select the copy source track. When the copy source track is selected, the ![]() ] to make the copy des- tination field blink, use [SEL (CH EDIT)] to select the copy destination track, and use the TIME/VALUE dial to select the copy destination
] to make the copy des- tination field blink, use [SEL (CH EDIT)] to select the copy destination track, and use the TIME/VALUE dial to select the copy destination
If you wish to perform a copy operation with the same settings for other tracks, select the copy source and copy destination tracks, and press CURSOR [ ![]() ] once again. Now you can specify the new copy source and copy destination tracks. In this case, it will not be possi- ble to select copy destination tracks that have already been selected as copy source tracks.
] once again. Now you can specify the new copy source and copy destination tracks. In this case, it will not be possi- ble to select copy destination tracks that have already been selected as copy source tracks.
If you wish to cancel the copy operation for a track, use PARAMETER [ ![]()
![]() ][
][ ![]()
![]() ] to display the settings for that track, and press [CANCEL (NO)] twice.
] to display the settings for that track, and press [CANCEL (NO)] twice.
4.Set the following items, and execute the copy opera- tion.
St (start point): Specify the starting time of the copy source playback data.
End (end point): Specify the ending time of the copy source playback data.
Frm (from point): Specify the time of the copy source playback data that will correspond to the To point. Normally you will set this to be the same as the Start point.
To (to point): Specify the base time of the copy destination.
Copy Time: Specify the number of copies (1Ð99).
< An easy way to specify the time settings >
Times for the Start point, From point, End point, and To point can be specified directly without having to display the Track Copy page. In Play condition, use the following procedure.
1.Move to the beginning (Start point) of the copy source performance data.
2.Hold down [TRACK] and press [LOC1/5].
3.Move to the time location in the destination to which the performance data will be copied (From point).
4.Hold down [TRACK] and press [LOC2/6].
5.Move to the end location of the copy source perfor- mance data (End point).
6.Hold down [TRACK] and press [LOC3/7].
7.Move to the basic time of the copy destination (To point).
8.Hold down [TRACK] and press [LOC4/8].
If you now access the Track Copy page, the times that were specified in steps 1Ð8 will be input as the time set- tings for the respective points.
Modifying the organization of the performance (Move)
This operation moves the playback data of the specified area to another location. This can be used to correct skewed tim- ing that occurred during recording. This operation can move the timing of two or more tracks of playback data at once.
Normally when moving playback data, the data will be moved so that it begins at the move destination timing. However it is also possible to move the data relative to a location within the data at which a specific sound occurs. To do so, use the ÒFrm (From)Ó setting.
For example suppose that you wish to move a sound effect of a time bomb ticking and then exploding, so that the explosion occurs at a specific timing location. Normally, you would have to calculate the time until the explosion in order to specify the move destination time. However in such cases, you can specify ÒFromÓ as Òthe move source time at which the explosion begins,Ó and specify ÒToÓ (the base time of the move destination) as Òthe move destination time at which you want the explosion to occur.Ó This lets you move the data with the explosion placed at precisely the right timing.
Example 1: Moving within the same track
|
|
|
|
|
|
|
|
|
|
|
|
|
|
|
|
|
| A |
|
|
| A |
|
| |||
|
|
|
|
|
|
|
|
|
|
|
|
|
|
| Start |
| End | To |
|
| Time | ||||||
Chapter 4
79