Chapter 4 Editing a recorded performance (track editing)
1.Select one of the
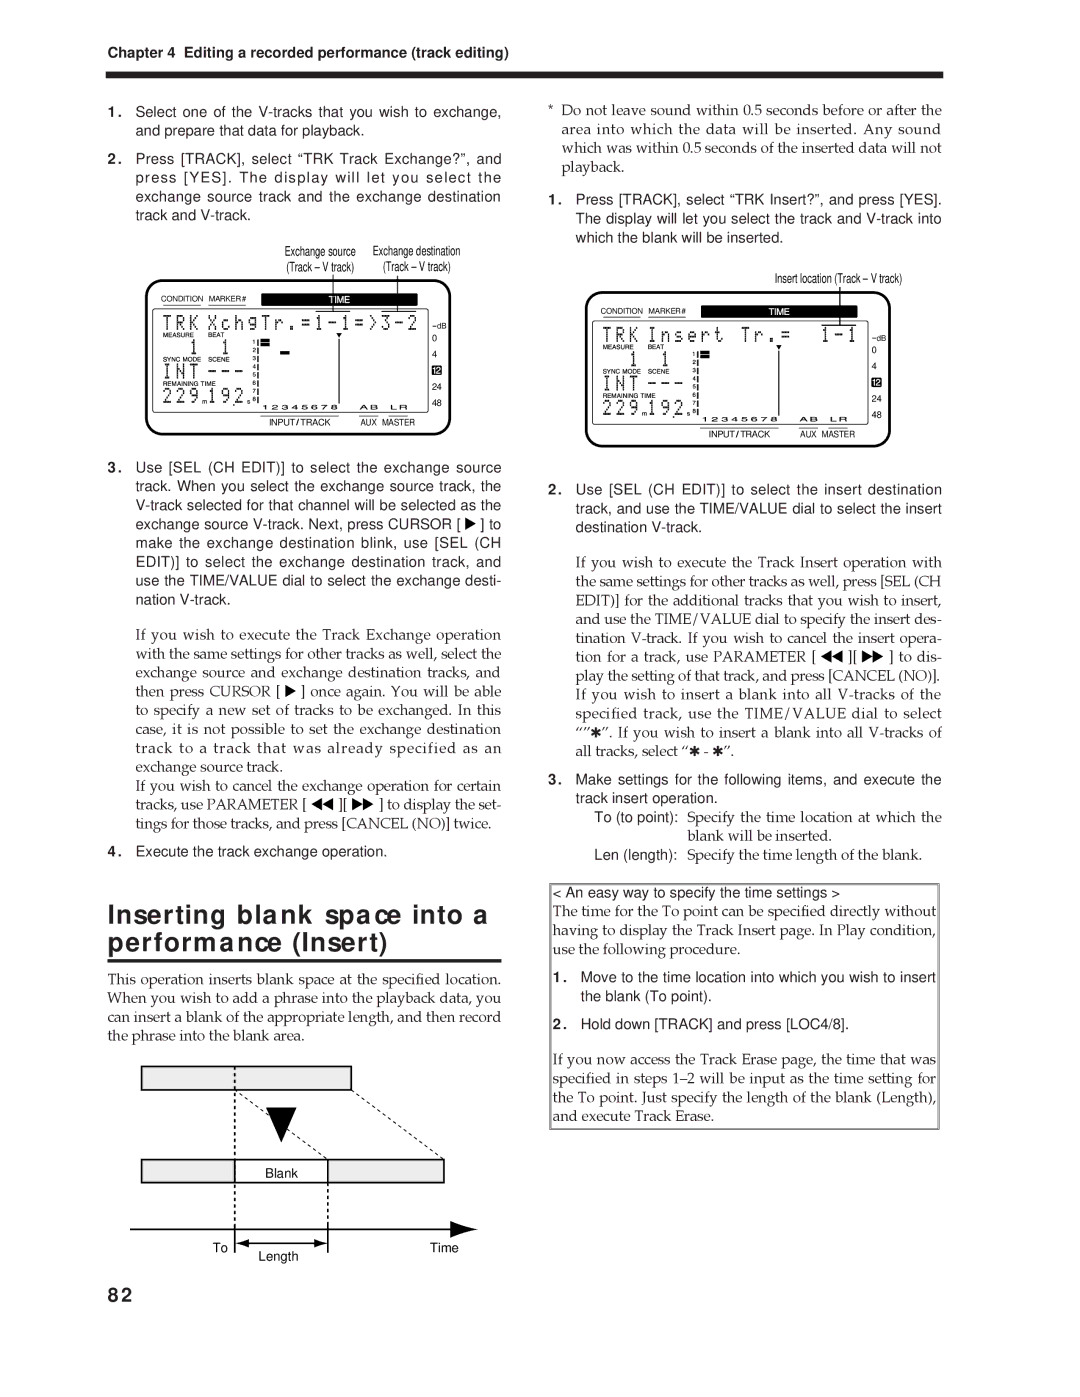
2.Press [TRACK], select “TRK Track Exchange?”, and press [YES]. The display will let you select the exchange source track and the exchange destination track and
|
|
|
|
| Exchange source | Exchange destination | ||||||
|
|
|
|
| (Track – V track) |
| (Track – V track) | |||||
CONDITION MARKER# |
|
| TIME |
|
|
|
| |||||
|
|
|
|
|
|
|
|
|
|
|
|
|
dB
0
4
12
24
48
INPUT TRACK | AUX MASTER |
3.Use [SEL (CH EDIT)] to select the exchange source track. When you select the exchange source track, the ![]() ] to make the exchange destination blink, use [SEL (CH EDIT)] to select the exchange destination track, and use the TIME/VALUE dial to select the exchange desti- nation
] to make the exchange destination blink, use [SEL (CH EDIT)] to select the exchange destination track, and use the TIME/VALUE dial to select the exchange desti- nation
If you wish to execute the Track Exchange operation with the same settings for other tracks as well, select the exchange source and exchange destination tracks, and then press CURSOR [ ![]() ] once again. You will be able to specify a new set of tracks to be exchanged. In this case, it is not possible to set the exchange destination track to a track that was already specified as an exchange source track.
] once again. You will be able to specify a new set of tracks to be exchanged. In this case, it is not possible to set the exchange destination track to a track that was already specified as an exchange source track.
If you wish to cancel the exchange operation for certain tracks, use PARAMETER [ ![]()
![]() ][
][ ![]()
![]() ] to display the set- tings for those tracks, and press [CANCEL (NO)] twice.
] to display the set- tings for those tracks, and press [CANCEL (NO)] twice.
4.Execute the track exchange operation.
Inserting blank space into a performance (Insert)
This operation inserts blank space at the specified location. When you wish to add a phrase into the playback data, you can insert a blank of the appropriate length, and then record the phrase into the blank area.
|
|
| Blank |
|
|
| |
|
|
|
|
|
|
| |
| To |
|
|
| Time | ||
|
| Length | |||||
|
|
|
|
|
| ||
*Do not leave sound within 0.5 seconds before or after the area into which the data will be inserted. Any sound which was within 0.5 seconds of the inserted data will not playback.
1.Press [TRACK], select “TRK Insert?”, and press [YES]. The display will let you select the track and
Insert location (Track – V track)
CONDITION MARKER# | TIME | ||||
|
|
|
|
|
|
dB
0
4
12
24
48
INPUT TRACK | AUX MASTER |
2.Use [SEL (CH EDIT)] to select the insert destination track, and use the TIME/VALUE dial to select the insert destination
If you wish to execute the Track Insert operation with the same settings for other tracks as well, press [SEL (CH EDIT)] for the additional tracks that you wish to insert, and use the TIME/VALUE dial to specify the insert des- tination ![]()
![]() ][
][ ![]()
![]() ] to dis- play the setting of that track, and press [CANCEL (NO)]. If you wish to insert a blank into all
] to dis- play the setting of that track, and press [CANCEL (NO)]. If you wish to insert a blank into all
3.Make settings for the following items, and execute the track insert operation.
To (to point): Specify the time location at which the blank will be inserted.
Len (length): Specify the time length of the blank.
< An easy way to specify the time settings >
The time for the To point can be specified directly without having to display the Track Insert page. In Play condition, use the following procedure.
1.Move to the time location into which you wish to insert the blank (To point).
2.Hold down [TRACK] and press [LOC4/8].
If you now access the Track Erase page, the time that was specified in steps 1Ð2 will be input as the time setting for the To point. Just specify the length of the blank (Length), and execute Track Erase.
82