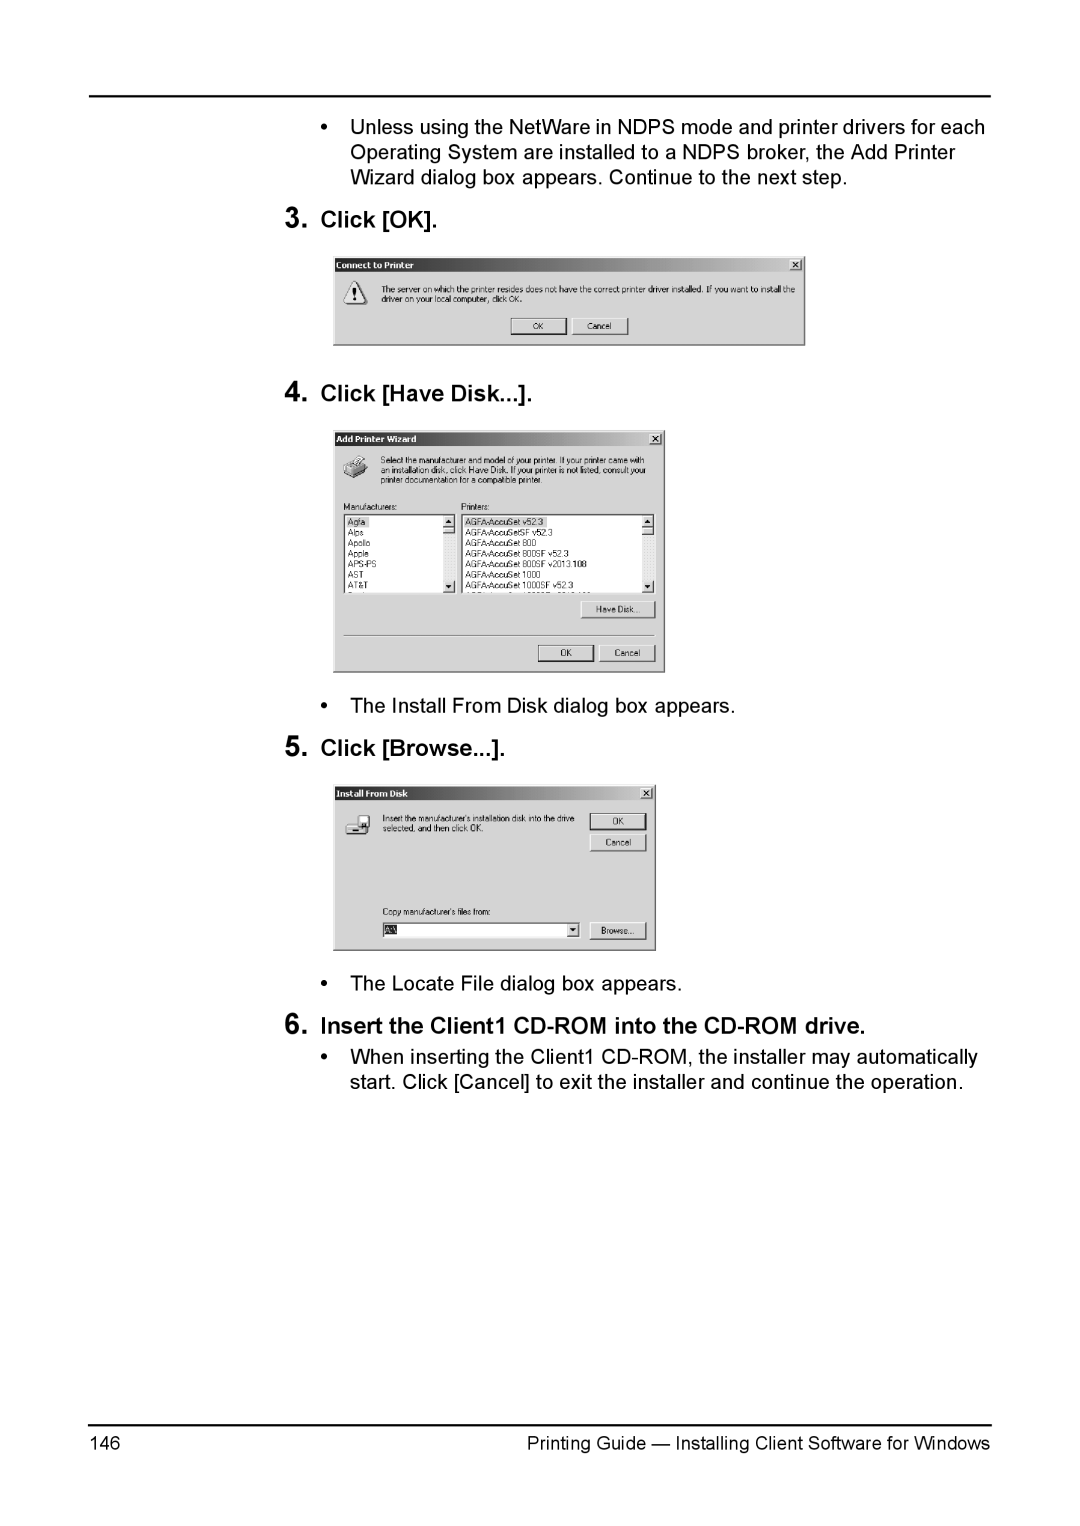
3.
4.
•Unless using the NetWare in NDPS mode and printer drivers for each Operating System are installed to a NDPS broker, the Add Printer Wizard dialog box appears. Continue to the next step.
Click [OK].
Click [Have Disk...].
• The Install From Disk dialog box appears.
5.Click [Browse...].
•The Locate File dialog box appears.
6.Insert the Client1 CD-ROM into the CD-ROM drive.
•When inserting the Client1
146 | Printing Guide — Installing Client Software for Windows |