•Please install the client software following the instruction of the instal- lation for parallel printing.
P.25 "Installation for Parallel Printing Using the Installer"
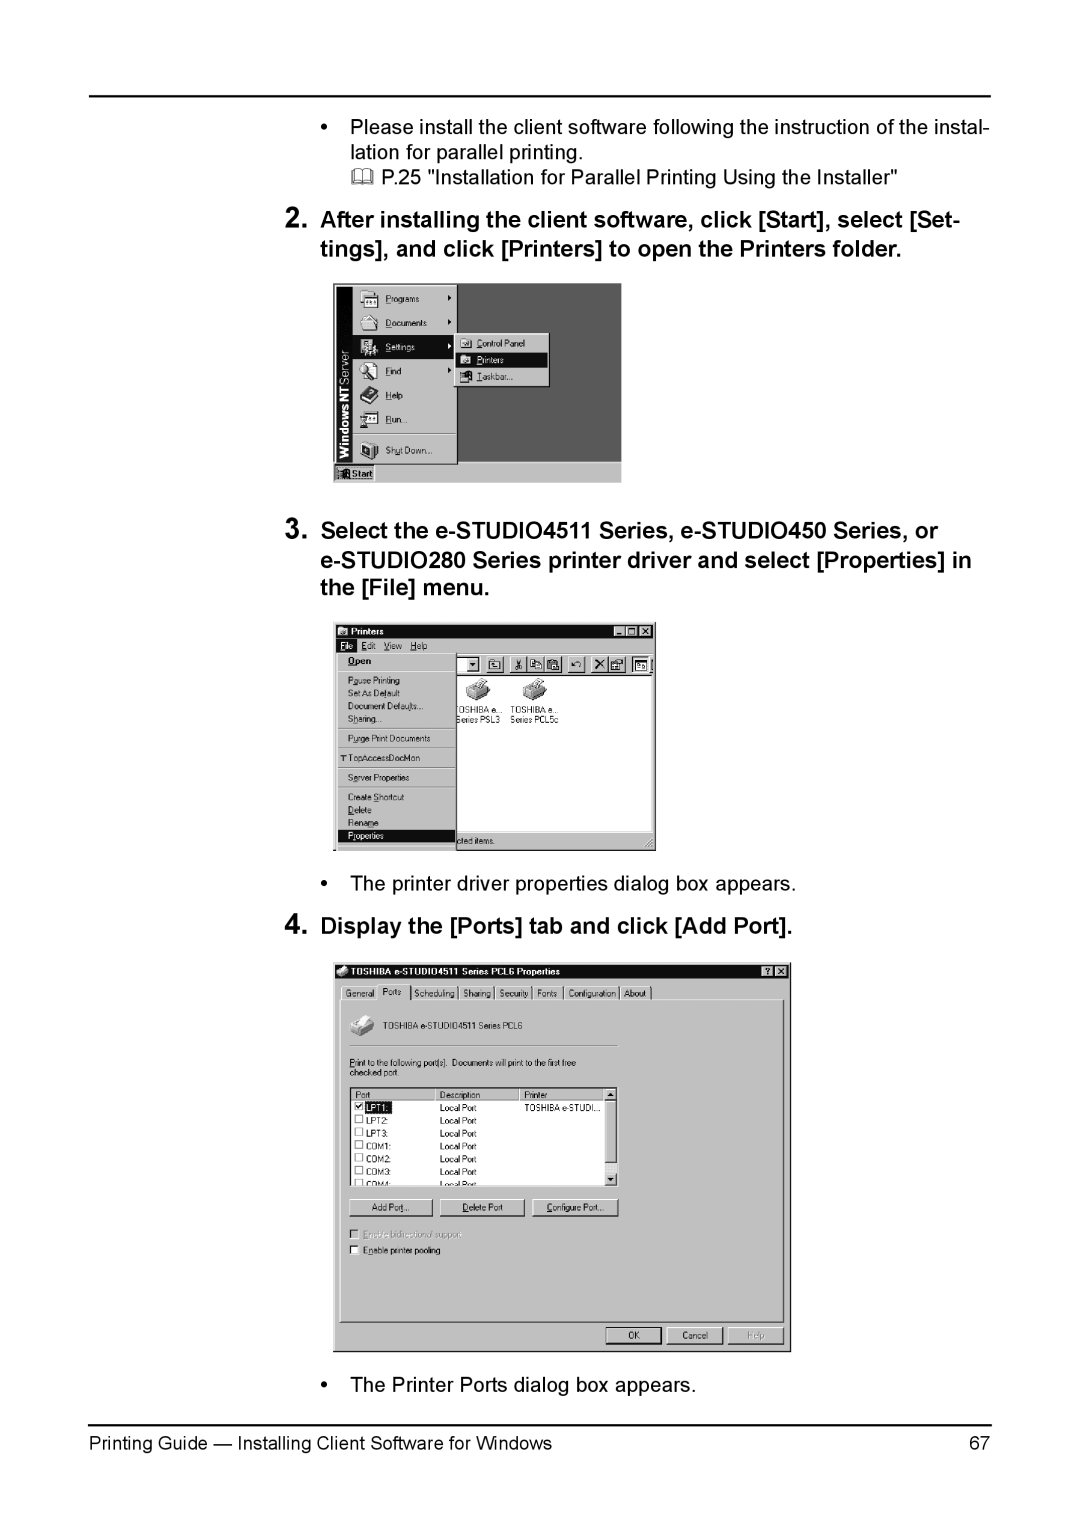
2.After installing the client software, click [Start], select [Set- tings], and click [Printers] to open the Printers folder.
3.Select the
• The printer driver properties dialog box appears.
4.Display the [Ports] tab and click [Add Port].
•The Printer Ports dialog box appears.
Printing Guide — Installing Client Software for Windows | 67 |
