Creating or editing a watermark
1.Click [Add] to create new watermark, or select a watermark that you want to edit and click [Edit] to edit a watermark.
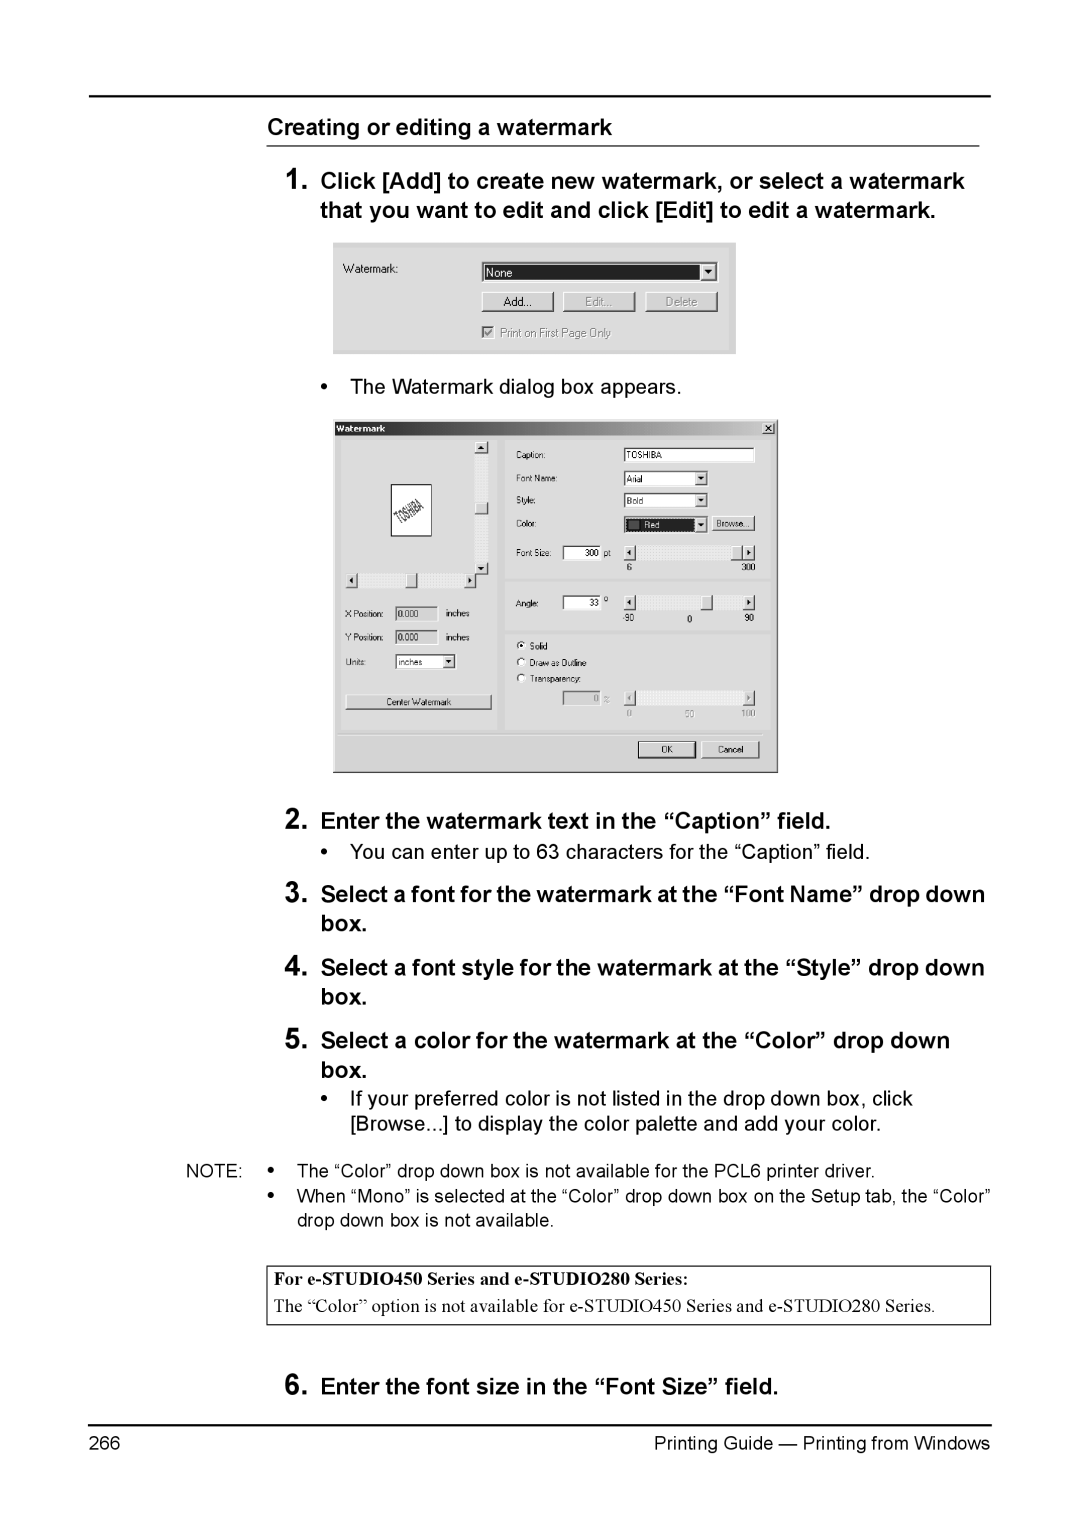
• The Watermark dialog box appears.
2.Enter the watermark text in the “Caption” field.
• You can enter up to 63 characters for the “Caption” field.
3.
4.
Select a font for the watermark at the “Font Name” drop down box.
Select a font style for the watermark at the “Style” drop down box.
5.Select a color for the watermark at the “Color” drop down box.
•If your preferred color is not listed in the drop down box, click [Browse...] to display the color palette and add your color.
NOTE: • The “Color” drop down box is not available for the PCL6 printer driver.
•When “Mono” is selected at the “Color” drop down box on the Setup tab, the “Color” drop down box is not available.
For e-STUDIO450 Series and e-STUDIO280 Series:
The “Color” option is not available for
6.Enter the font size in the “Font Size” field.
266 | Printing Guide — Printing from Windows |