Configuring Communications
The signal strength field provides some descriptive text regarding the strength of the connection to a Wireless Access Point. If there is no signal or no IP Address displayed; configuration of your network could be required.
Refer to the
Configuring multiple wireless Moderos to communicate to a target WAP200G
1.For each communicating touch panel, complete all of the steps outlined within the previous Configuring the Modero’s wireless card for secured access to a WAP200G section on page 25.
2.Navigate back to the Wireless Settings page on each panel.
3.Verify that all communicating Modero panels are using the same SSID, encryption level, Default Key #, and an identical Current Key value.
As an example, all panels should be set to Default Key #1 and be using aa:bb:cc..as the Current Key string value. This same Key value and Current Key string should be used on the target WAP.
4.Repeat steps 1 - 3 on each panel. Using the same passphrase, generates the same key for all communicating
Modero panels.
Step 3: Choose a Master Connection Mode
The panel requires you establish the type of connection you want made between it and your master.
In the Protected Setup page:
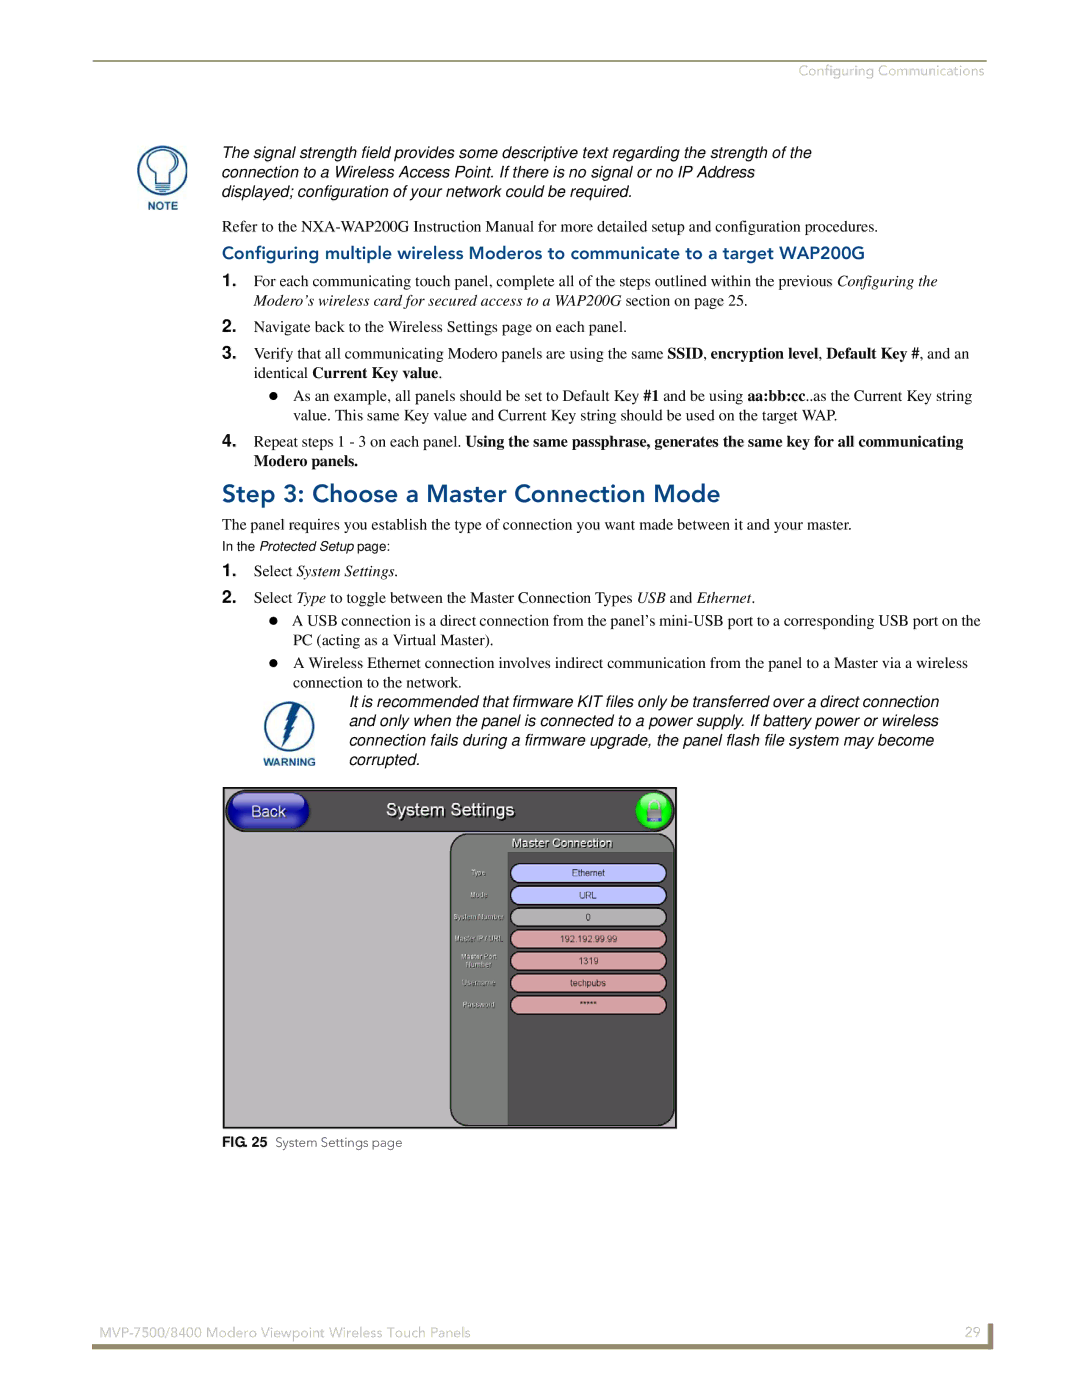
1.Select System Settings.
2.Select Type to toggle between the Master Connection Types USB and Ethernet.
A USB connection is a direct connection from the panel’s
A Wireless Ethernet connection involves indirect communication from the panel to a Master via a wireless connection to the network.
It is recommended that firmware KIT files only be transferred over a direct connection and only when the panel is connected to a power supply. If battery power or wireless connection fails during a firmware upgrade, the panel flash file system may become corrupted.
FIG. 25 System Settings page
29 | |
|
|