Wireless Interface Cards
Installing the 802.11g Card and Antenna
Upgrading the cards on an MVP involves opening the panel enclosure, removing the existing card, replacing it with the upgrade, and then closing the panel enclosure, as described below.
Firmware Requirements
The
Before installing the
Access the MVP’s Internal Components
Refer to the Accessing the MVP’s Internal Components section on page 7 for details.
Removing the Installed Card
Refer to the Removing the Installed Card section on page 8 for details.
Preparing the MVP’s Rear Housing
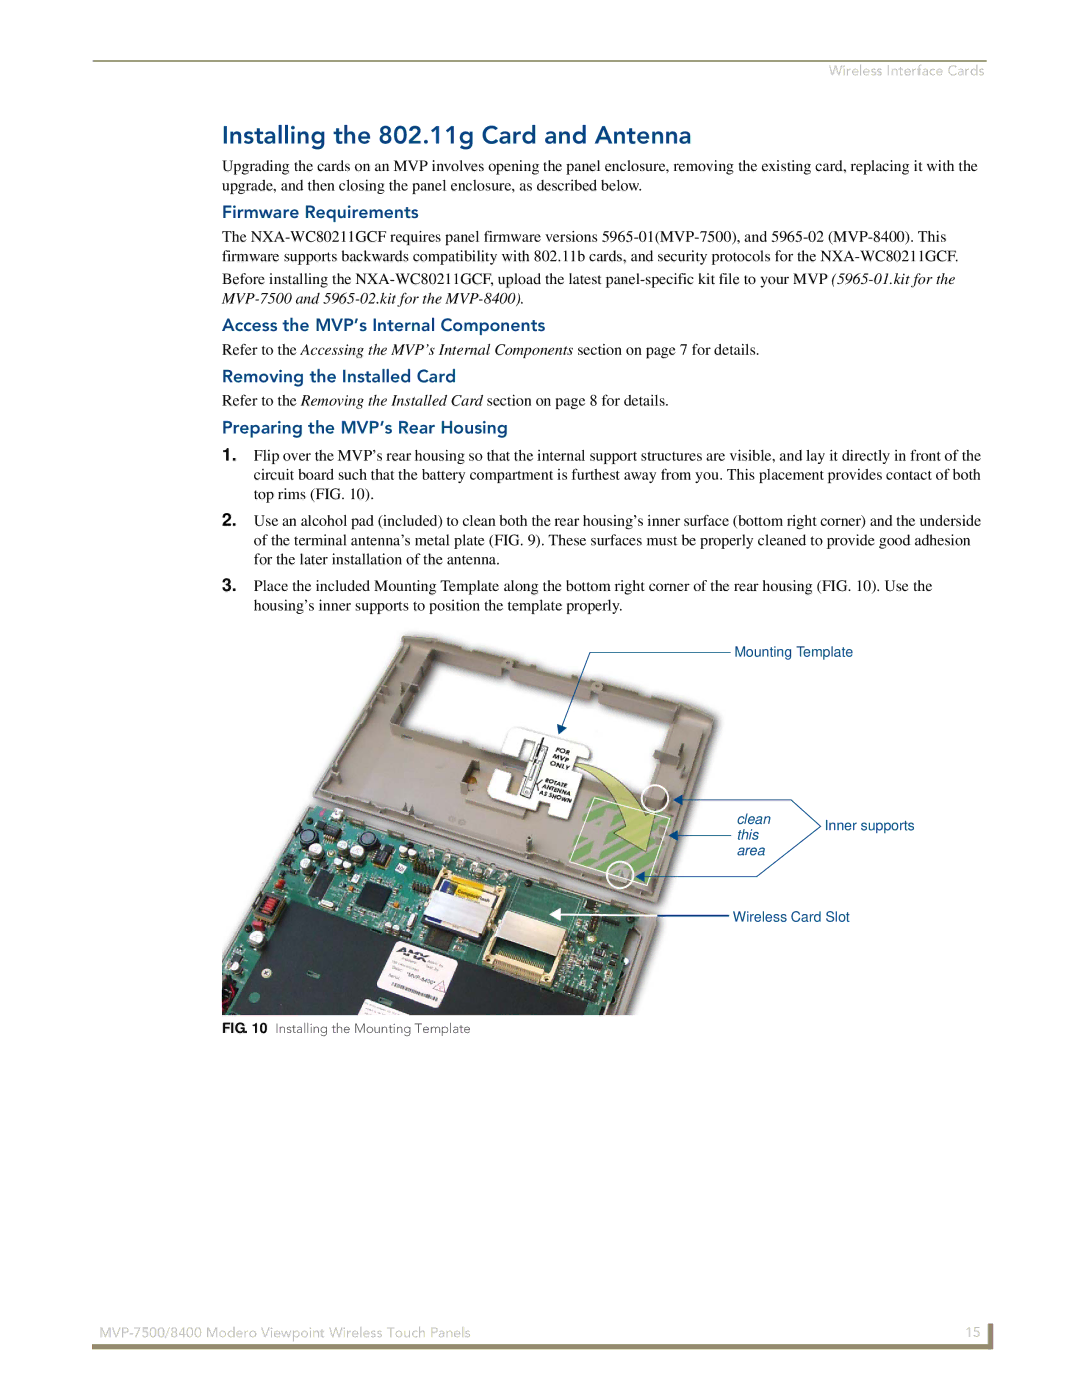
1.Flip over the MVP’s rear housing so that the internal support structures are visible, and lay it directly in front of the circuit board such that the battery compartment is furthest away from you. This placement provides contact of both top rims (FIG. 10).
2.Use an alcohol pad (included) to clean both the rear housing’s inner surface (bottom right corner) and the underside of the terminal antenna’s metal plate (FIG. 9). These surfaces must be properly cleaned to provide good adhesion for the later installation of the antenna.
3.Place the included Mounting Template along the bottom right corner of the rear housing (FIG. 10). Use the housing’s inner supports to position the template properly.
Mounting Template
clean | Inner supports | |
this | ||
| ||
area |
|
![]()
![]() Wireless Card Slot
Wireless Card Slot
FIG. 10 Installing the Mounting Template
15 | |
|
|